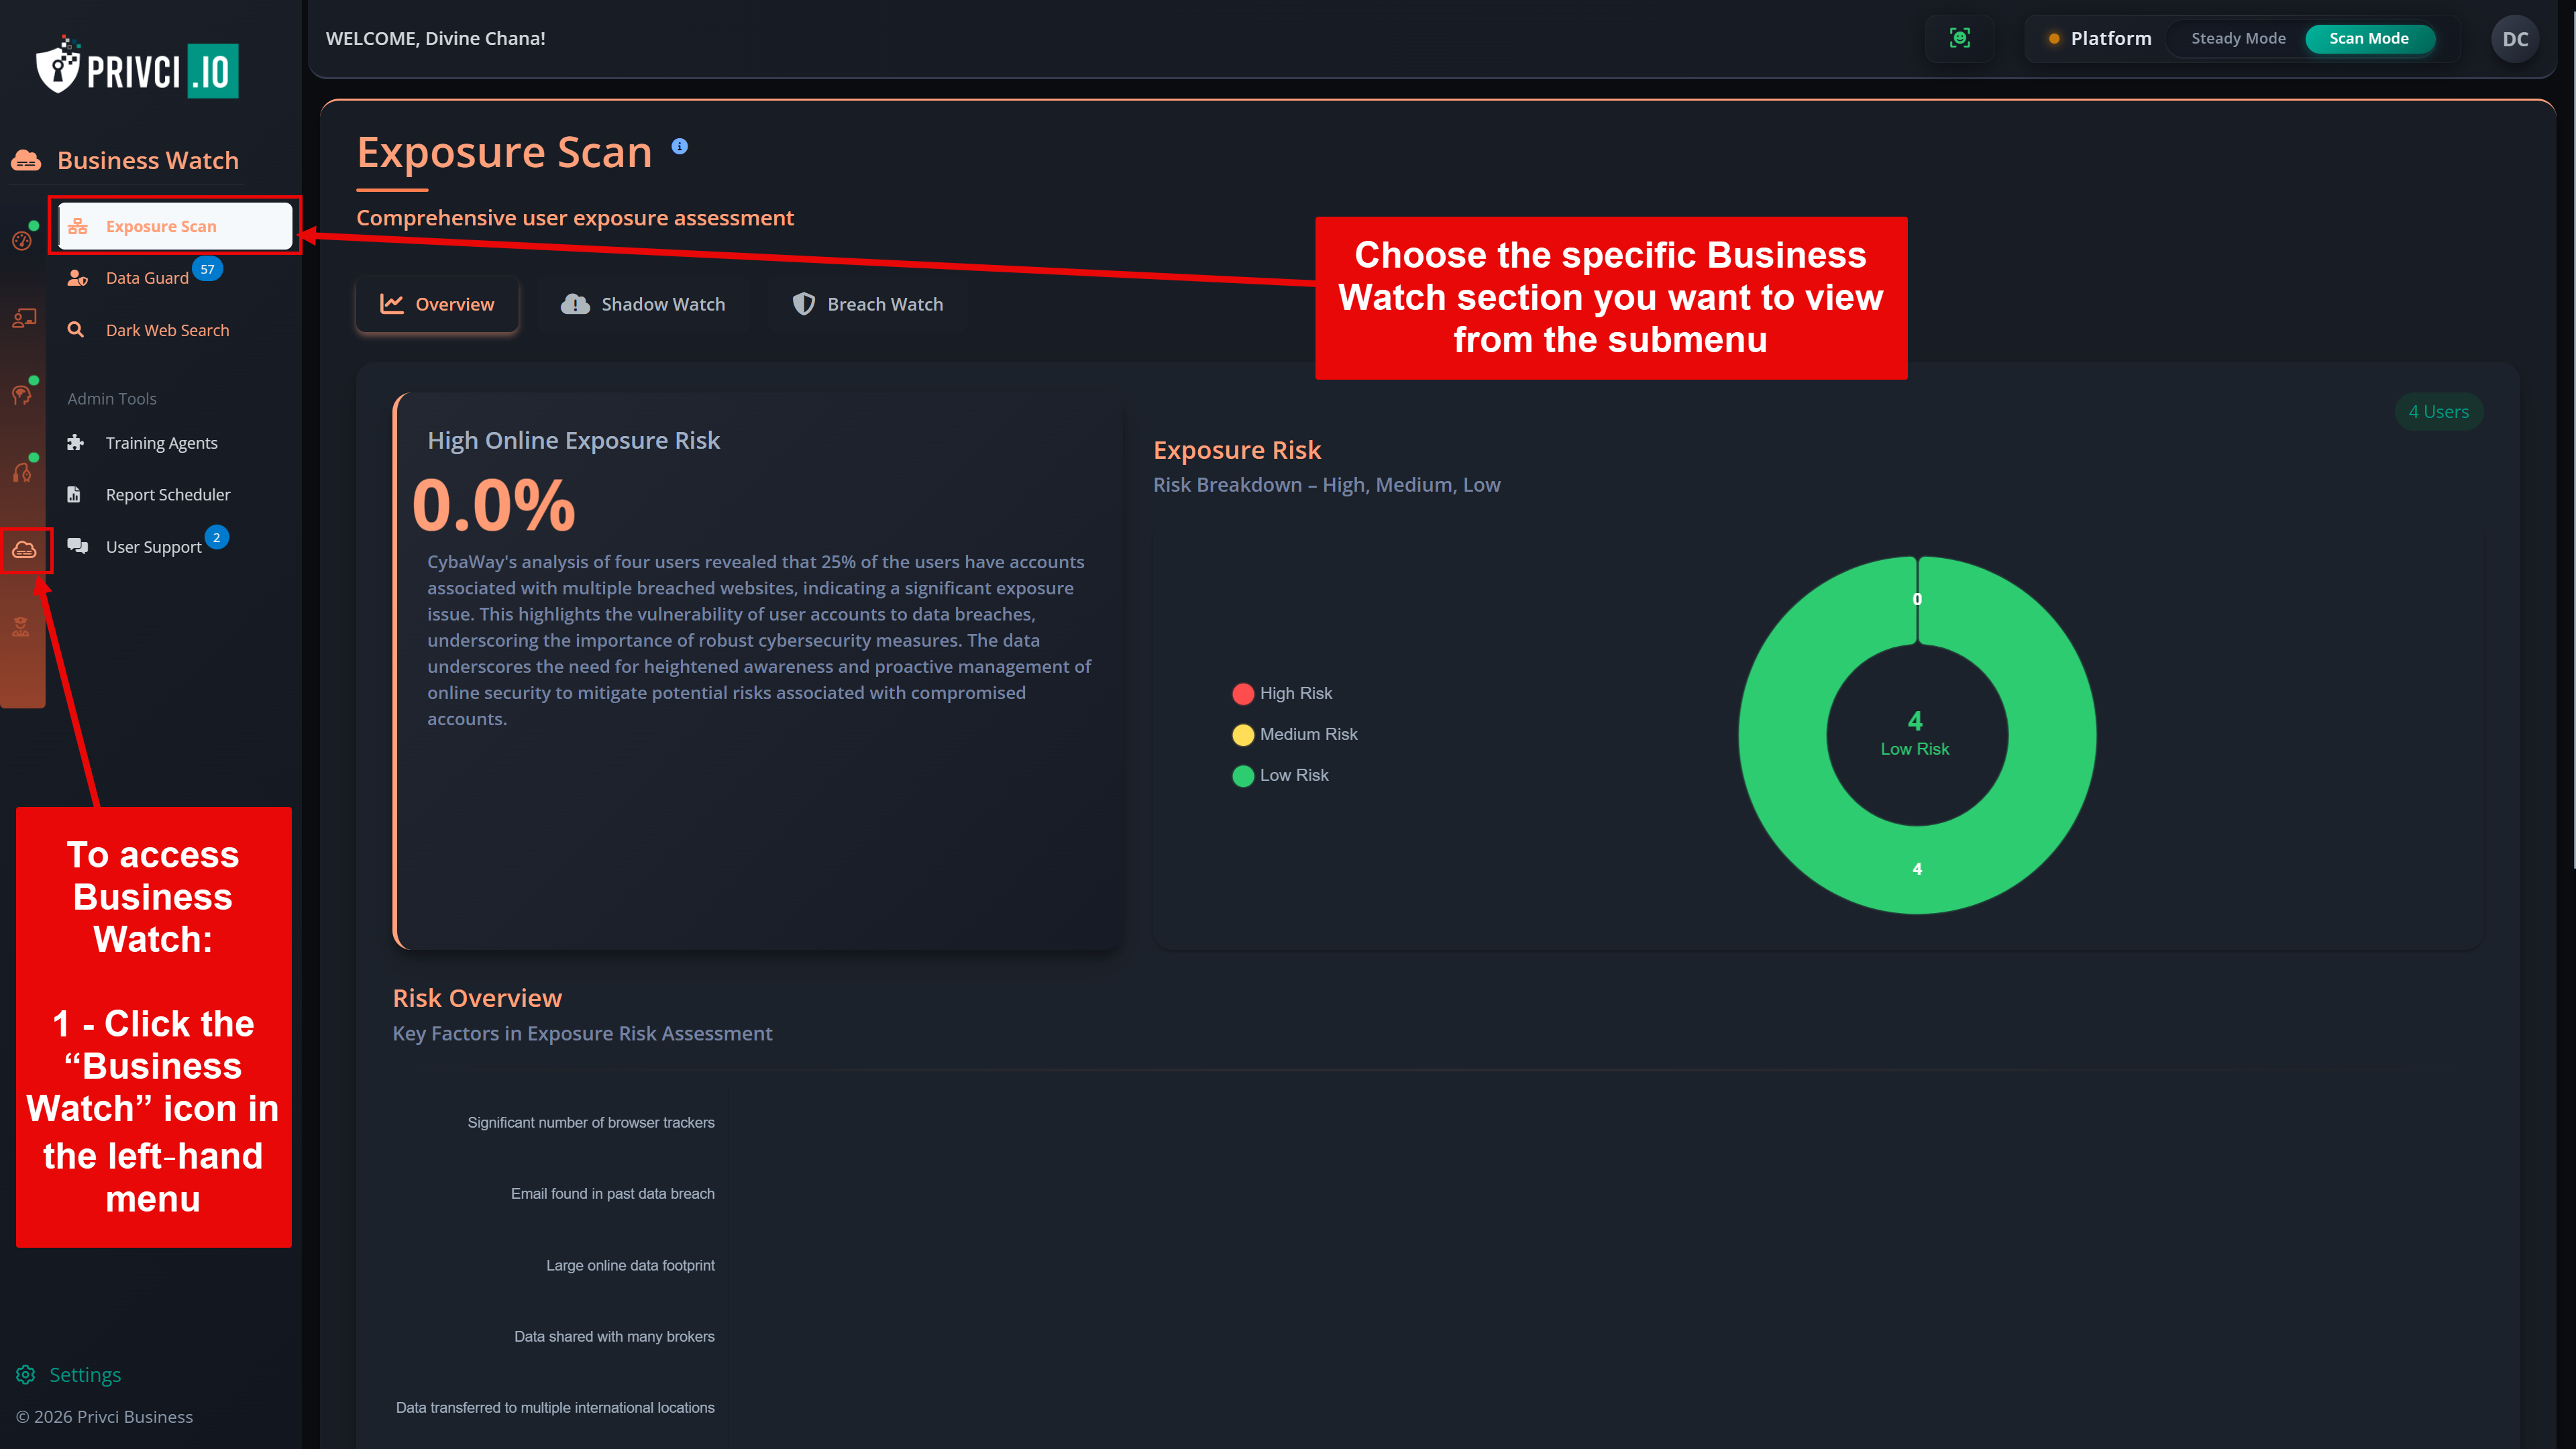
Privci is designed to align your Human Vulnerability Scan with your internal policies, business context, and approved tools. When you first log in, you’ll be guided through the platform’s initial configuration.
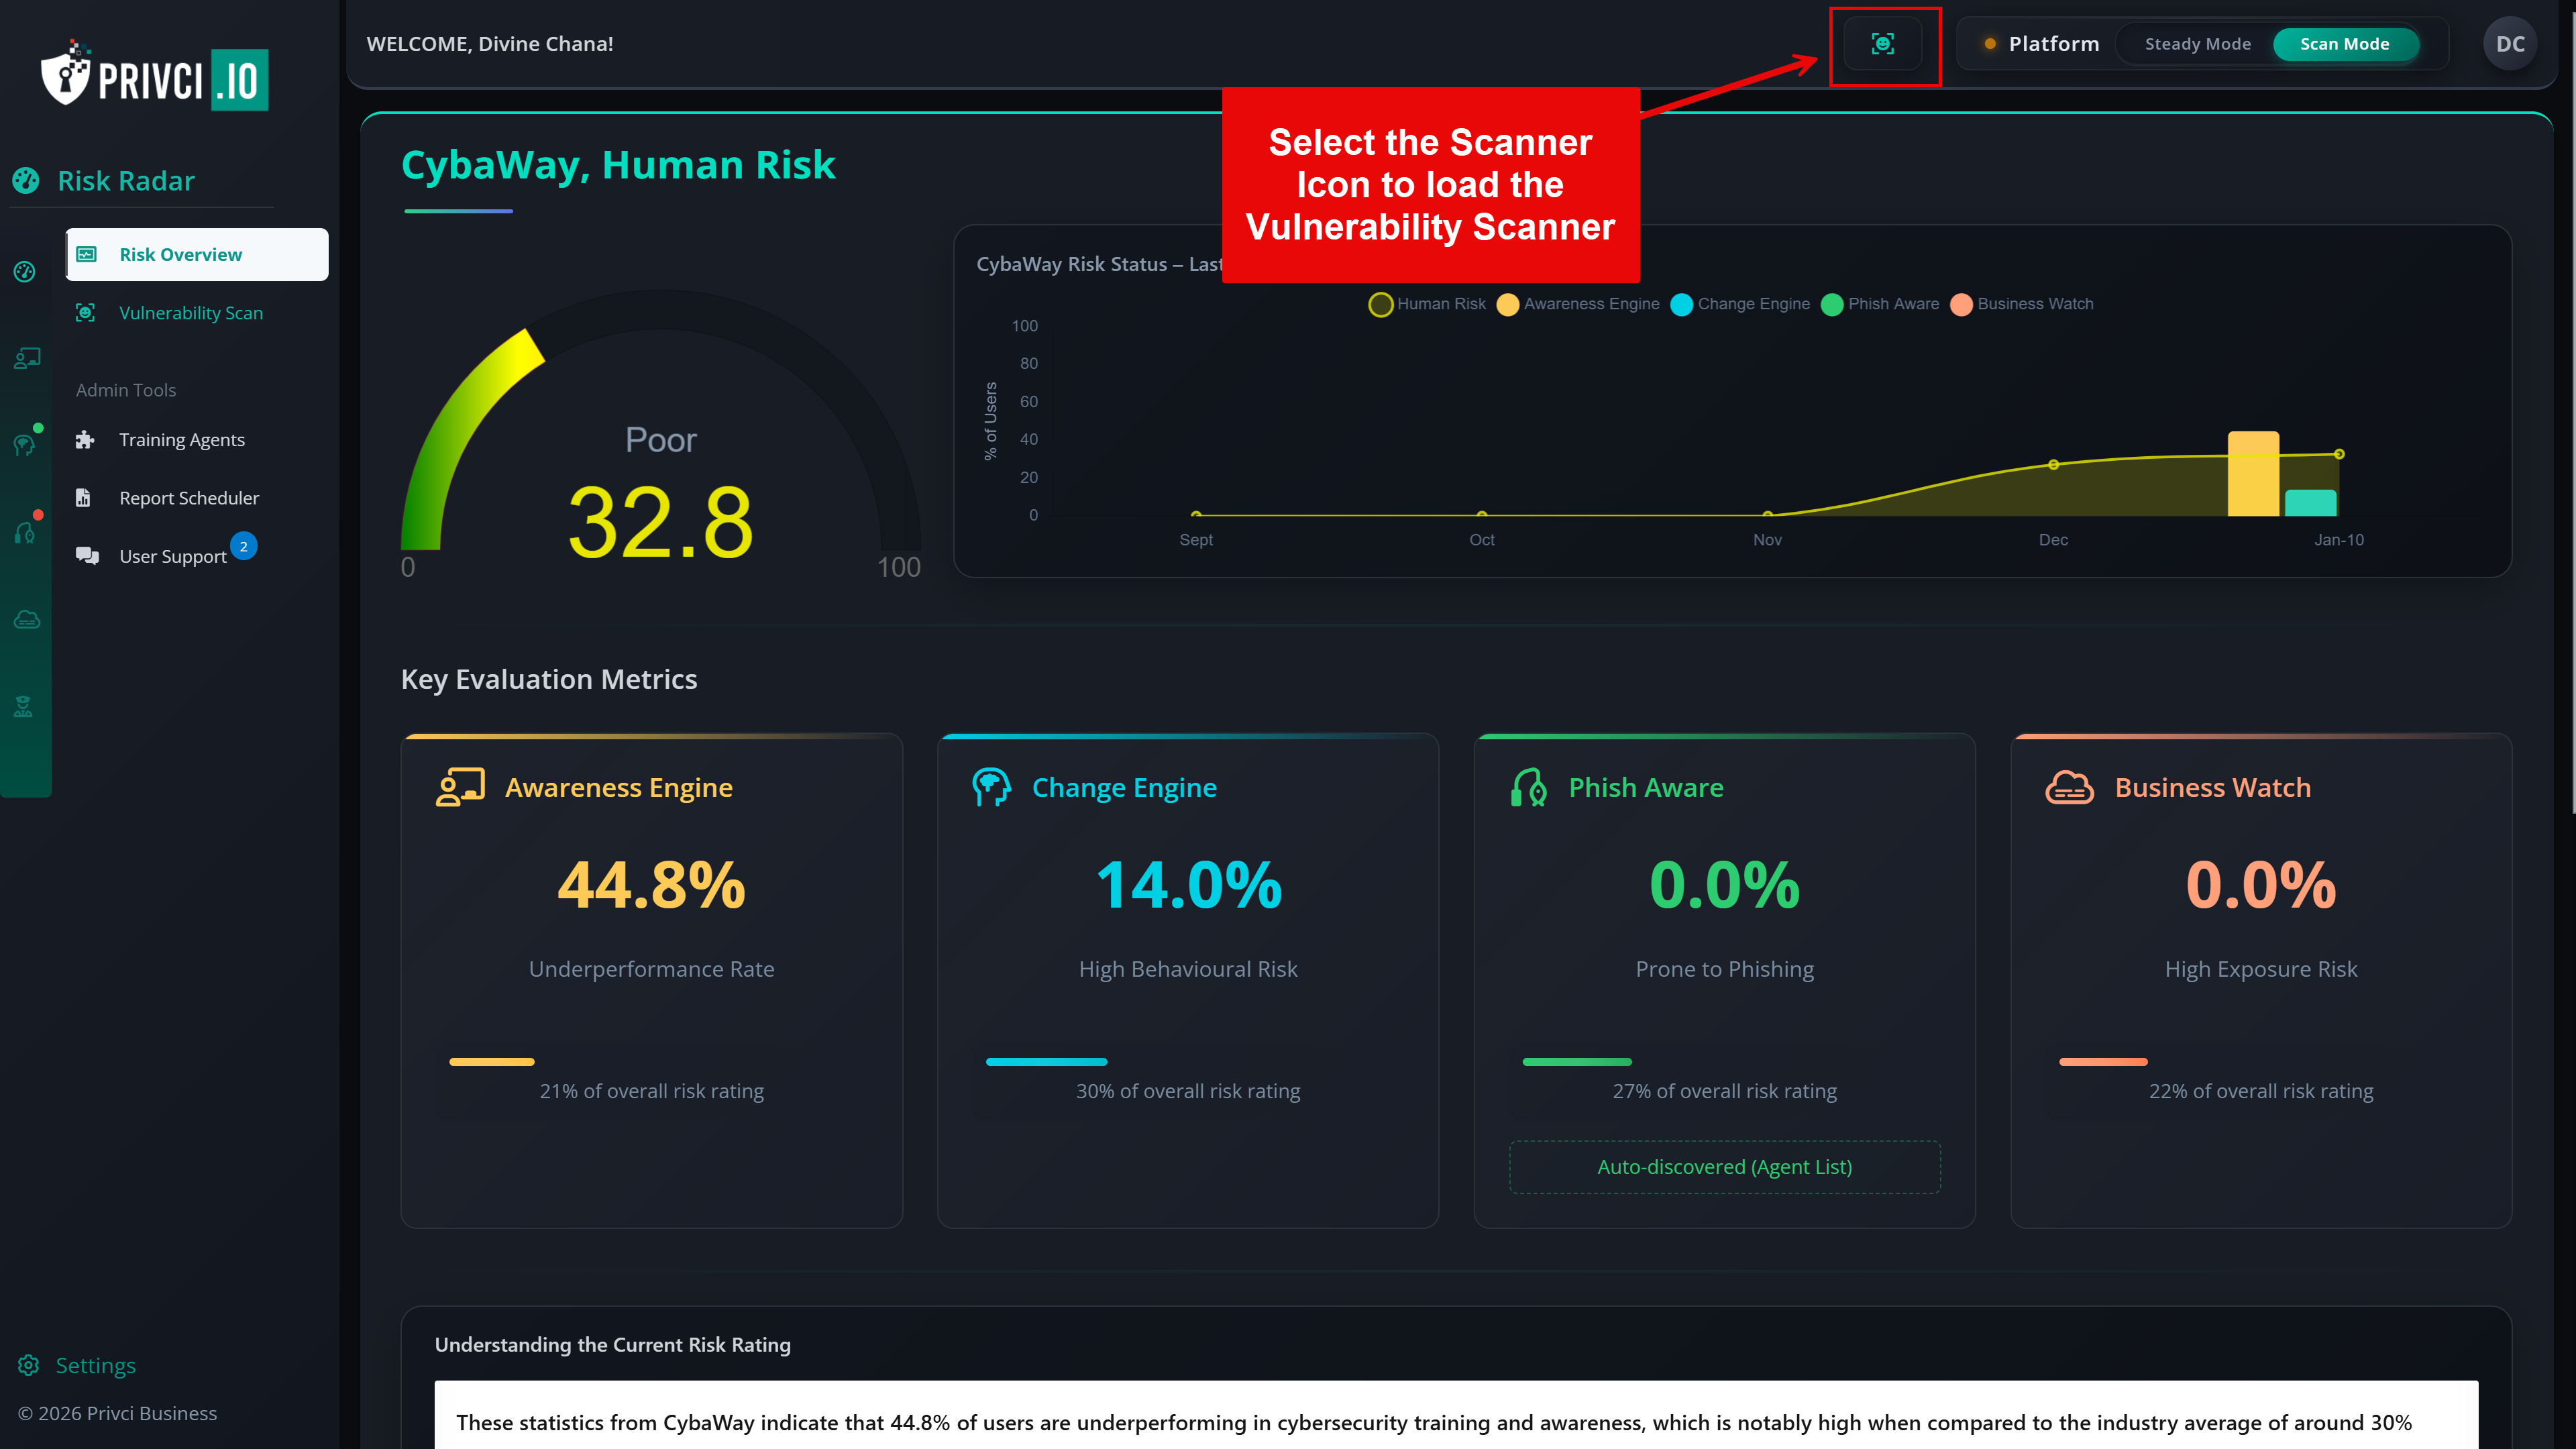
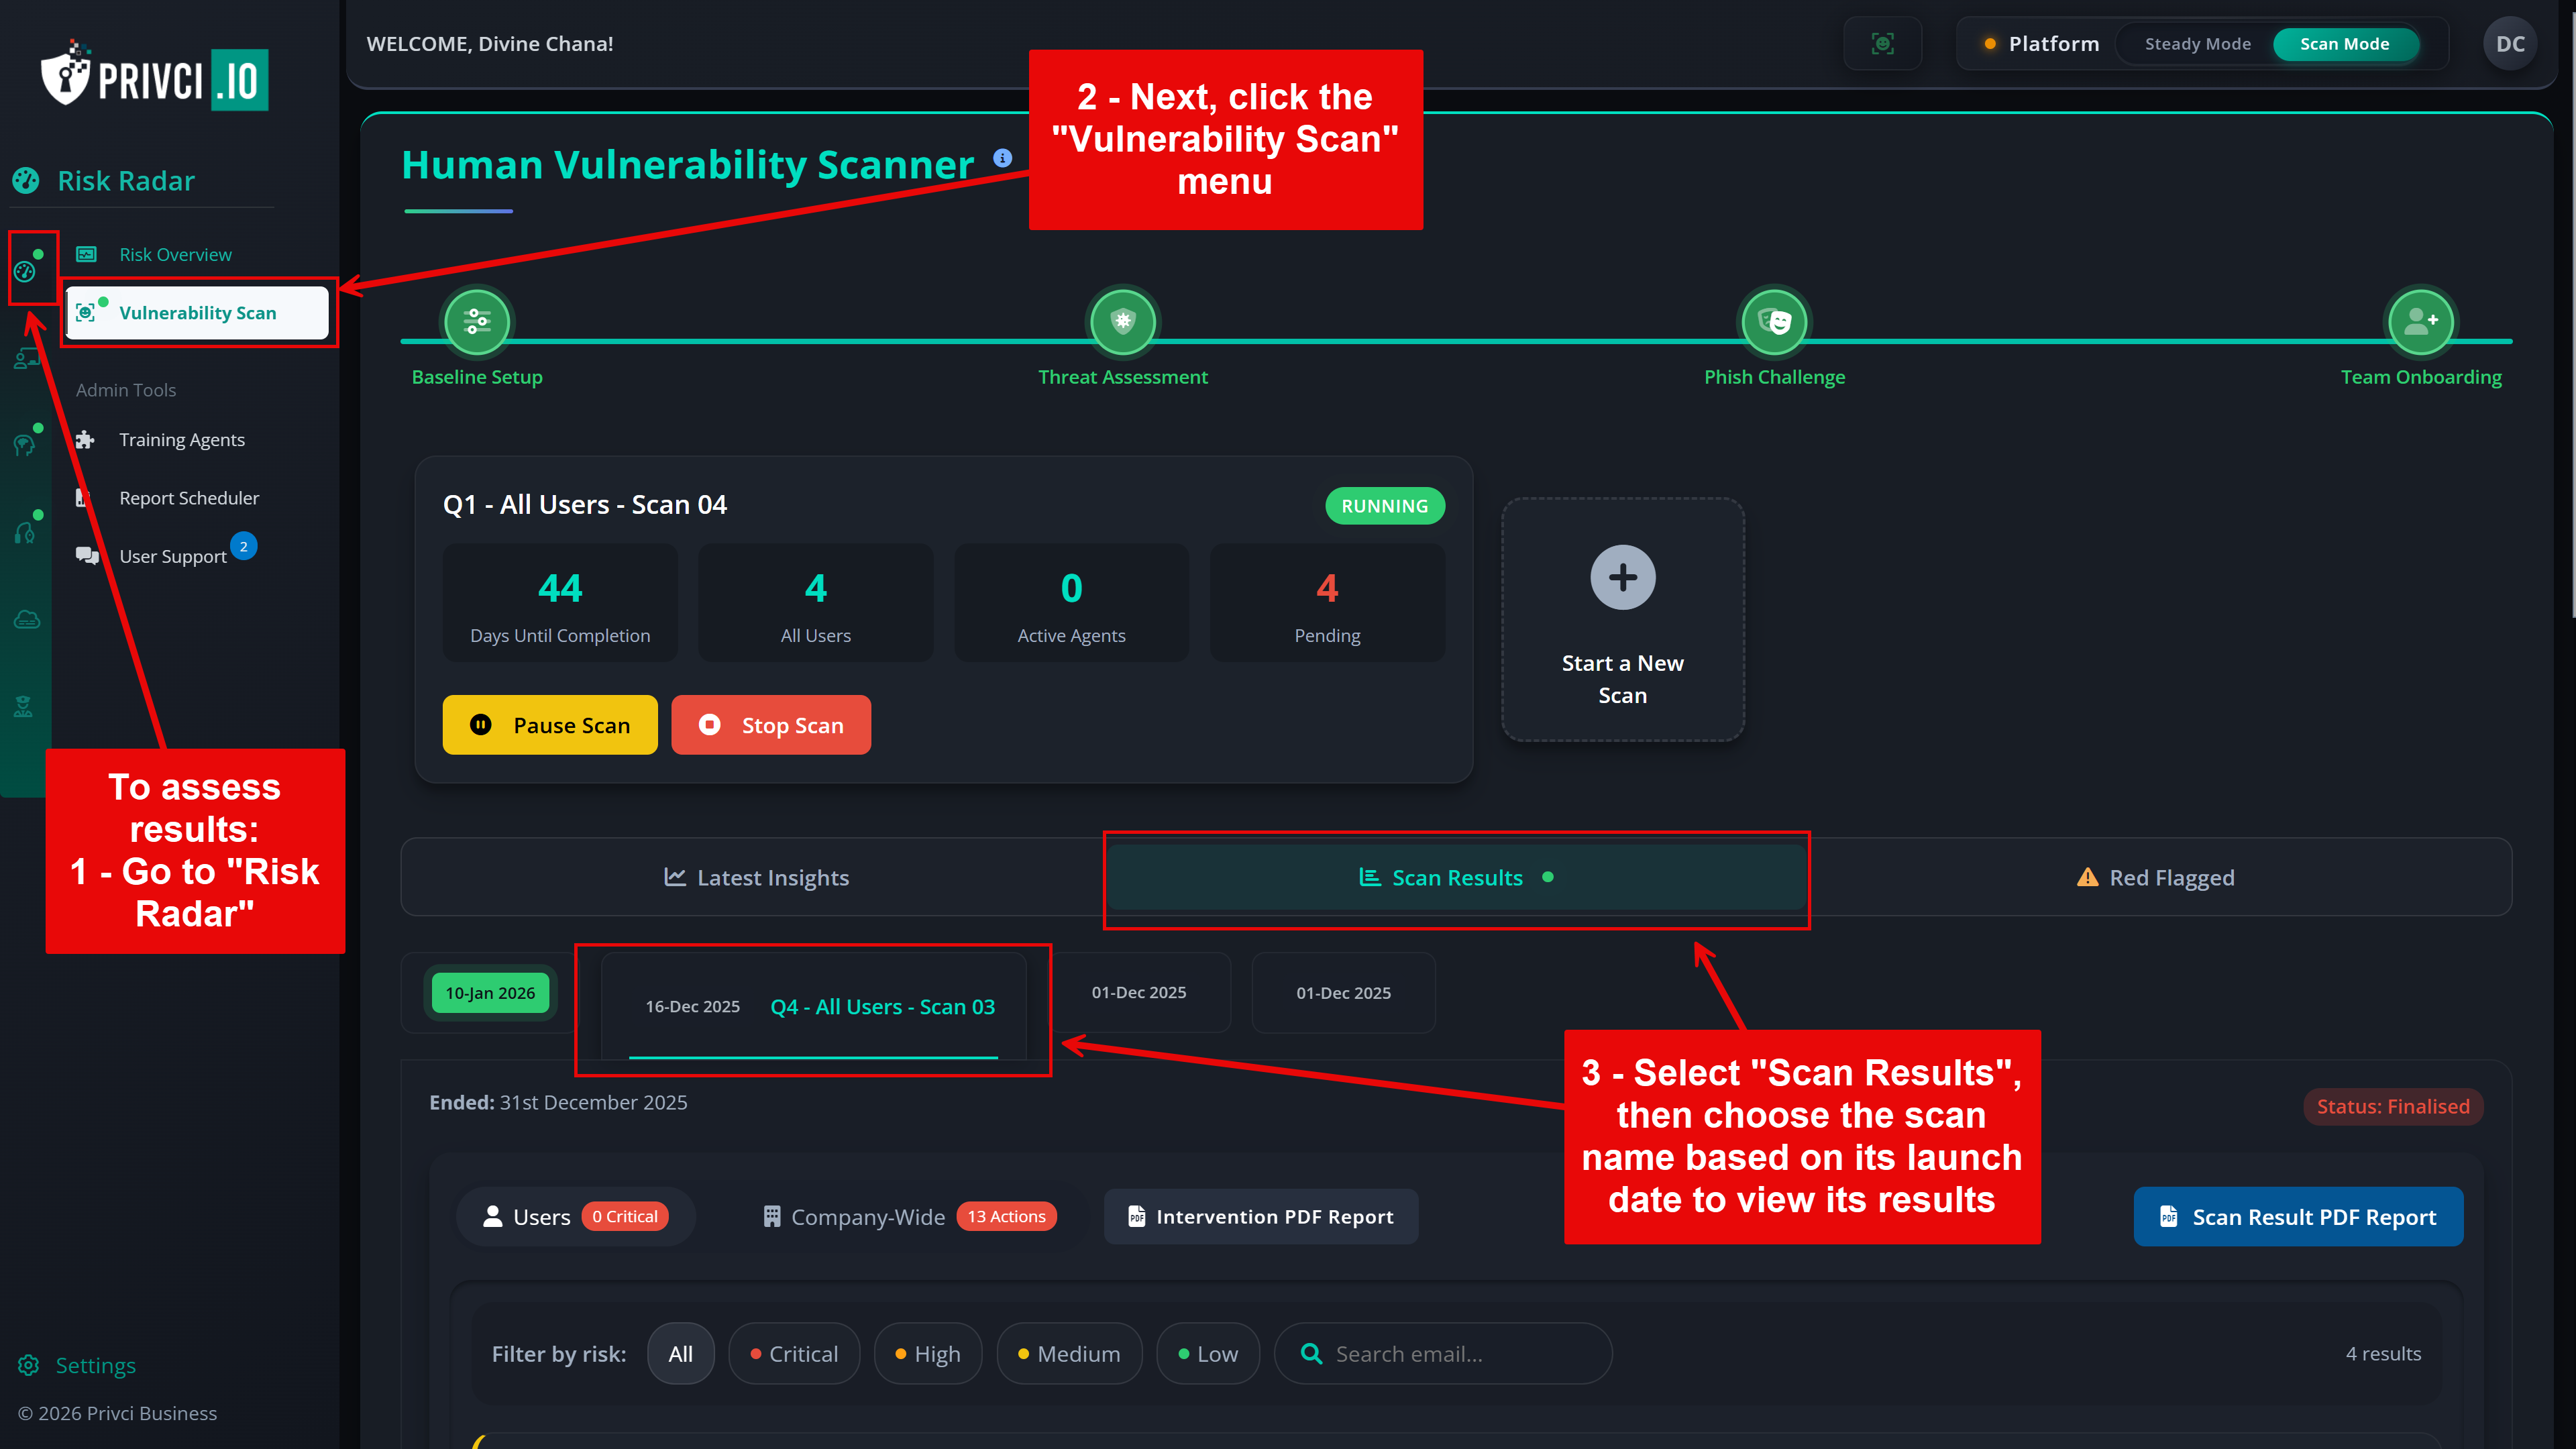
You can revisit these settings at any time from the “Risk Radar” tab. Select “Vulnerability Scan” and then choose “Baseline Setup” at the top of the page.
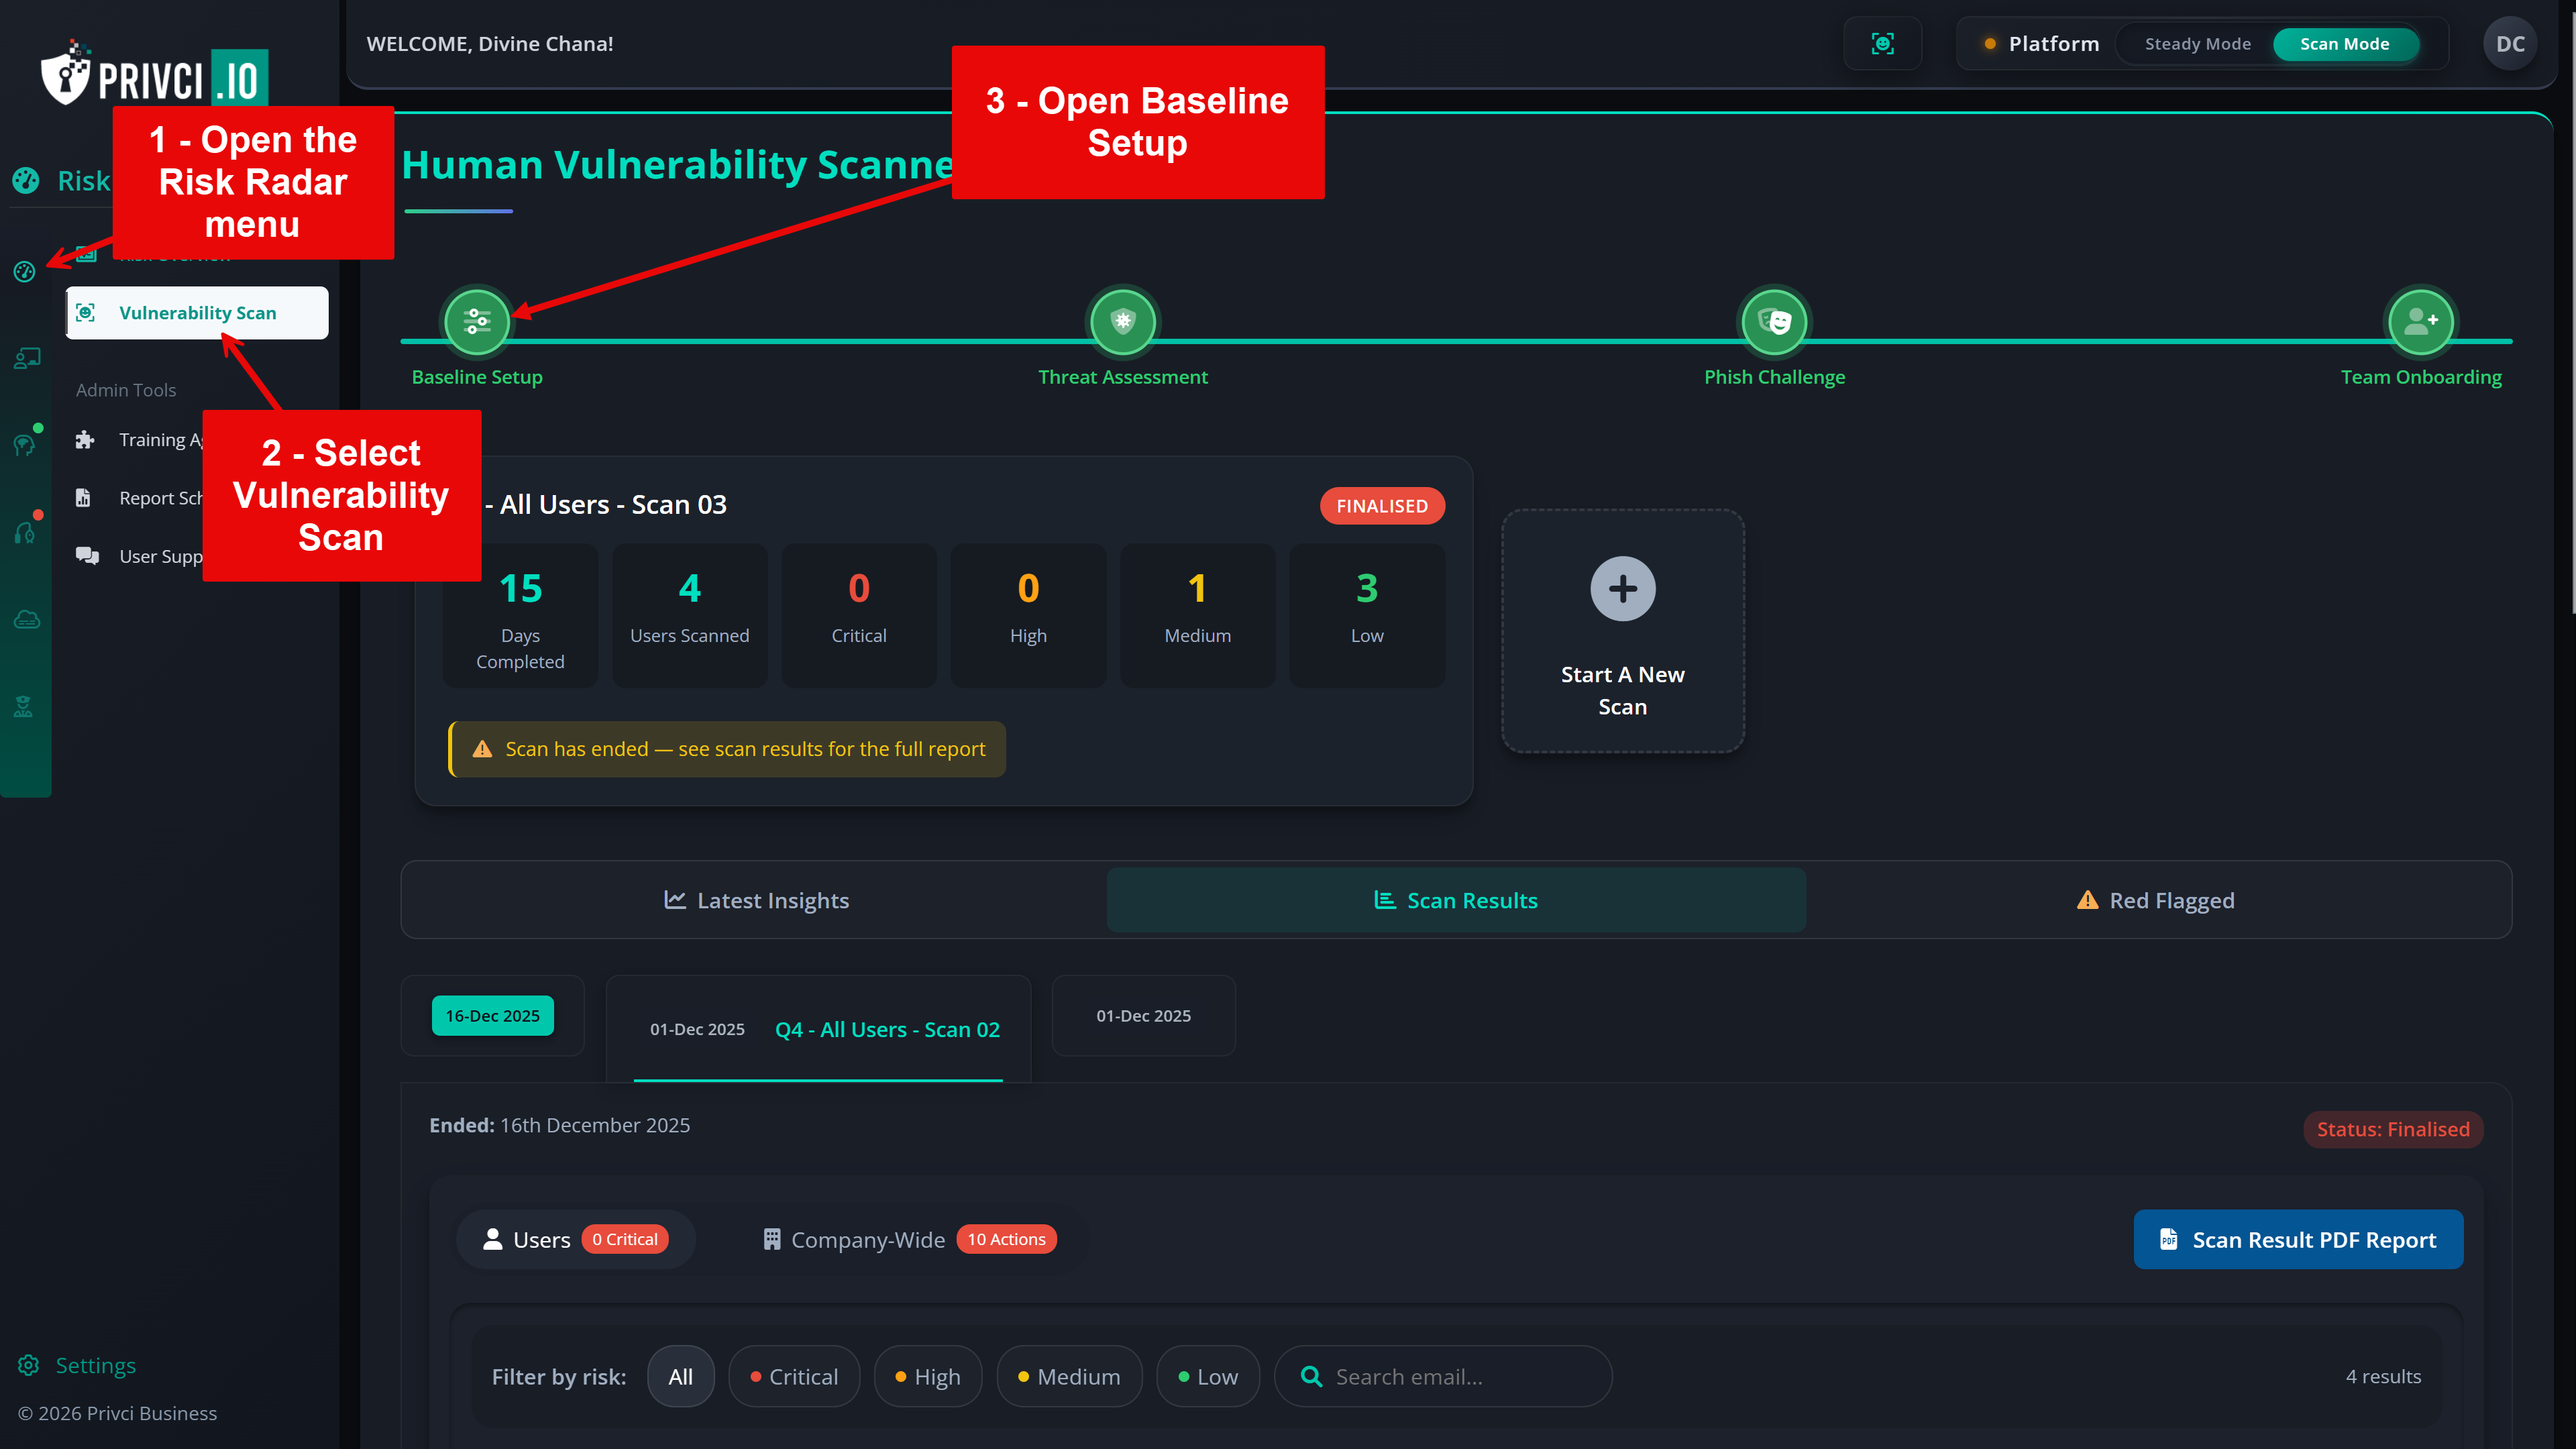
The Initial Setup & Configuration page includes four key areas:
Baseline Setup
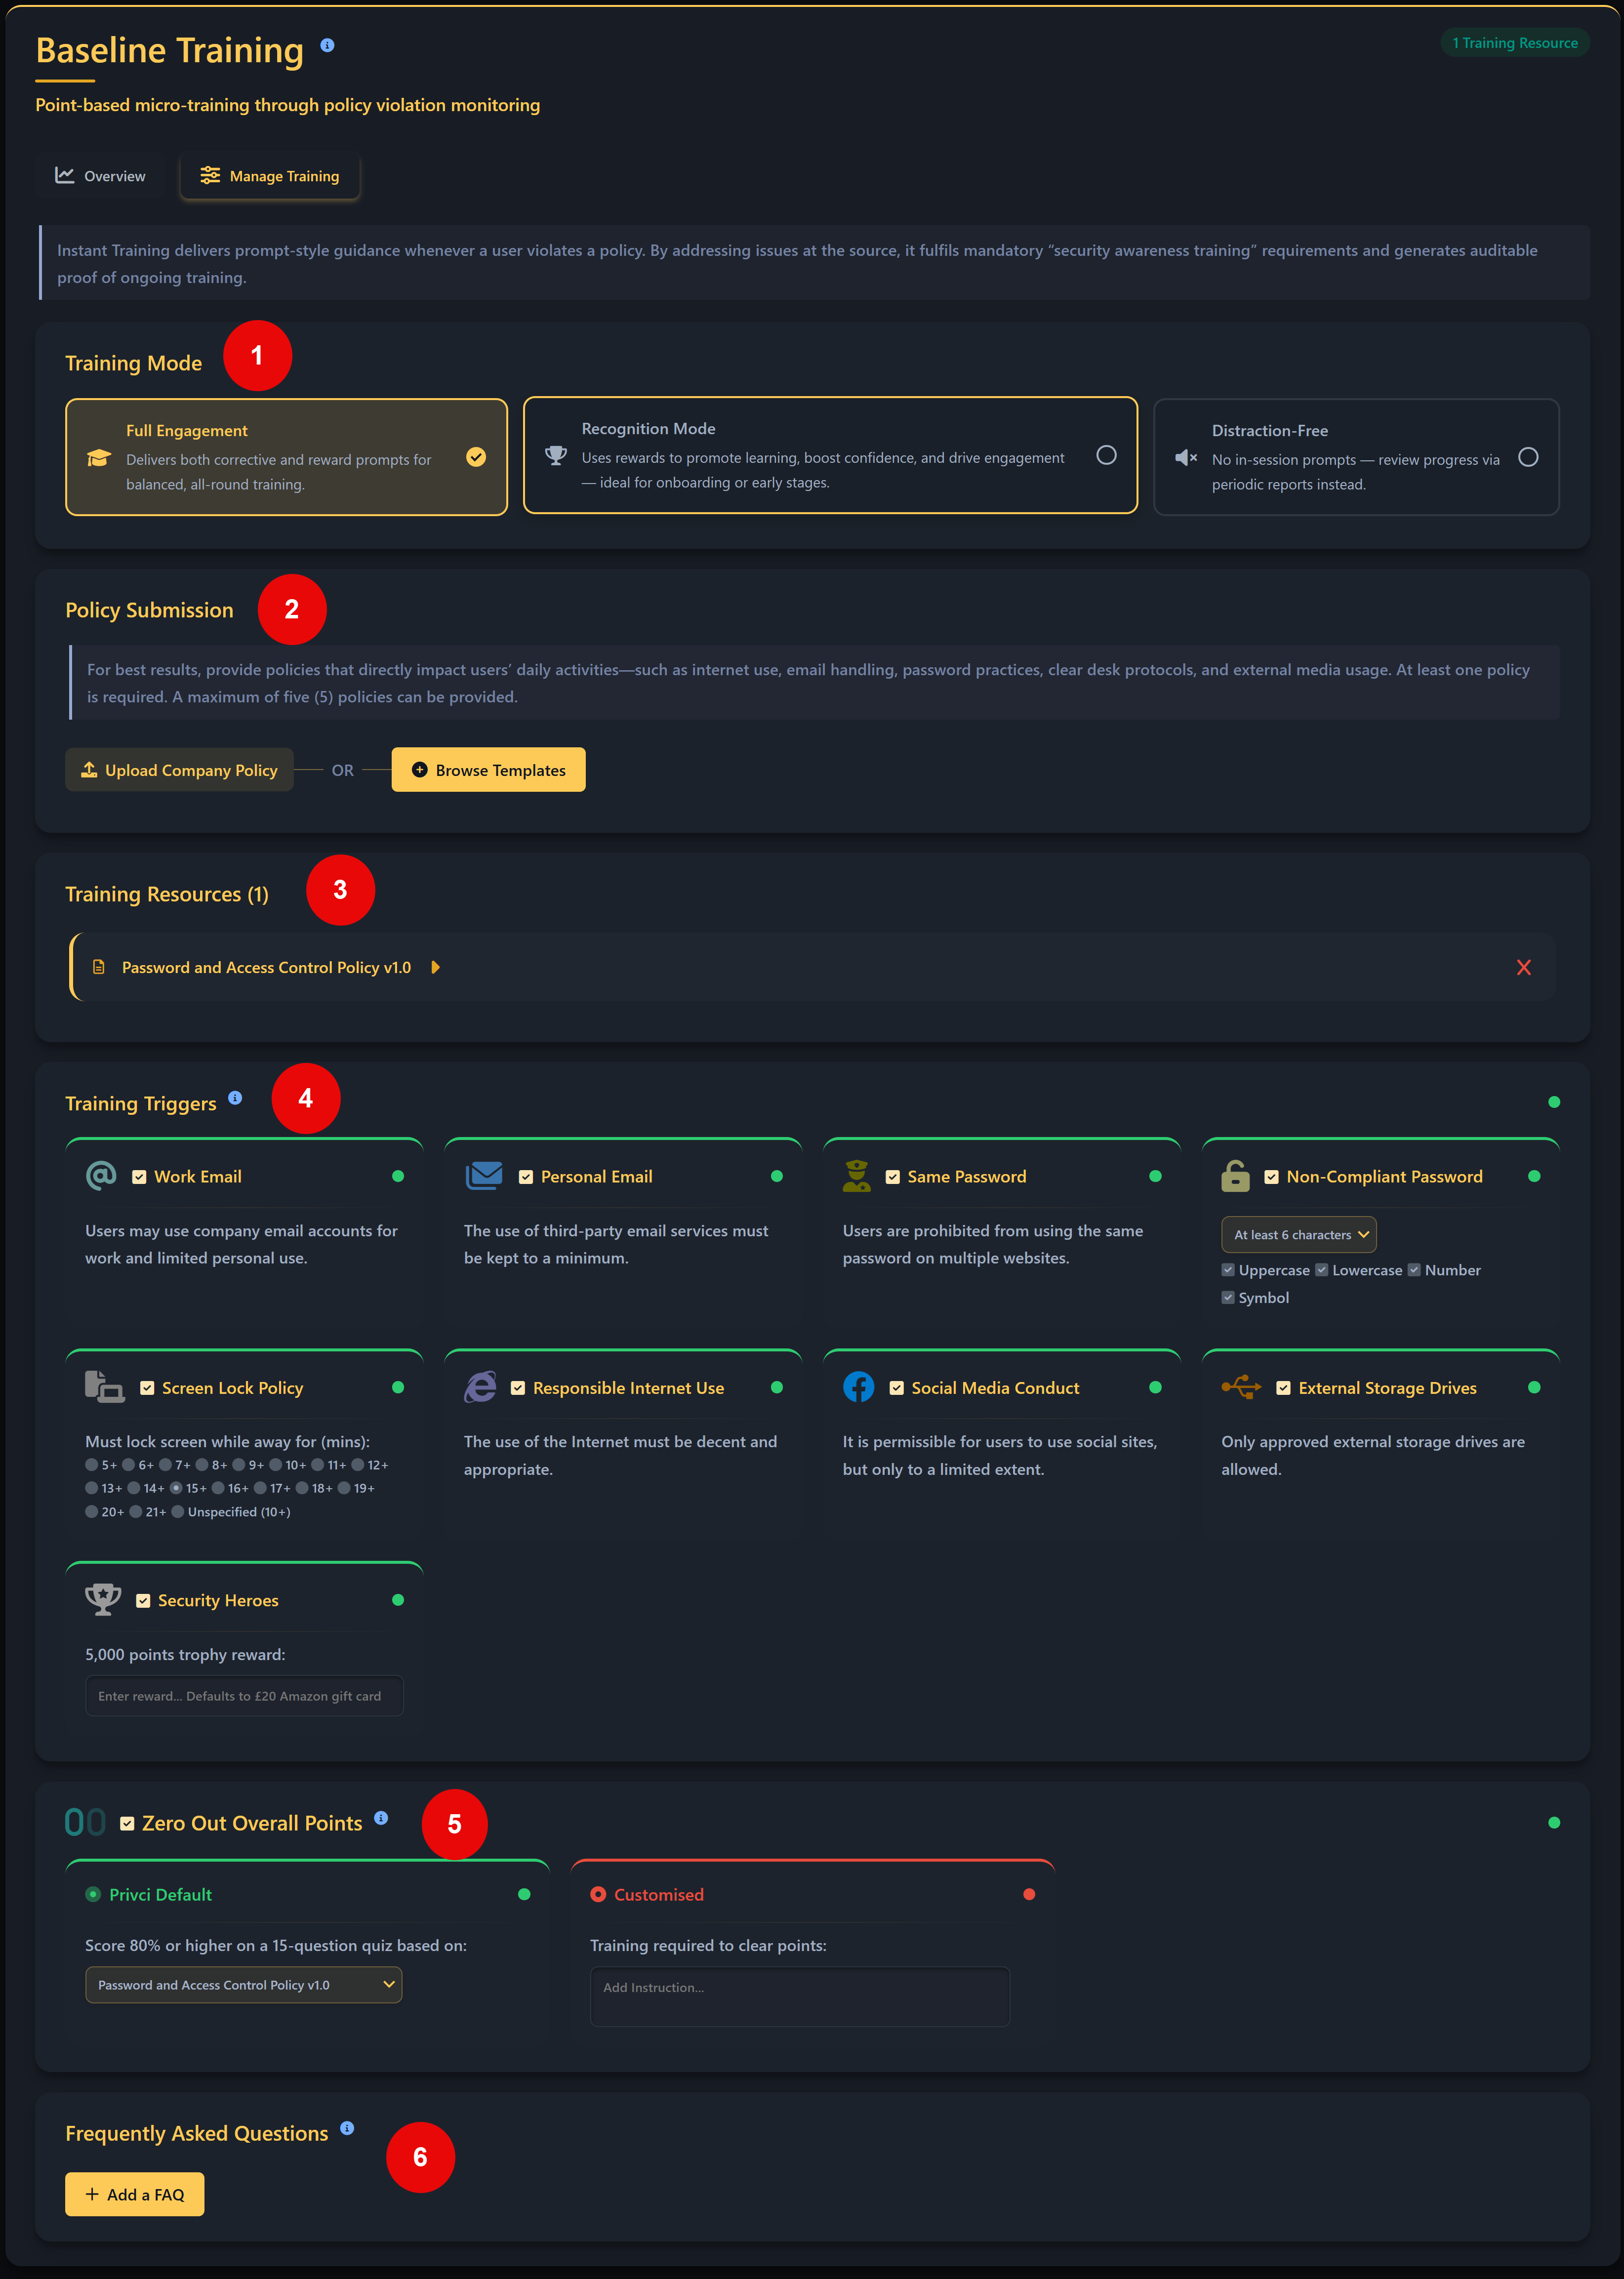
The Baseline Setup defines the core parameters of your scan: how long it runs, which internal policies are assessed, which domains are in scope, and which email clients are considered “approved” for business use.
- Scan Duration. Choose how many days the Human Vulnerability Scan should run. During this period, users are assessed on knowledge, policy alignment, and behaviour in real contexts. We recommend a minimum of 30 days to generate meaningful behavioural insights.
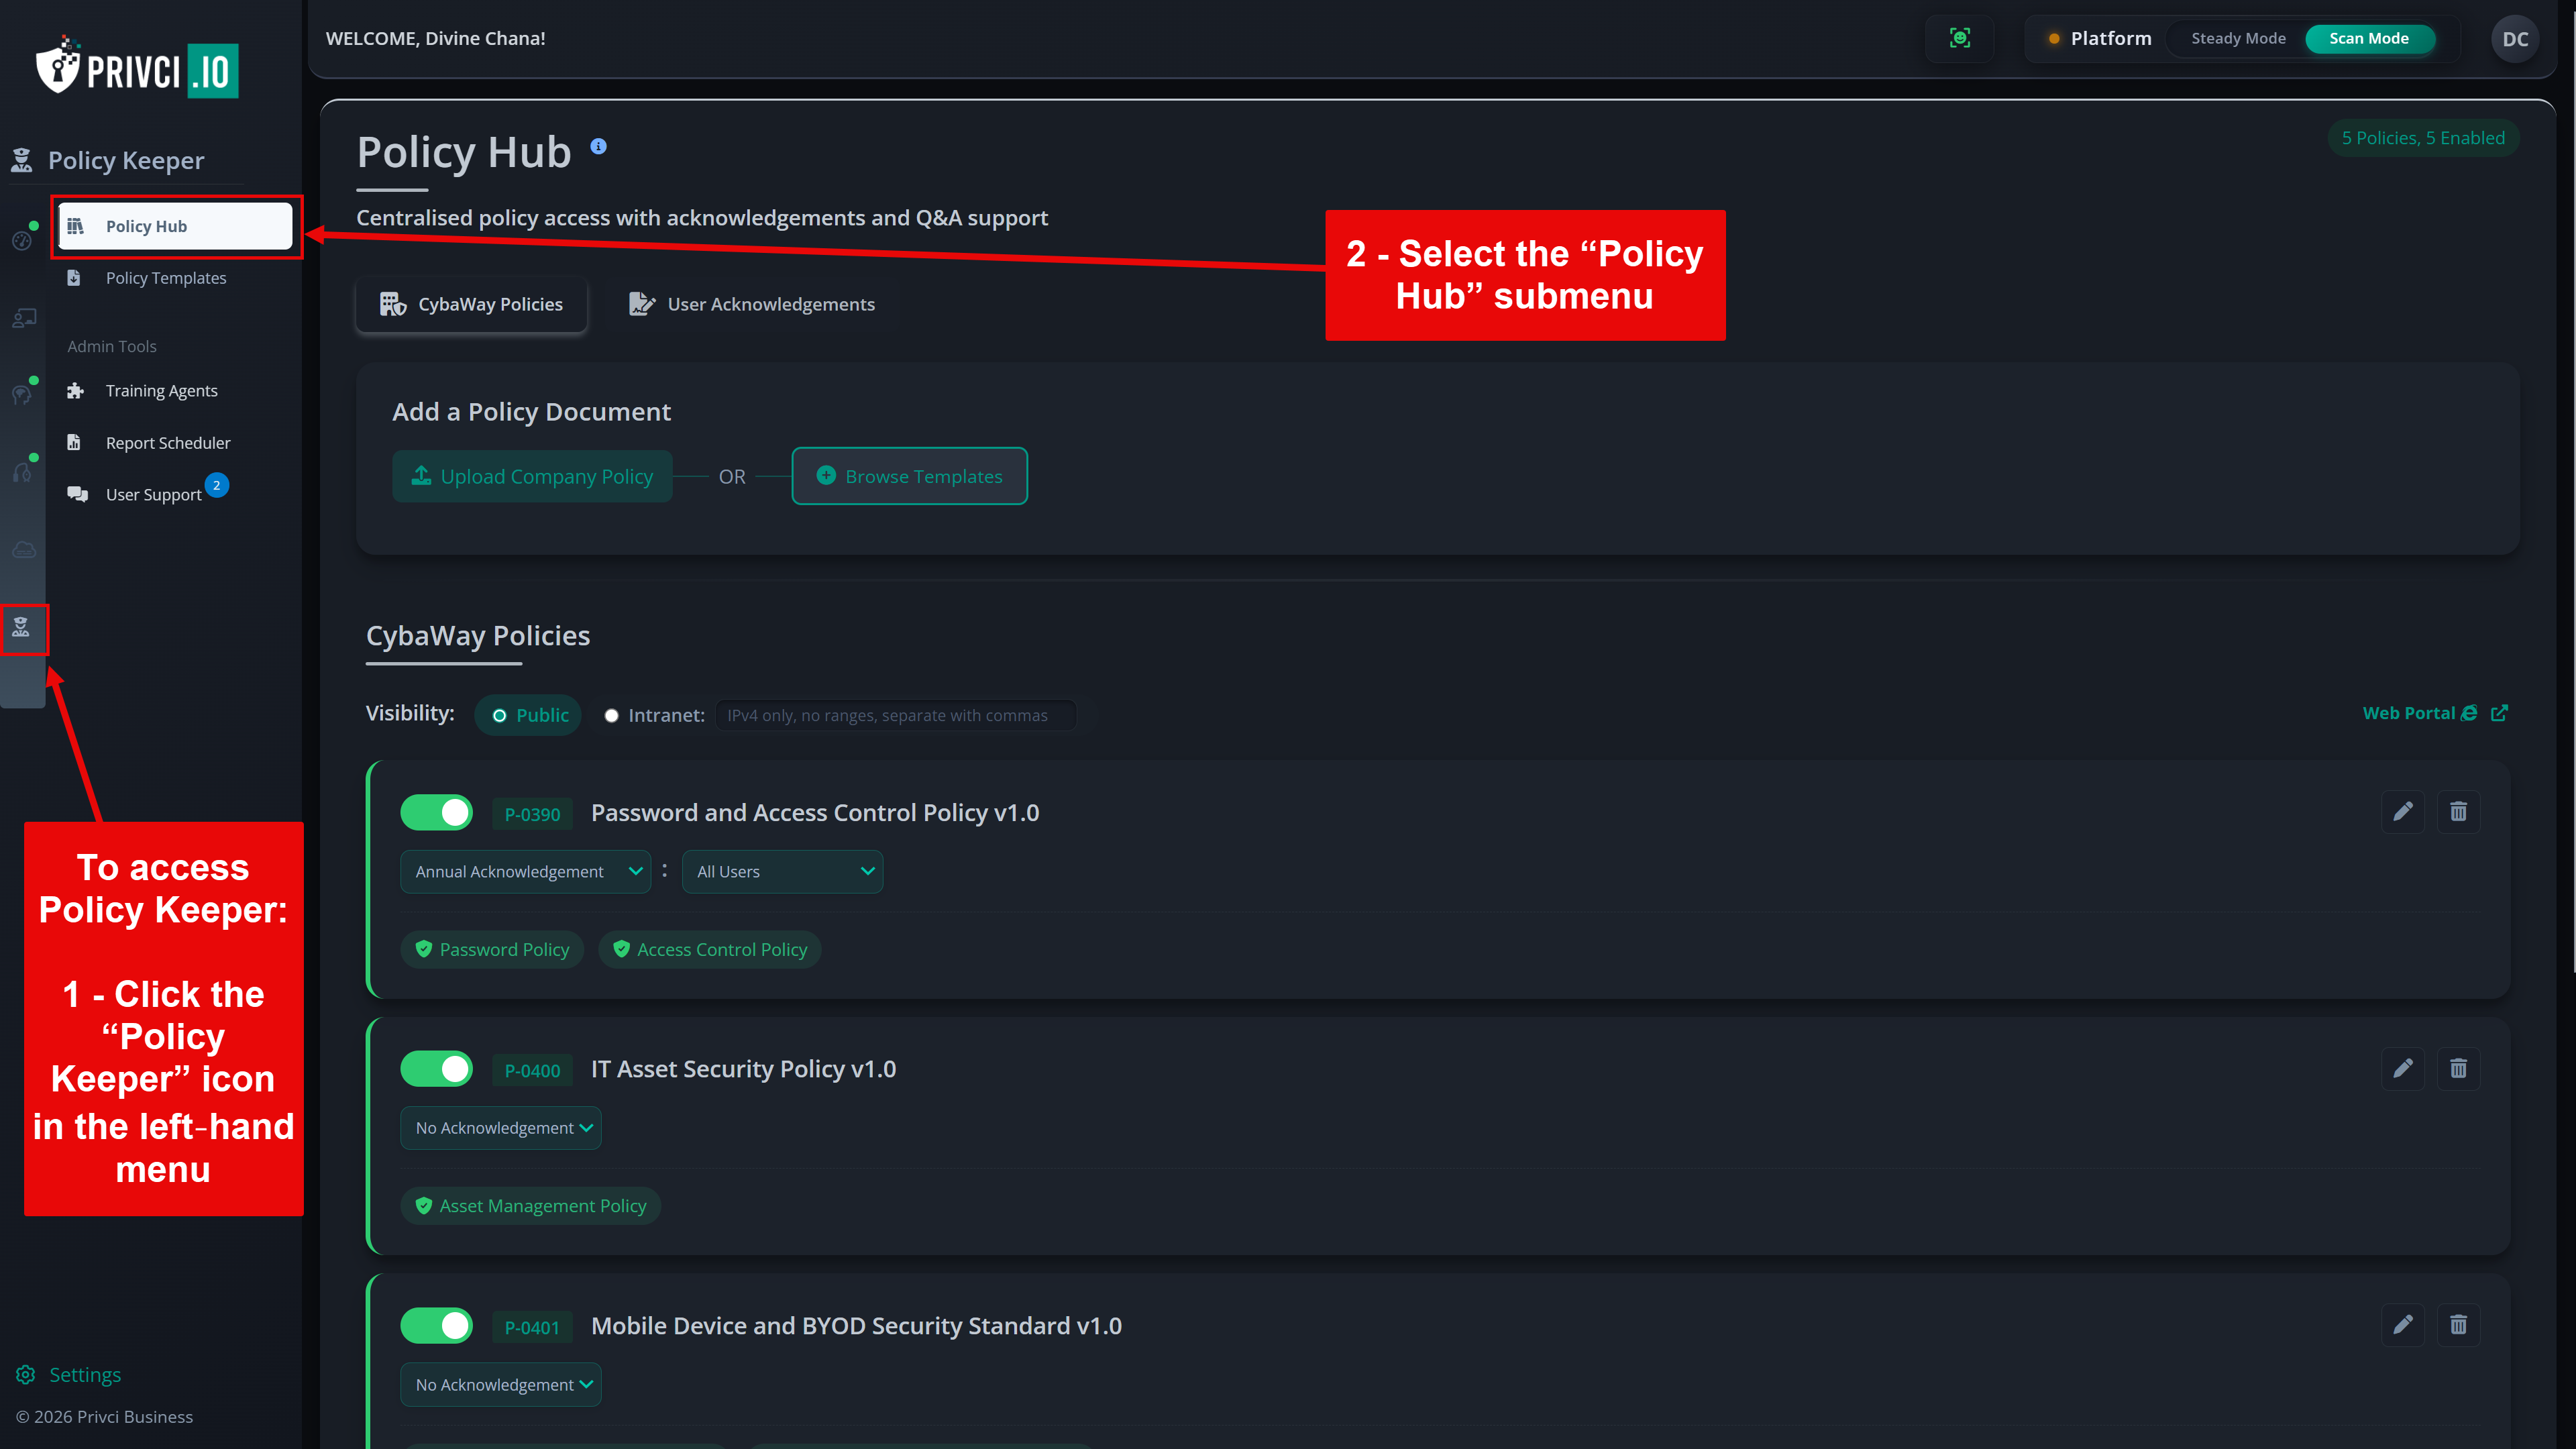
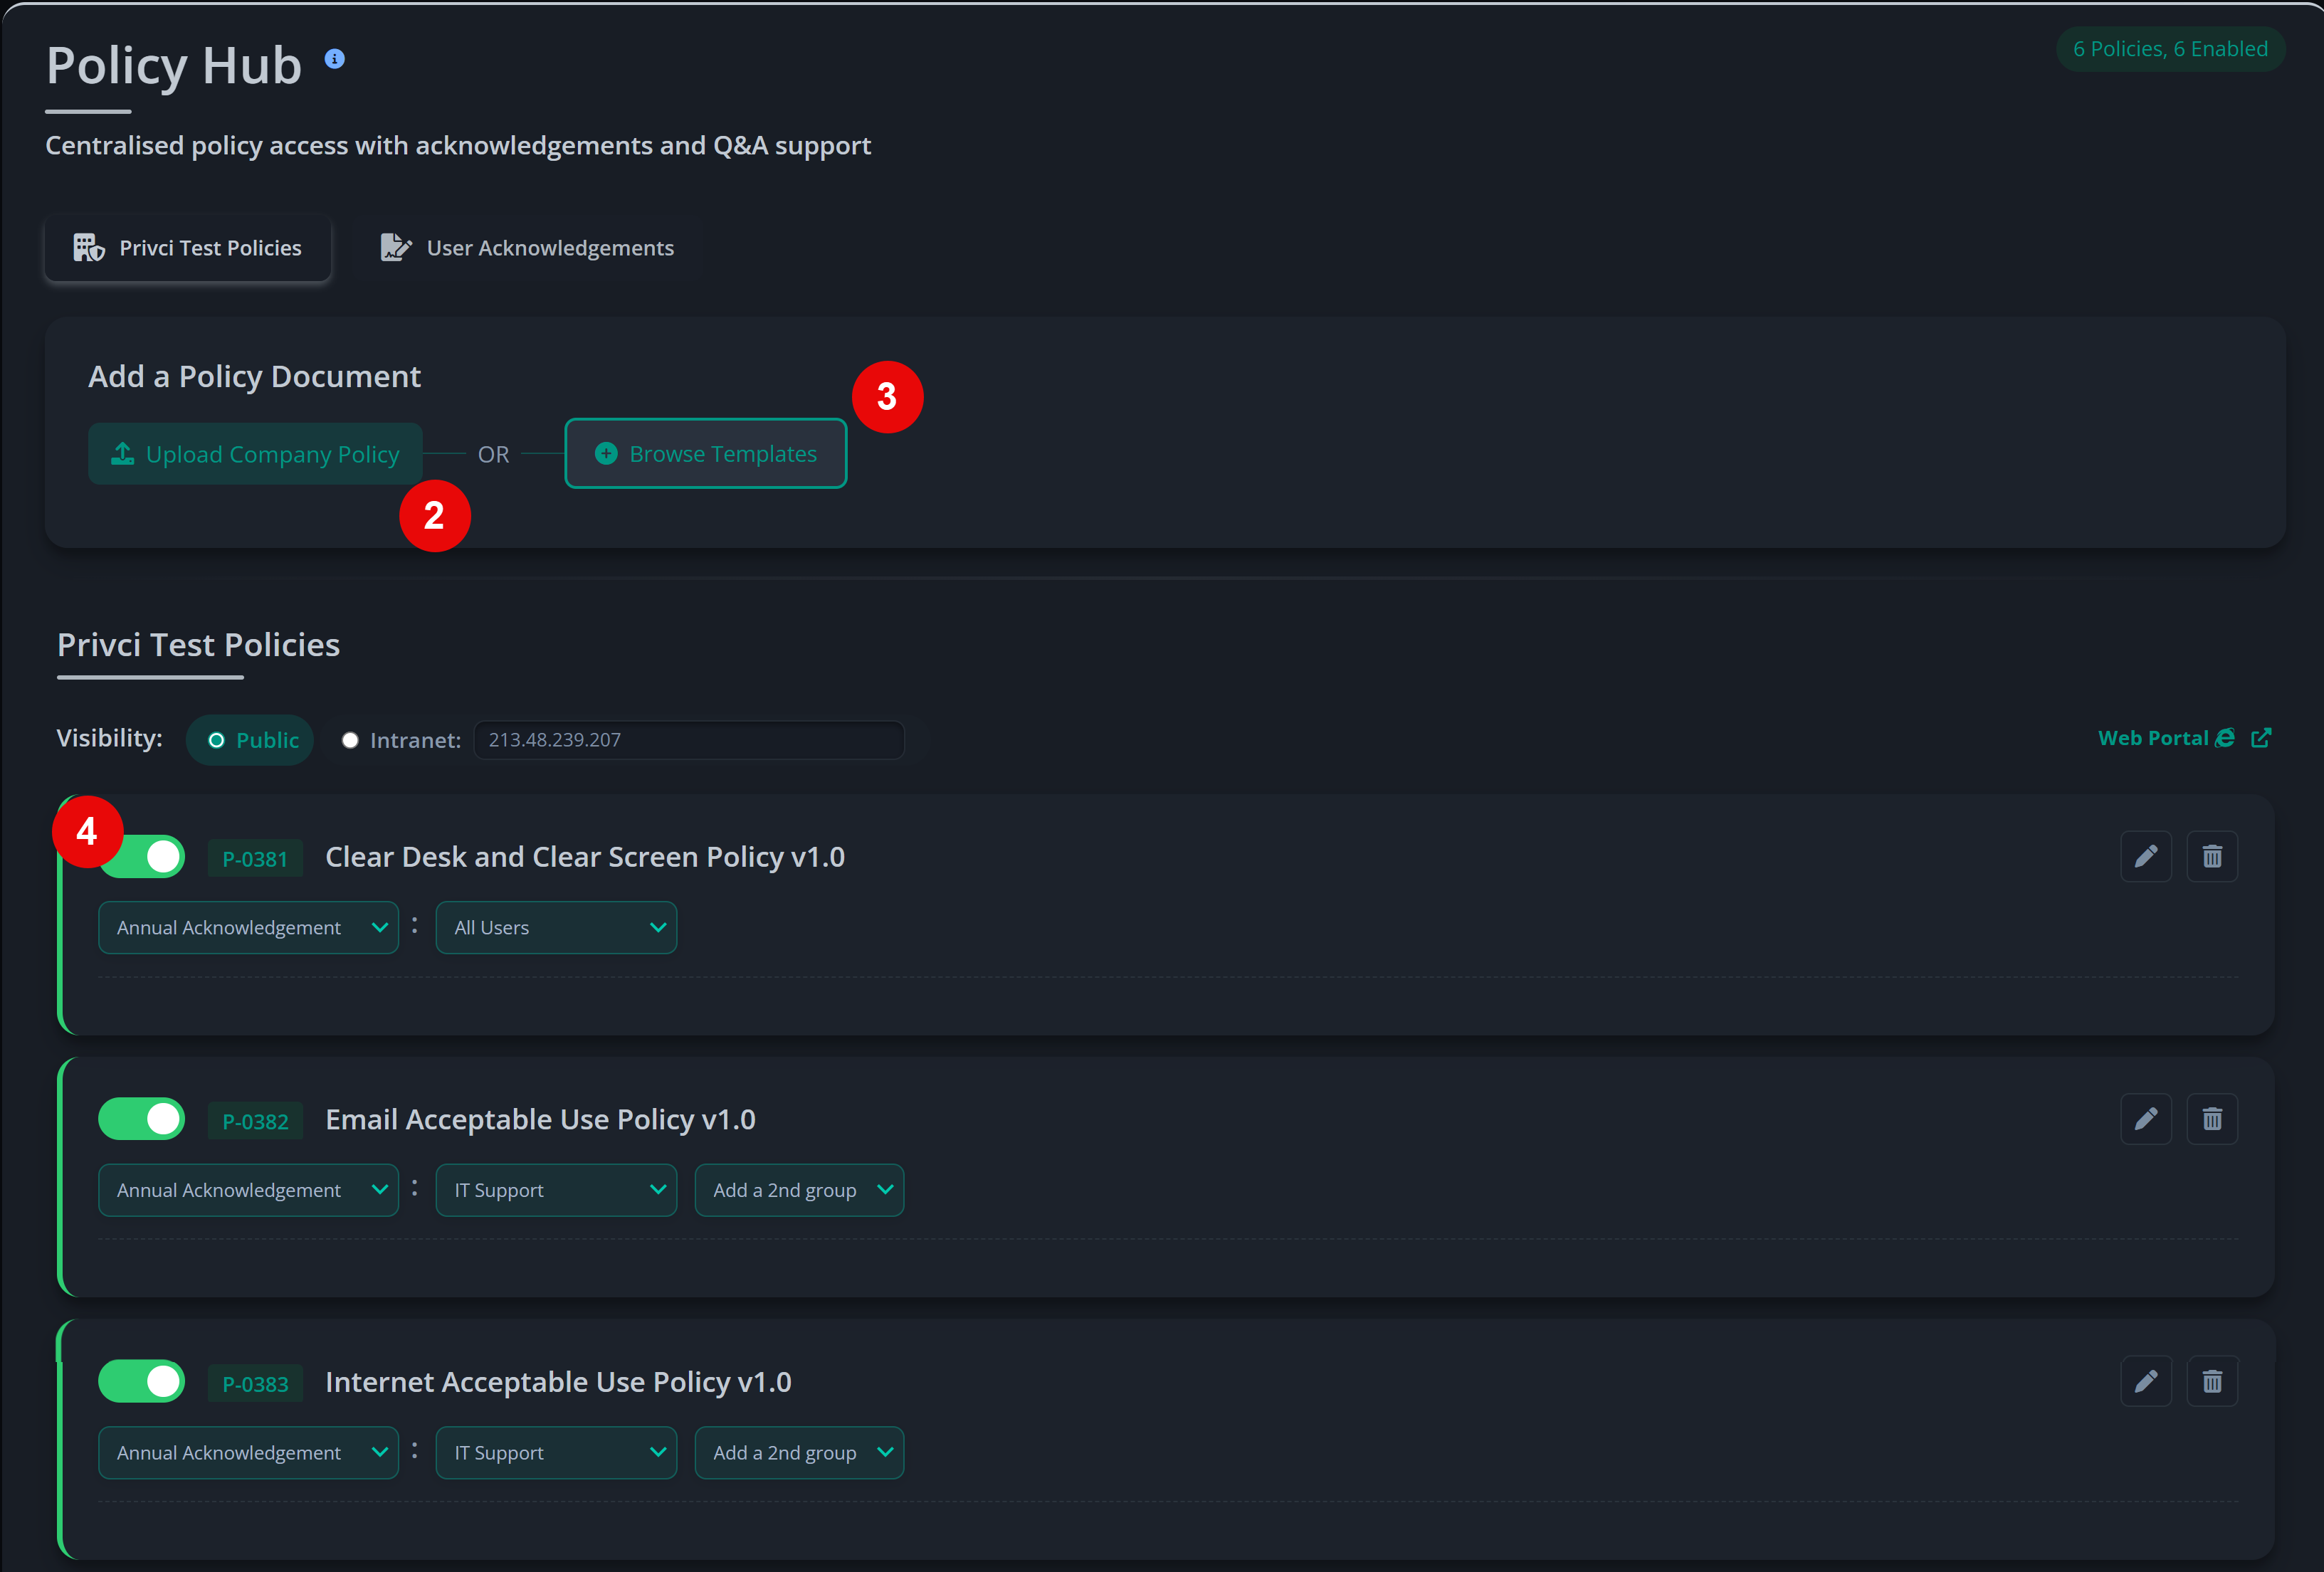
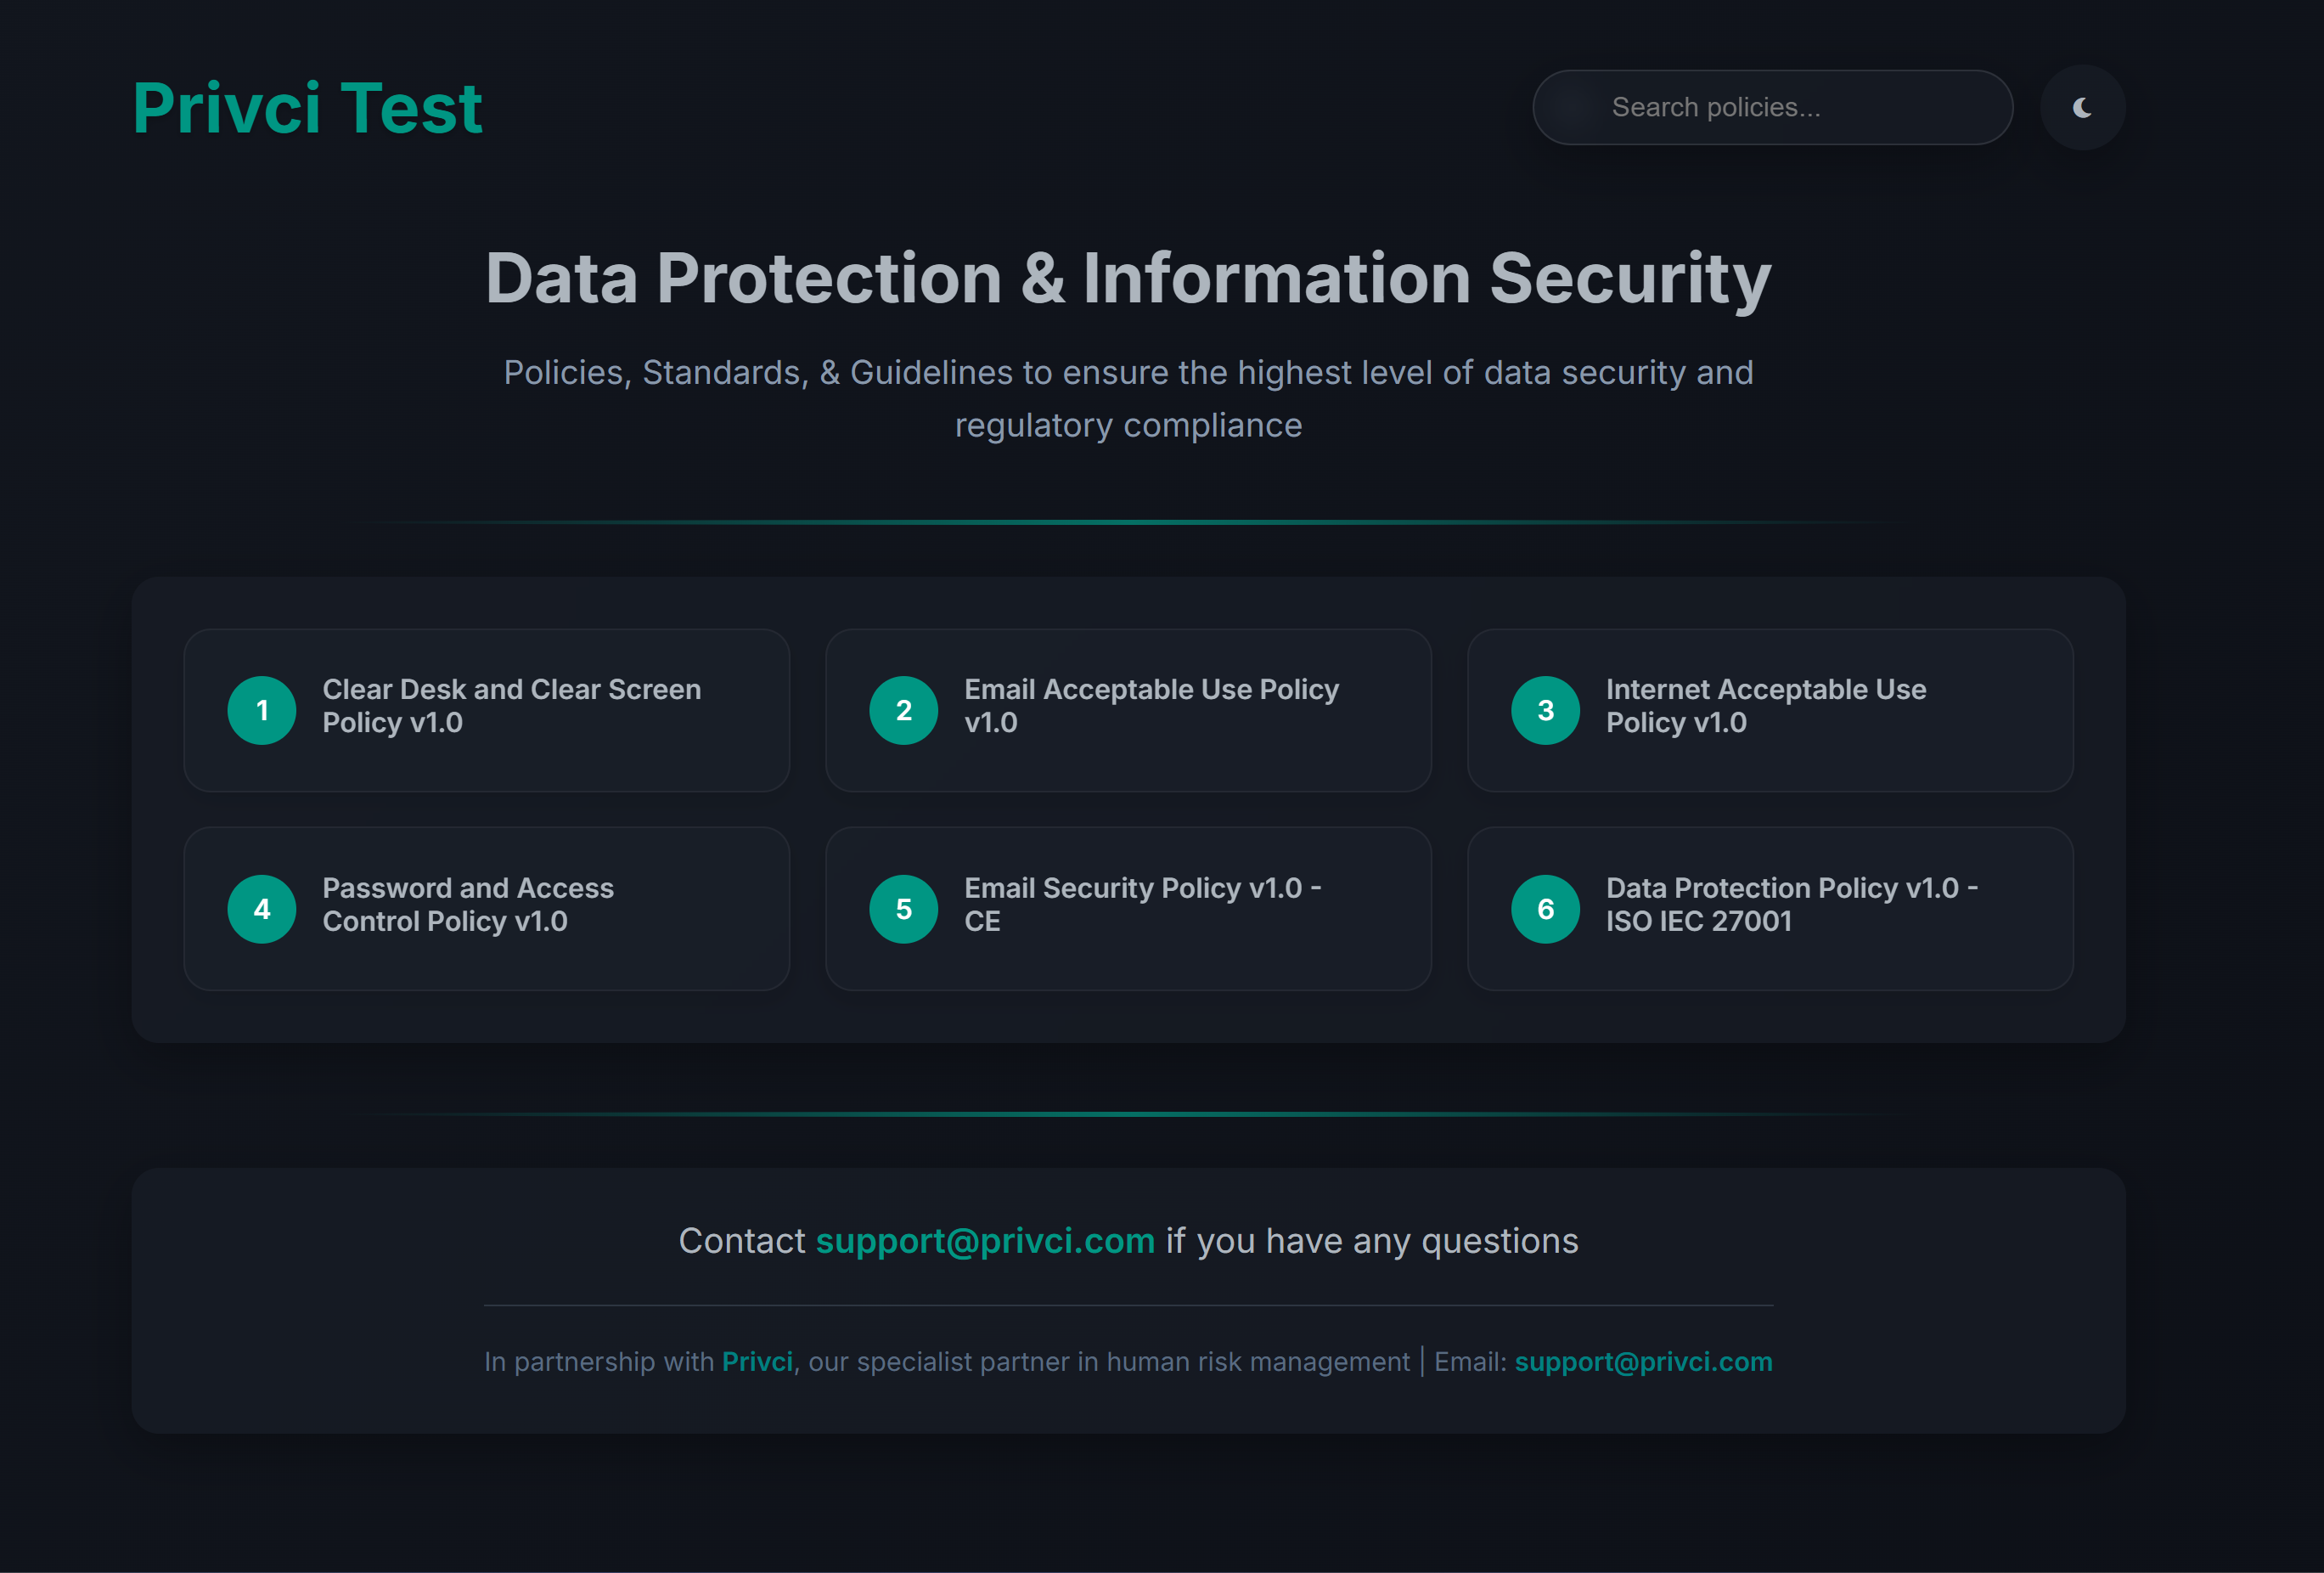
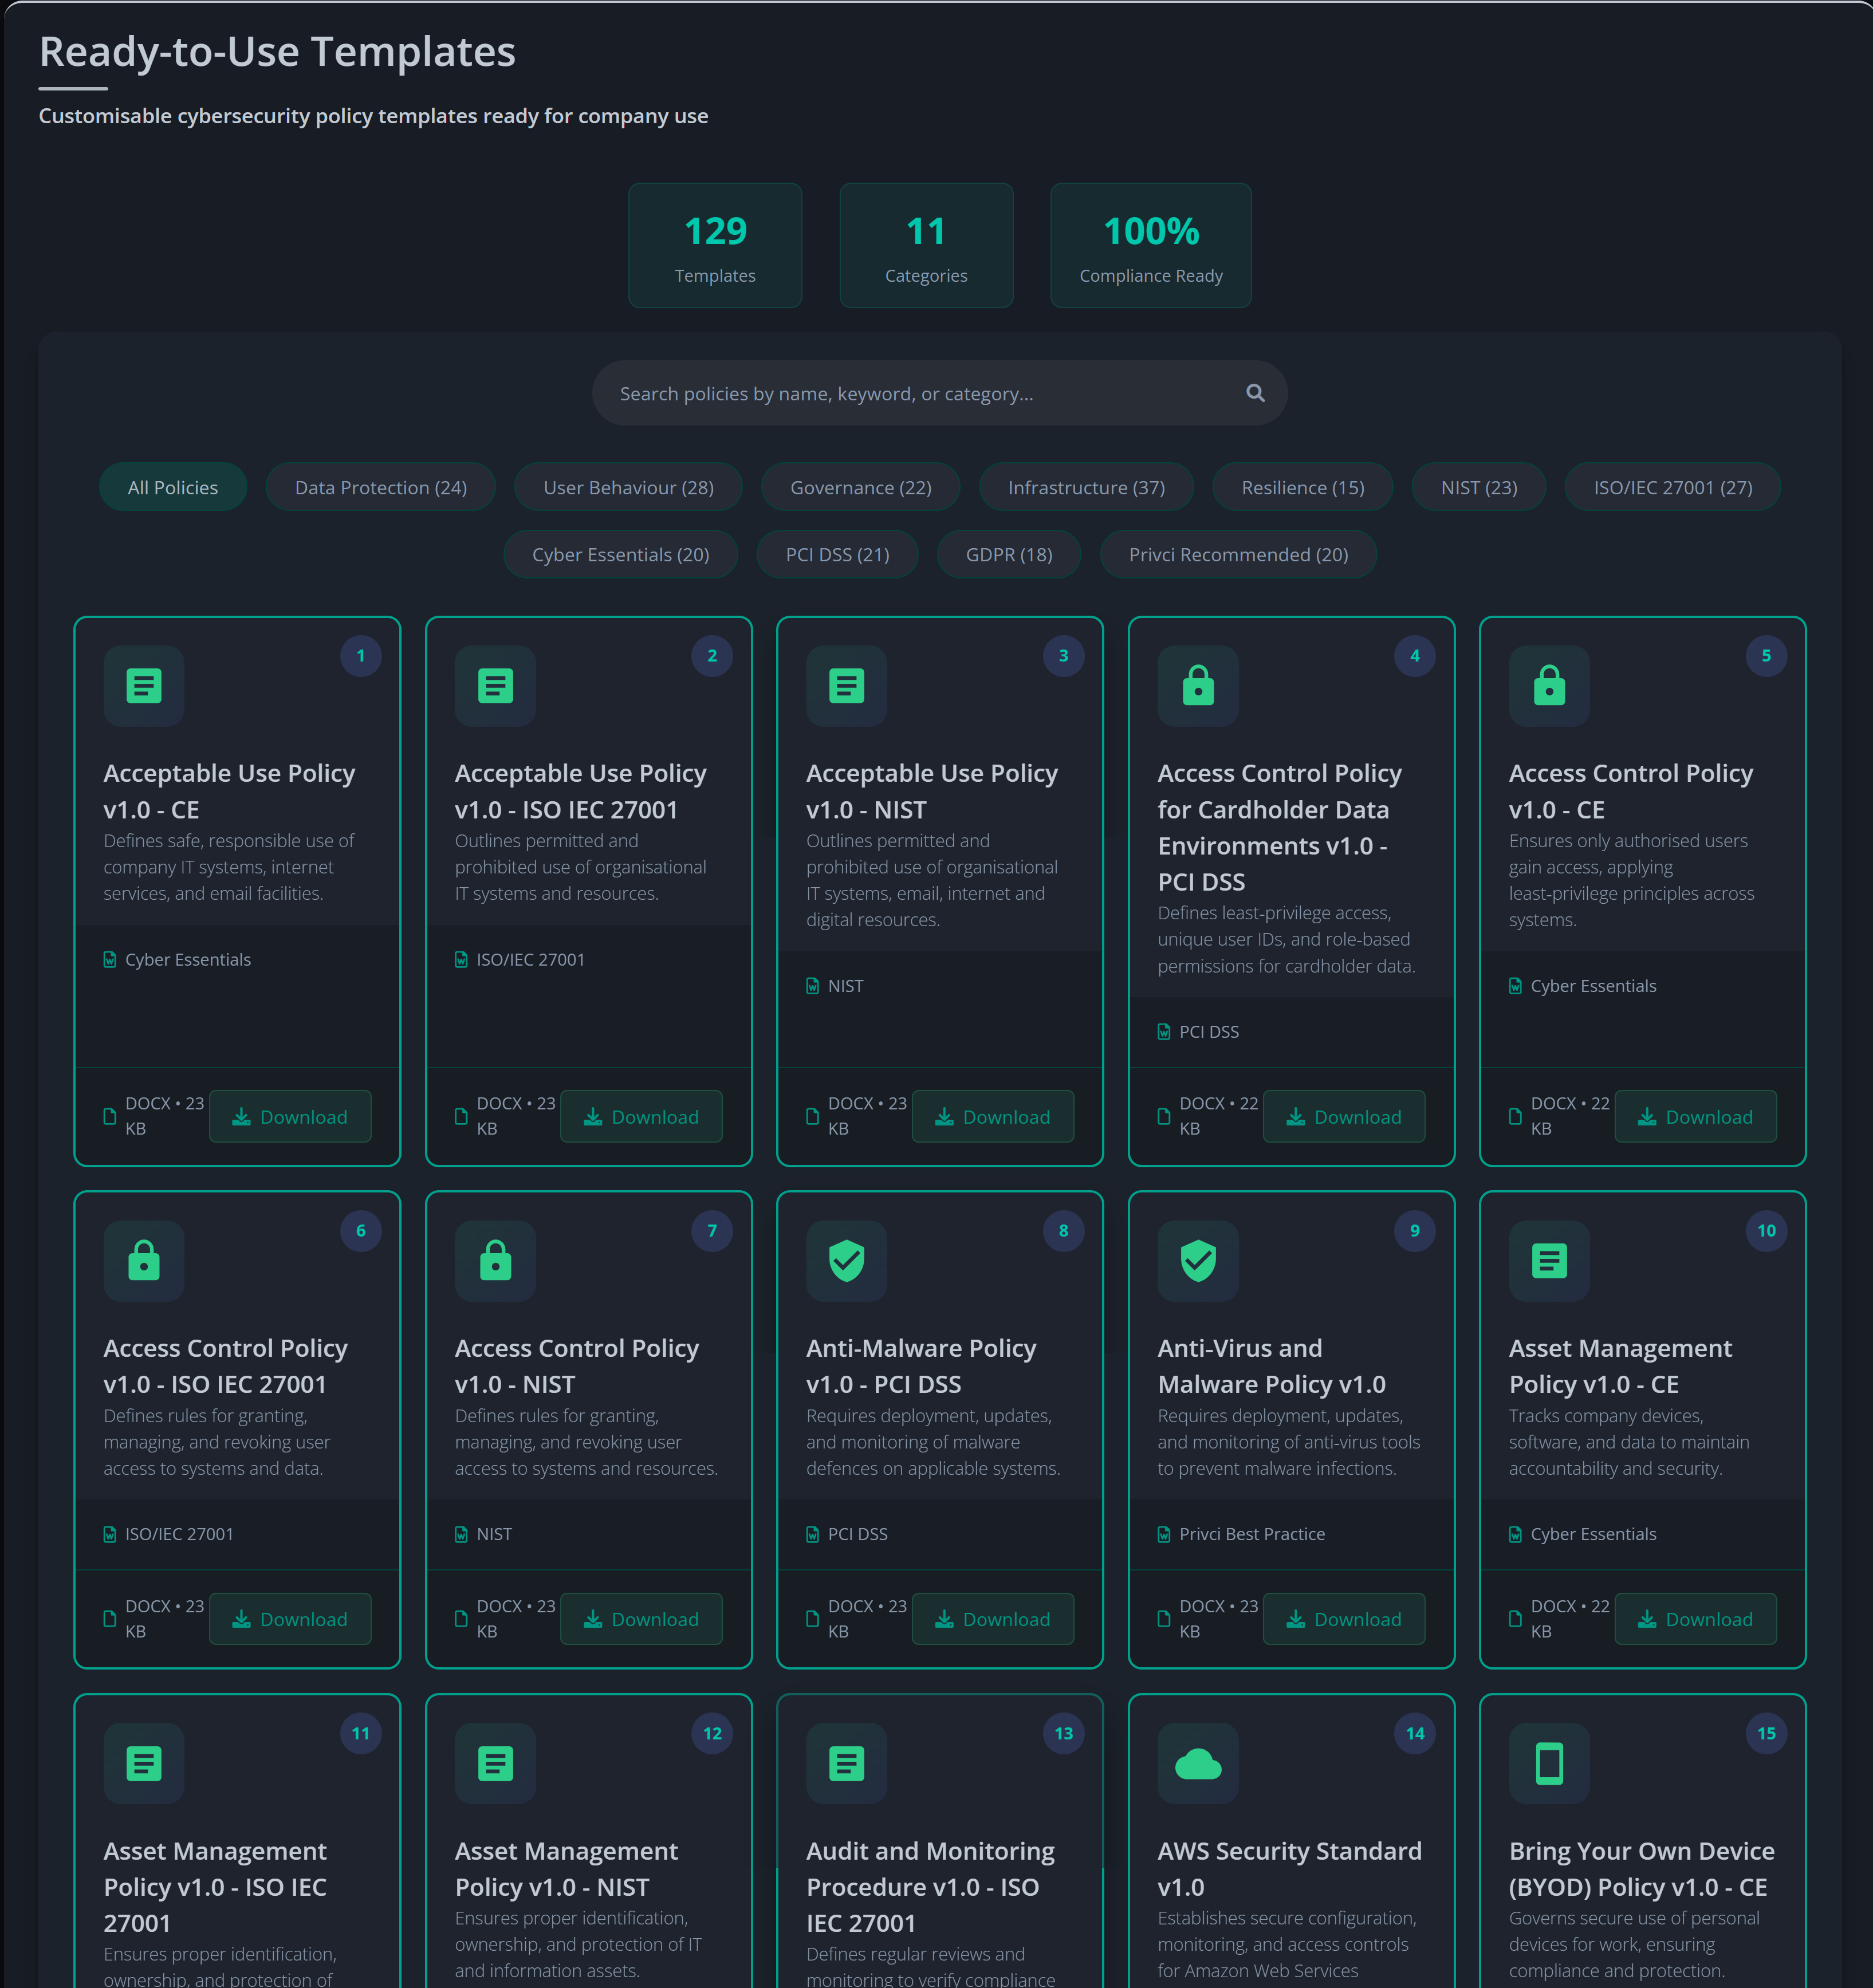
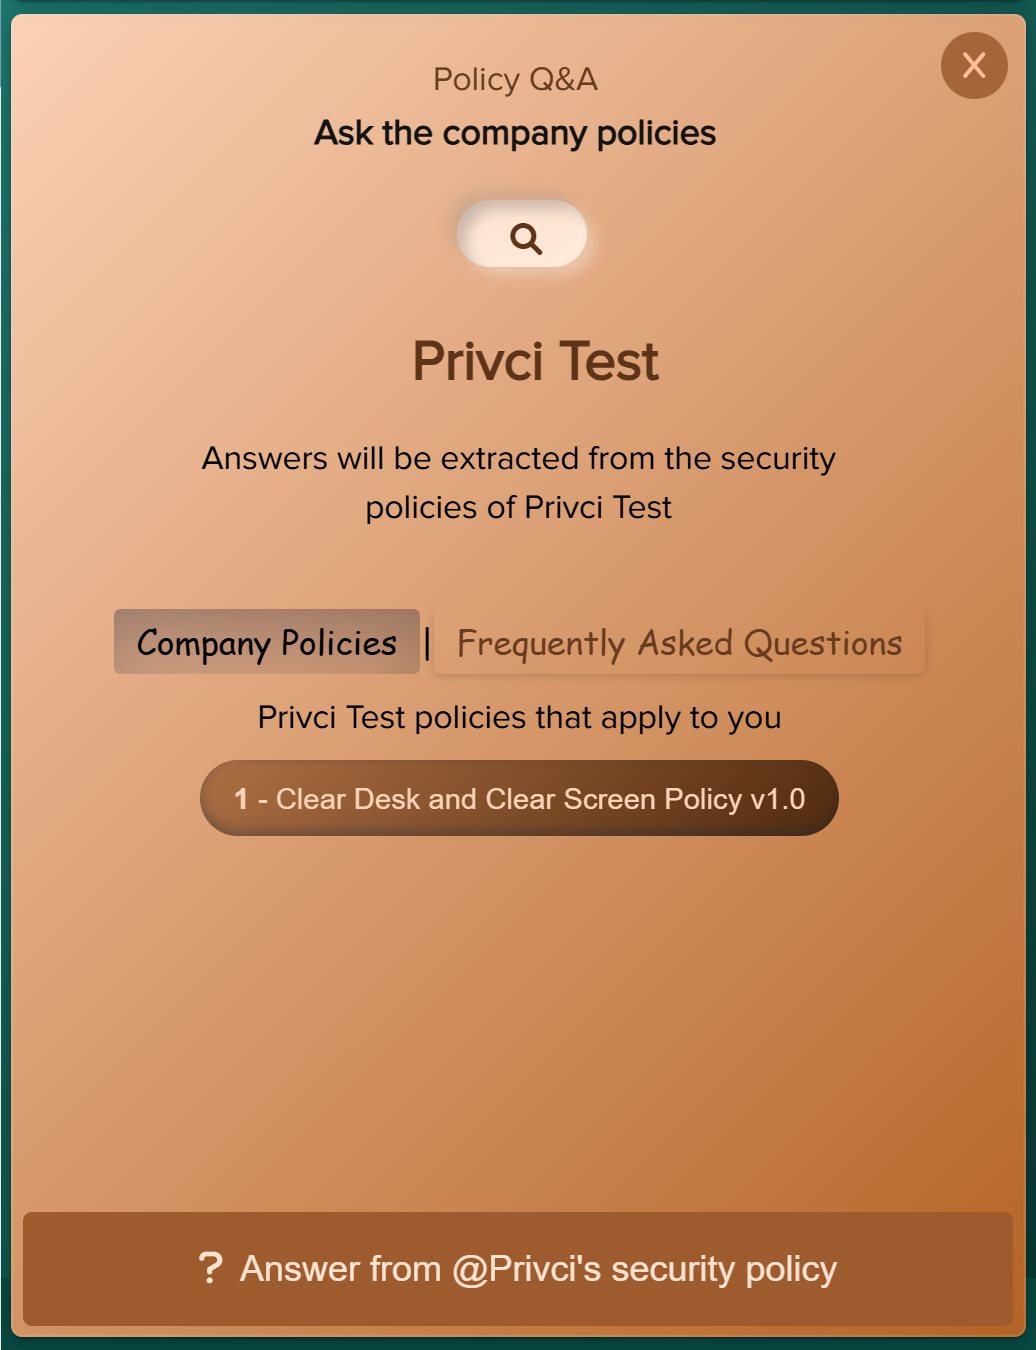
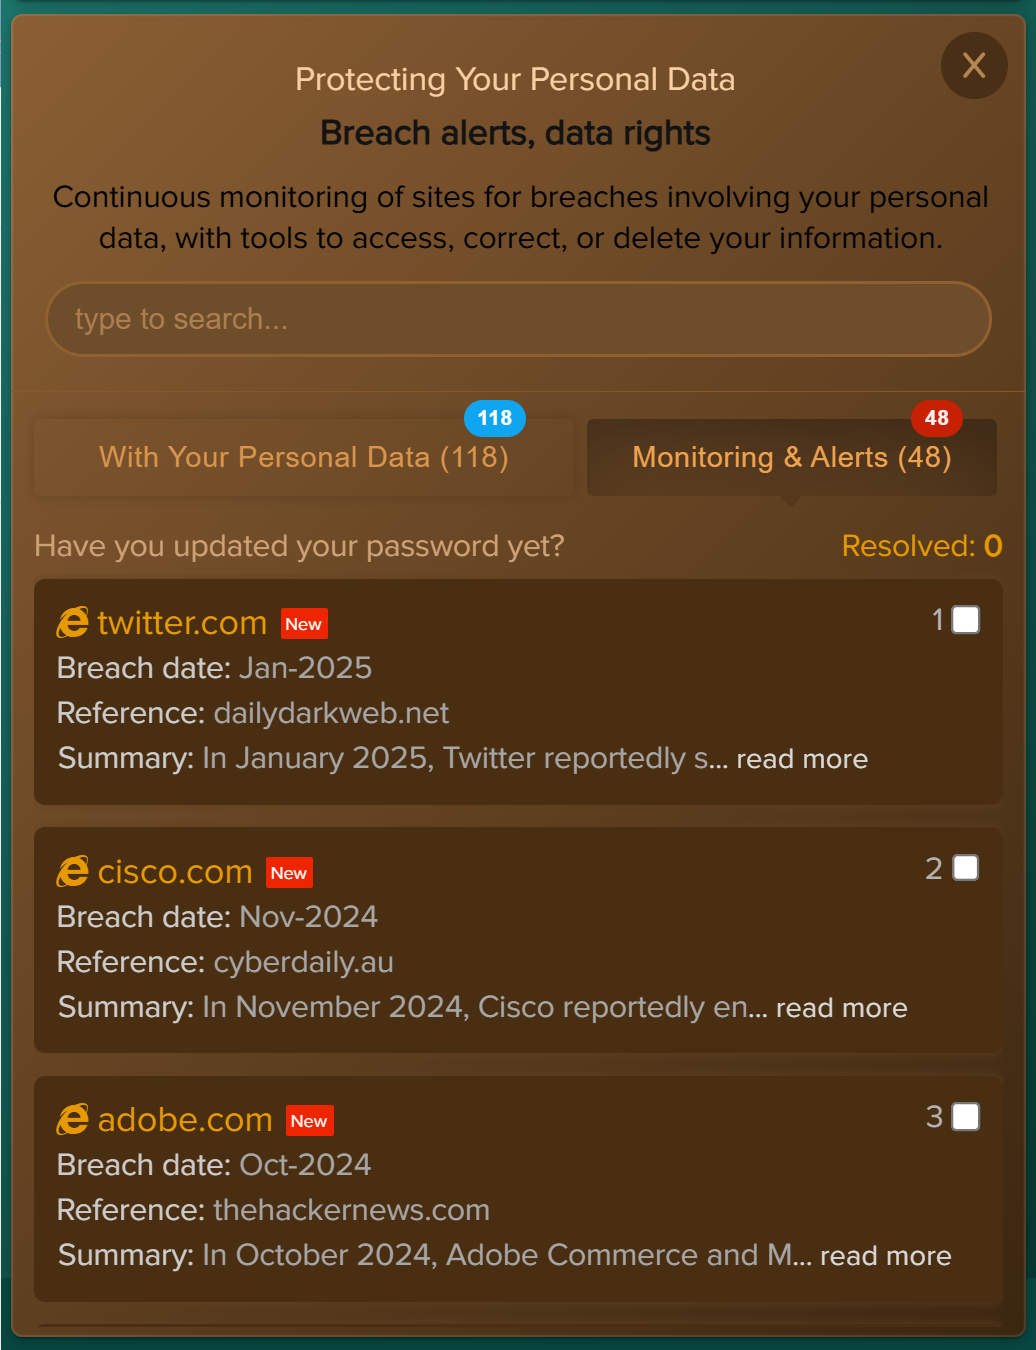
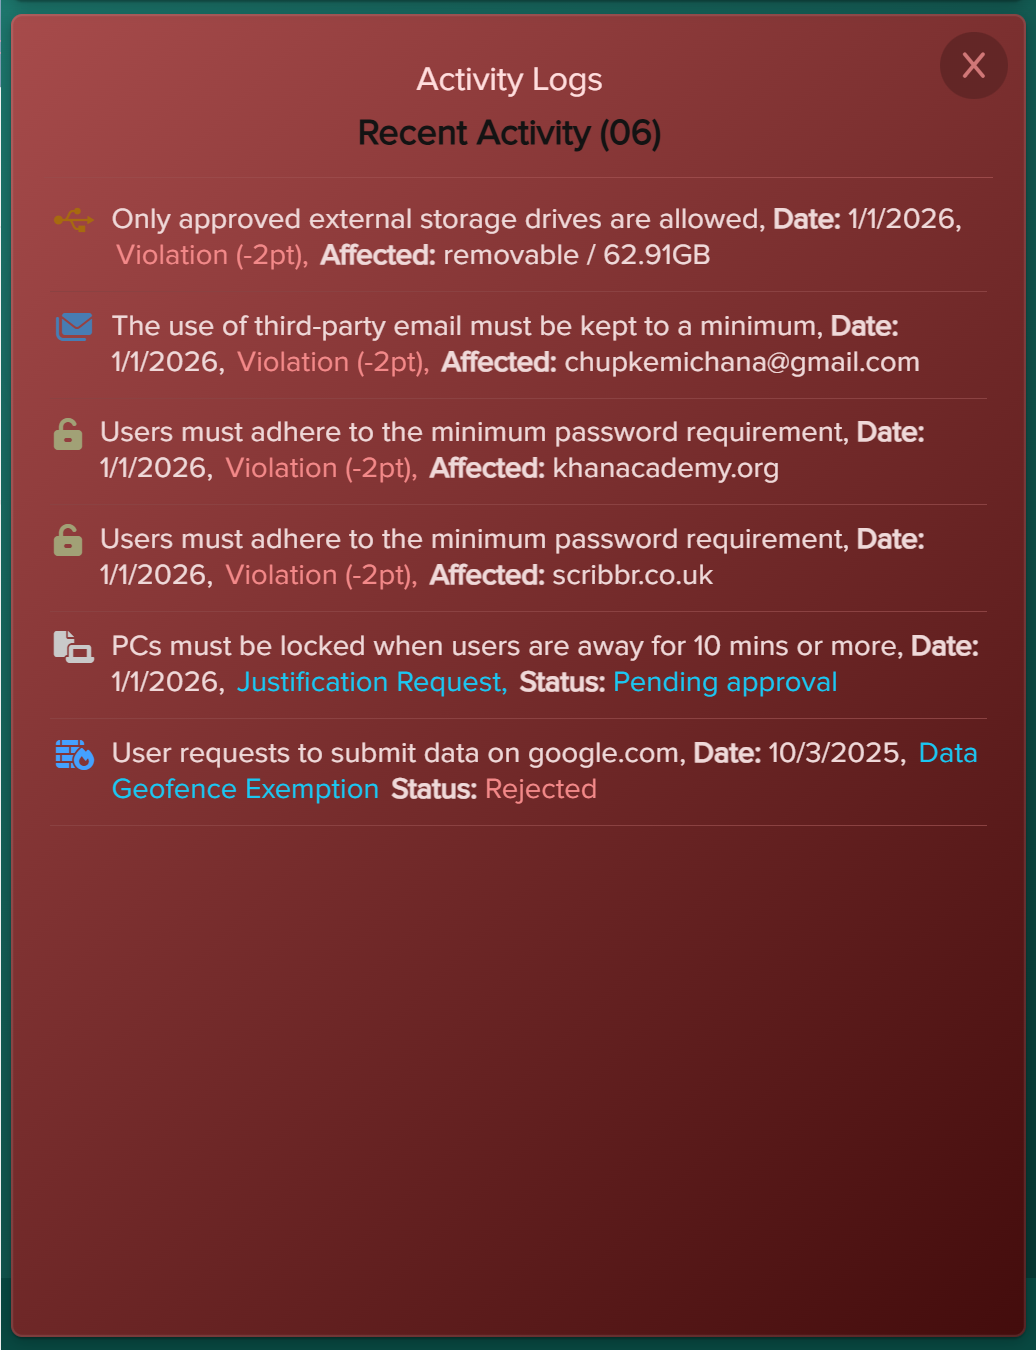
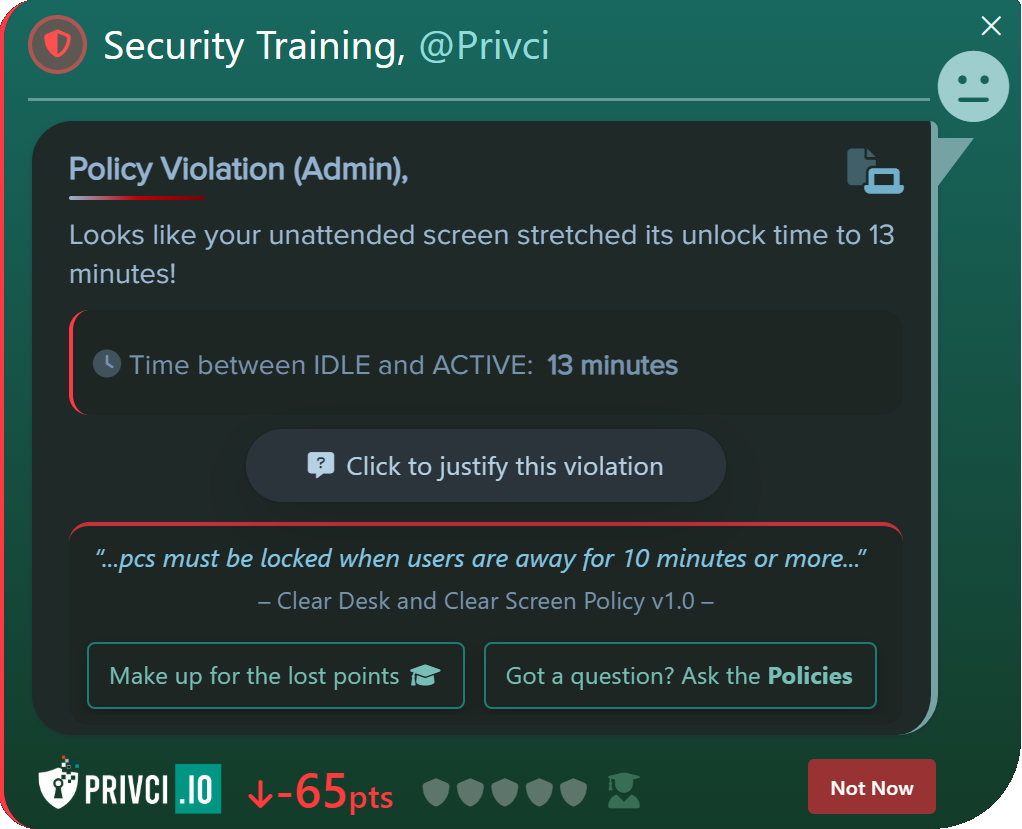
- Company Policy. Select or upload the internal policies you want to include in the baseline assessment and violation monitoring. Focus on policies that impact day‑to‑day work, such as email use, internet use, passwords, clear desk practices, and external media.
-
Email Domain(s). Add the email domains that represent your organisation (for example,
@yourcompany.com). These domains are used to determine which users are in scope for the scan and training agent. - Approved Email Client(s). Select the email services your organisation considers approved for business communication. This helps the scanner distinguish between work email environments and personal email services used by your users.
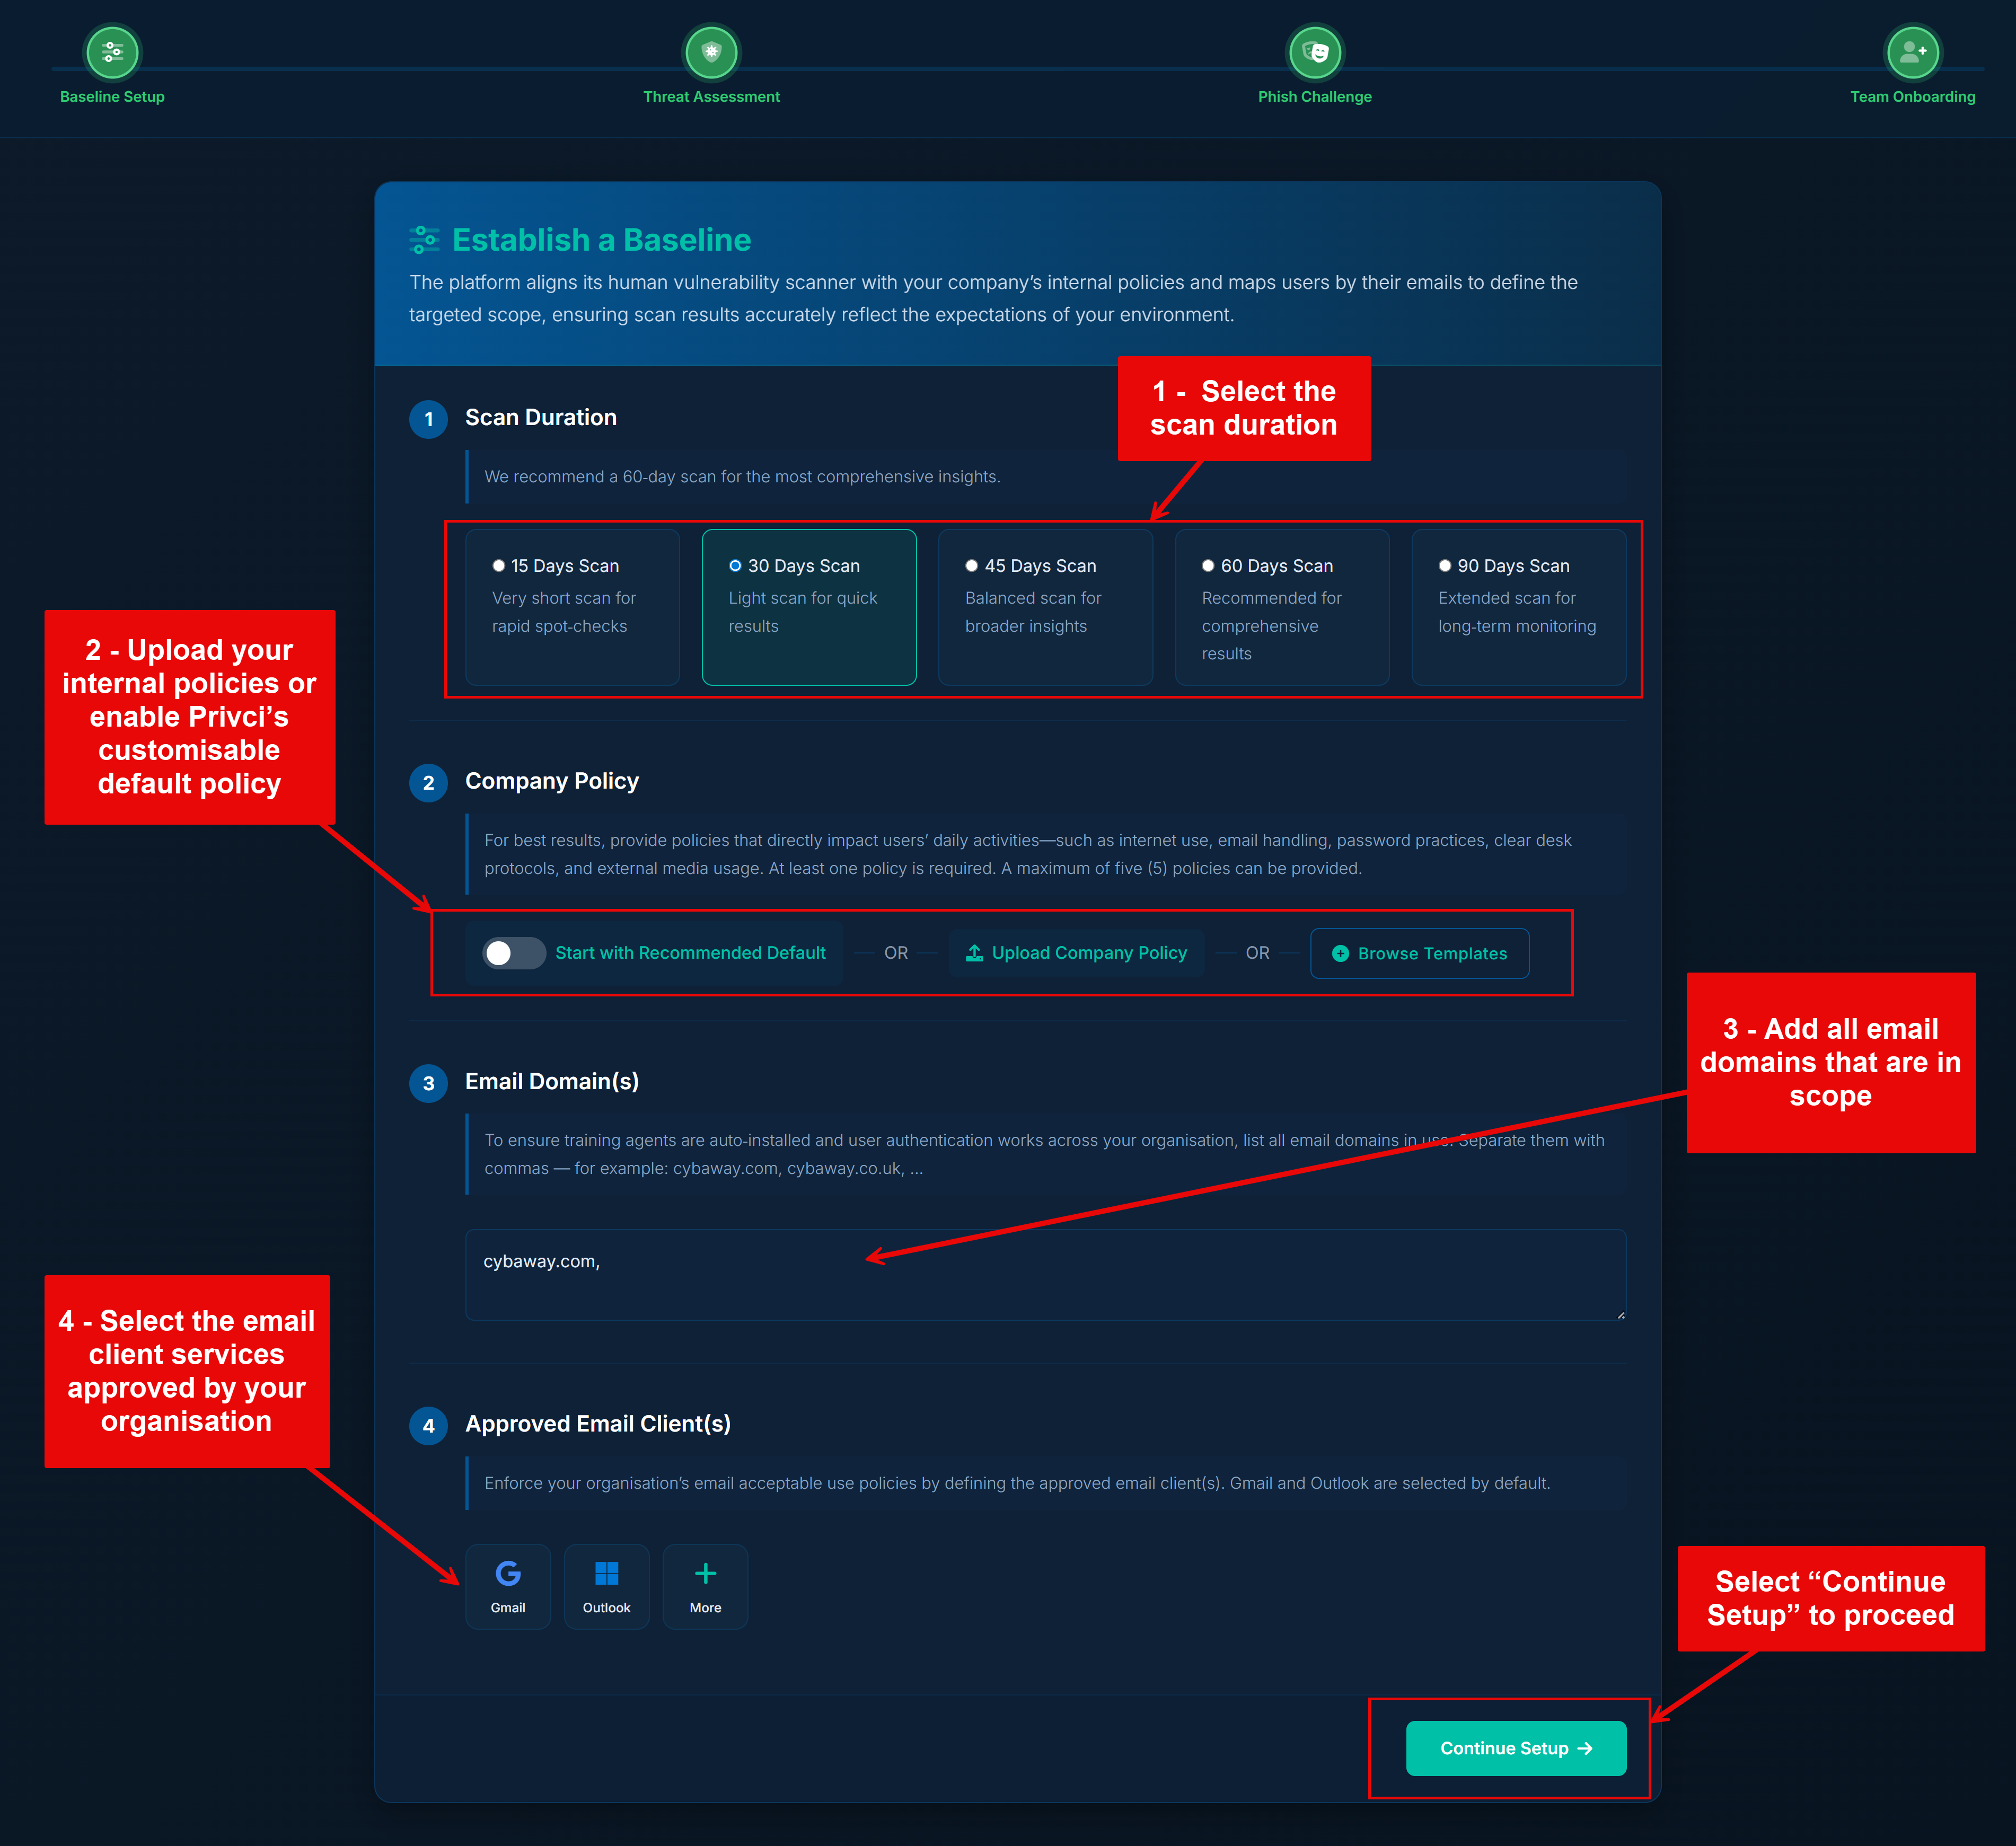
Note: If you reduce the scan duration while a scan is already running, the scan will end earlier than originally planned. Always confirm changes before saving to avoid terminating an active scan prematurely.
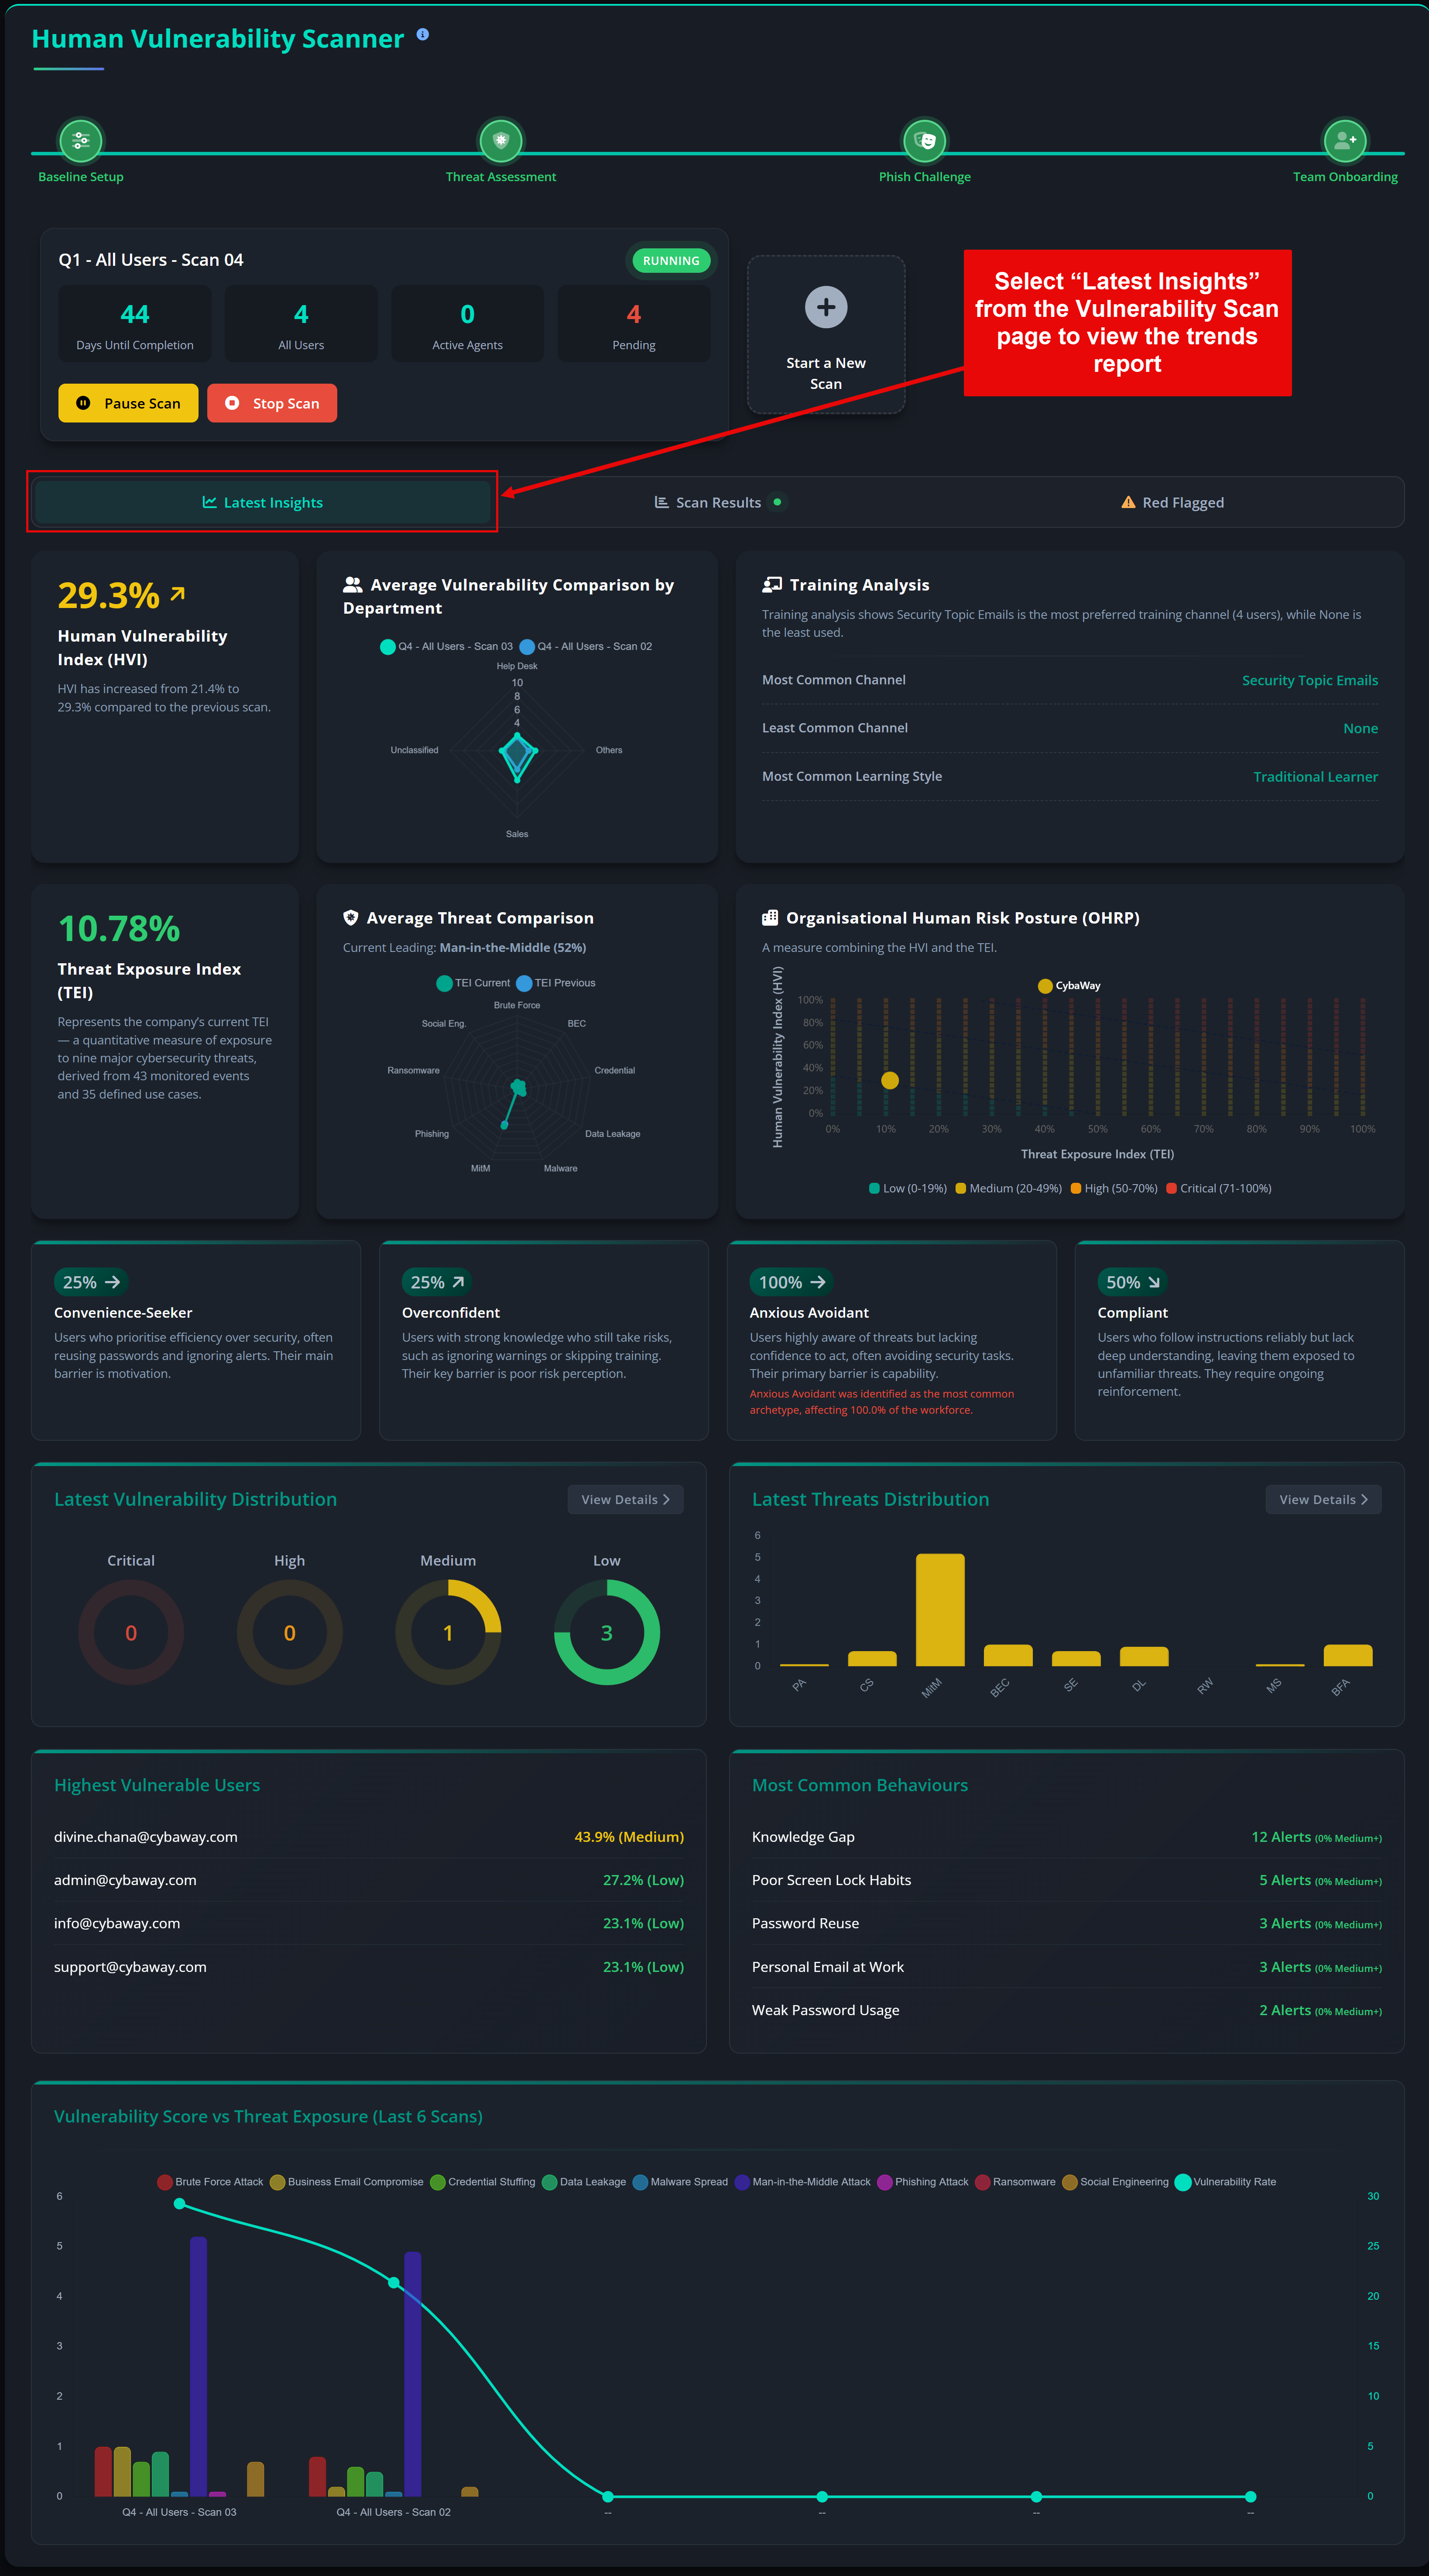
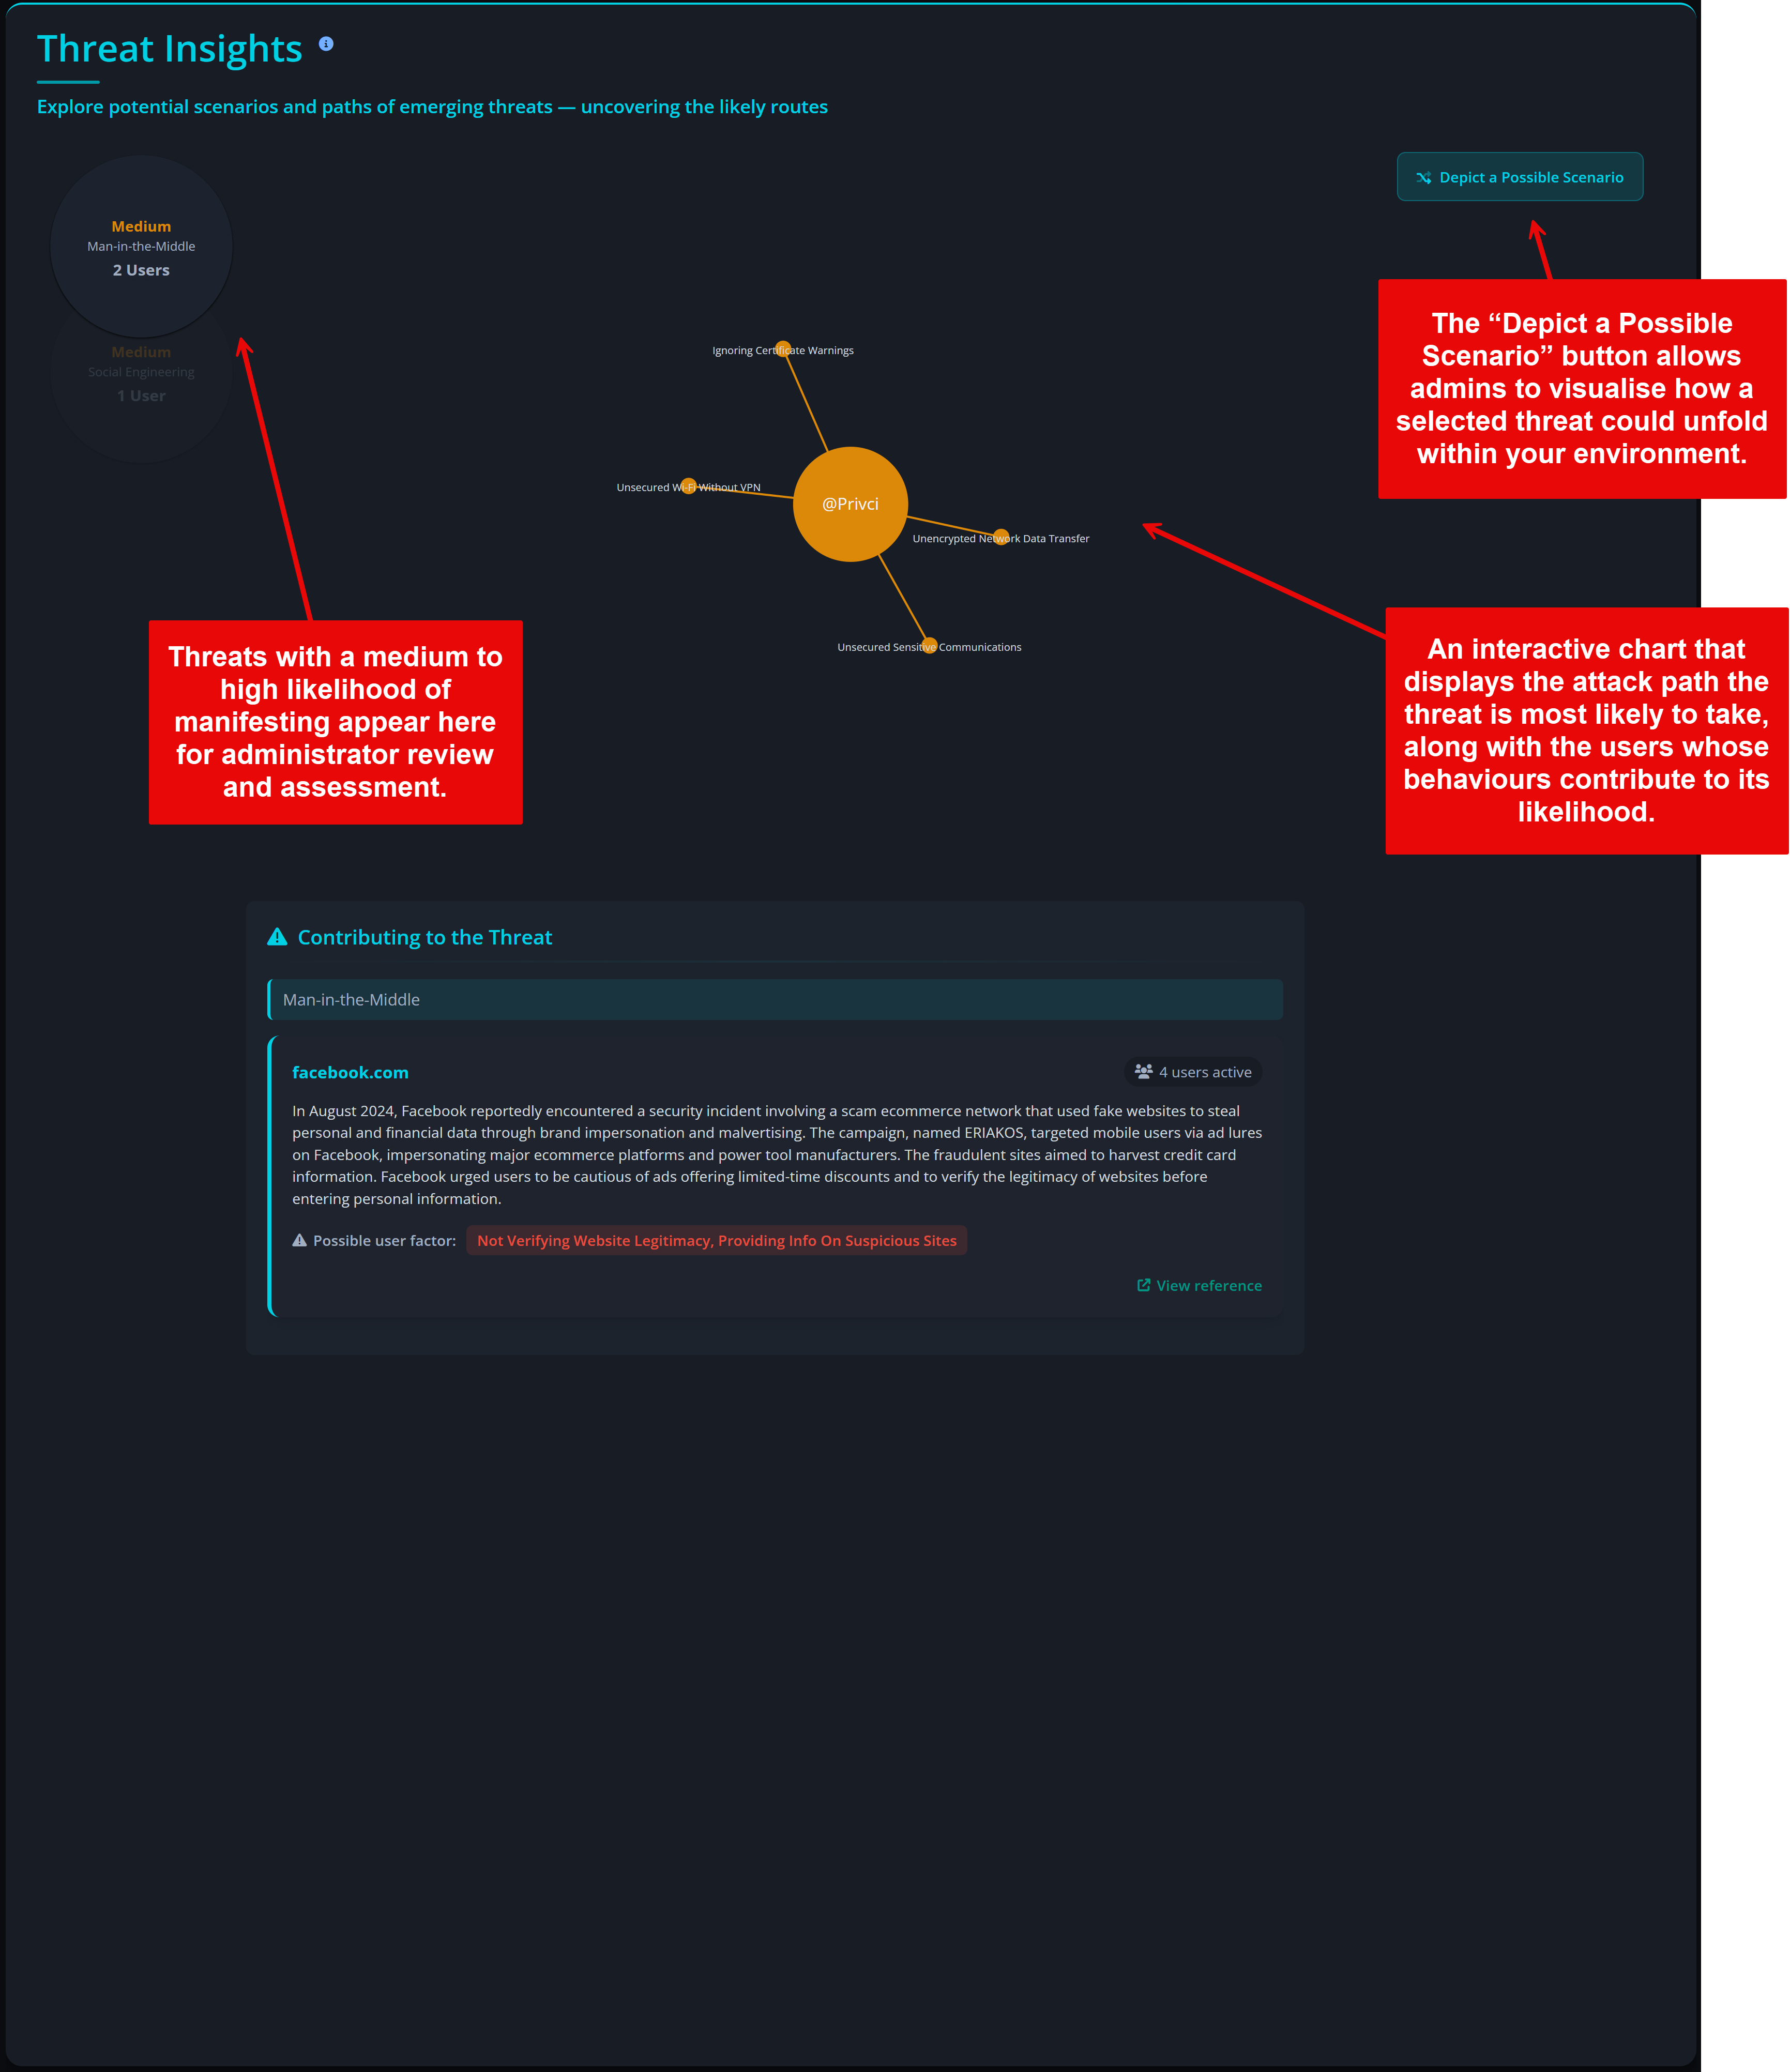
Threat Assessment
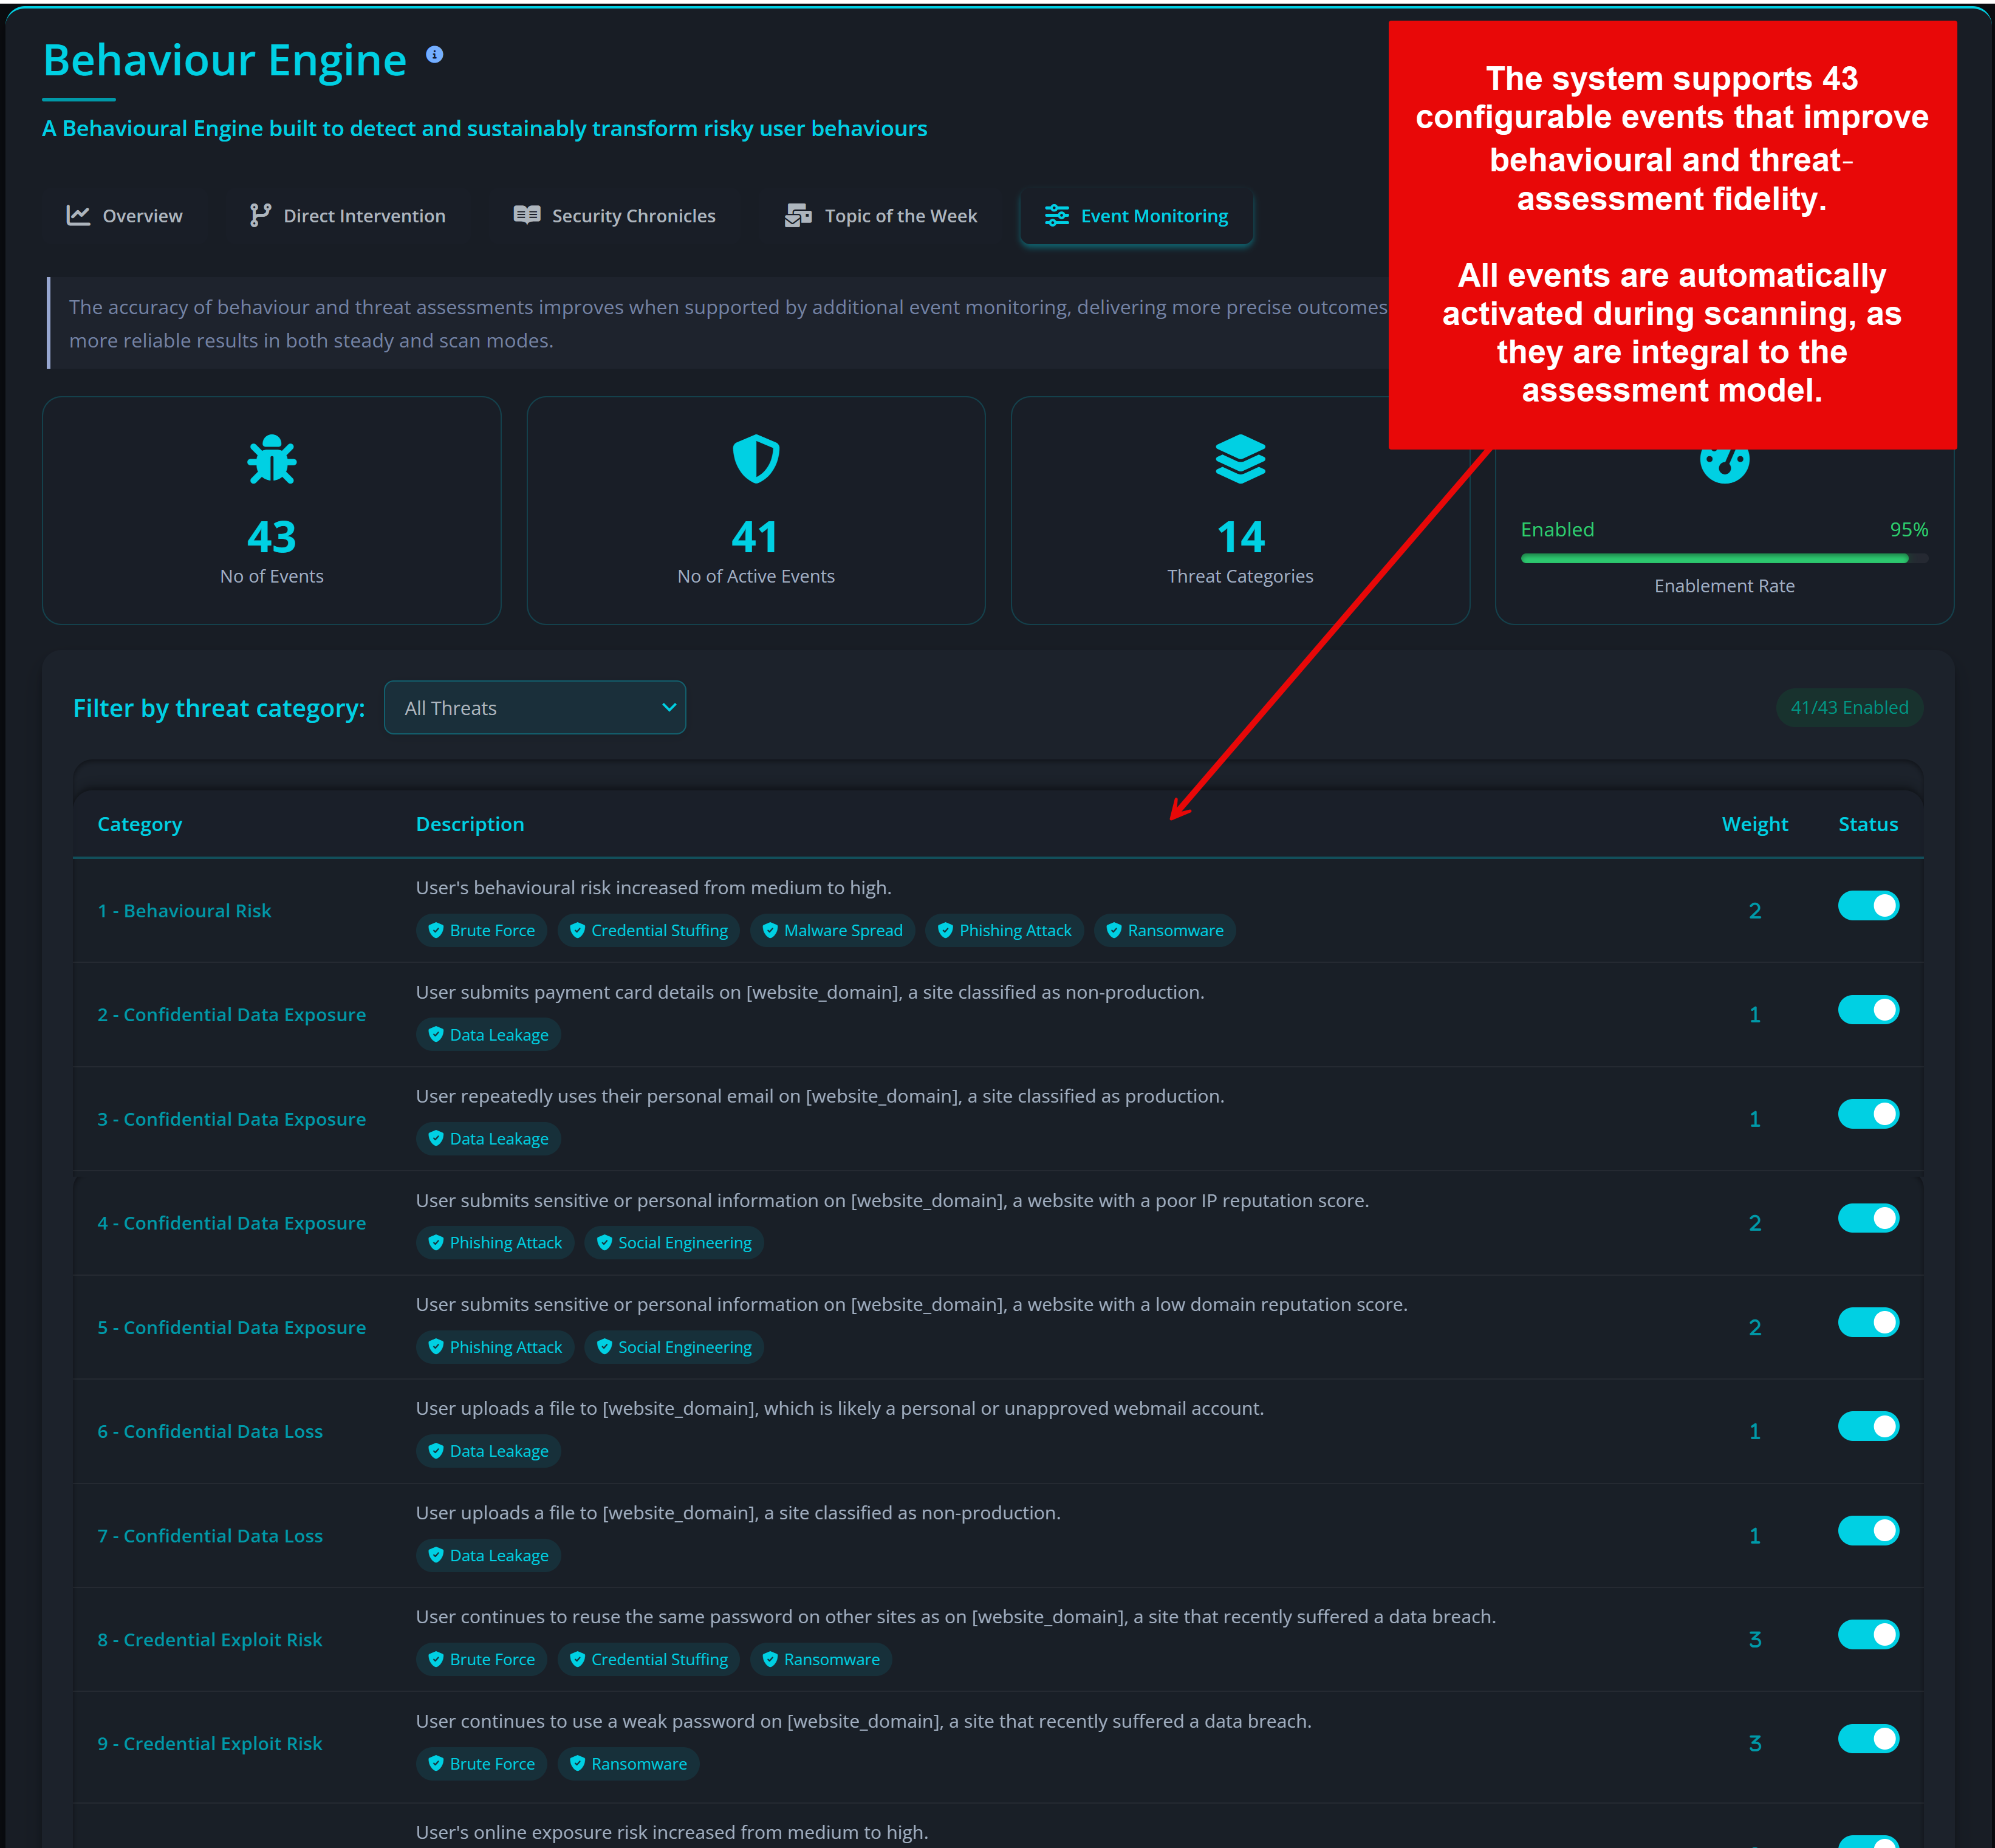
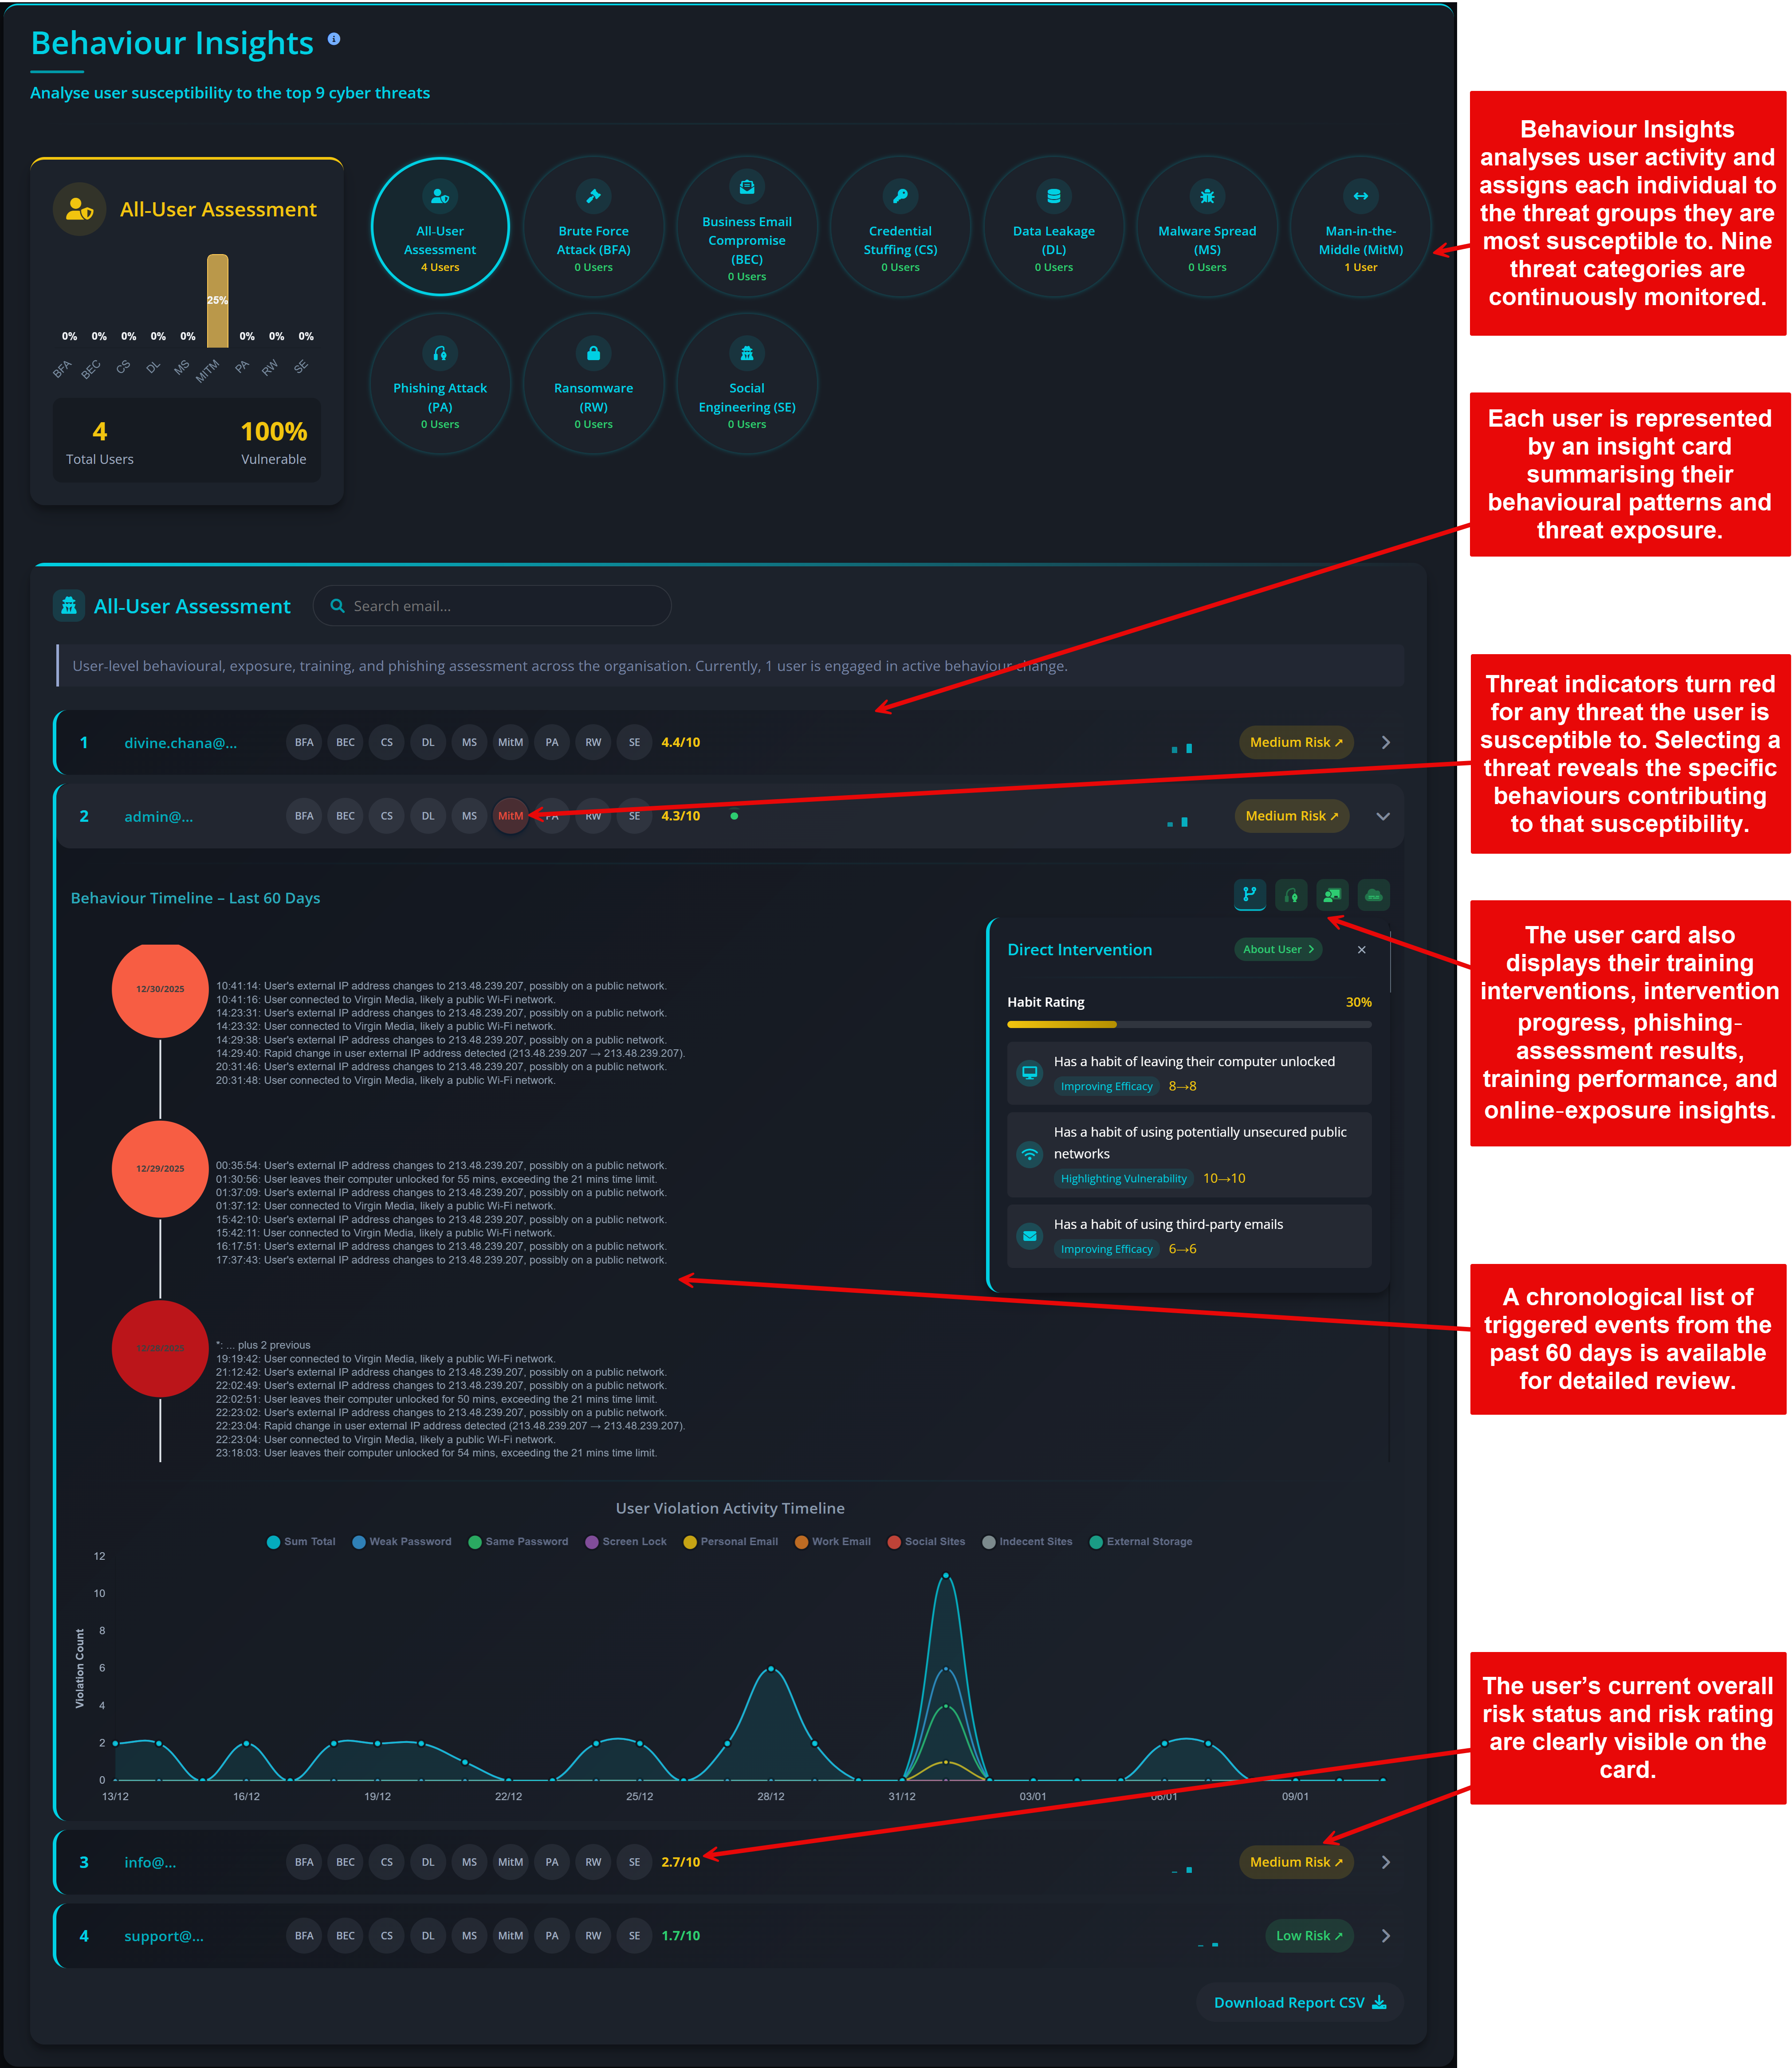
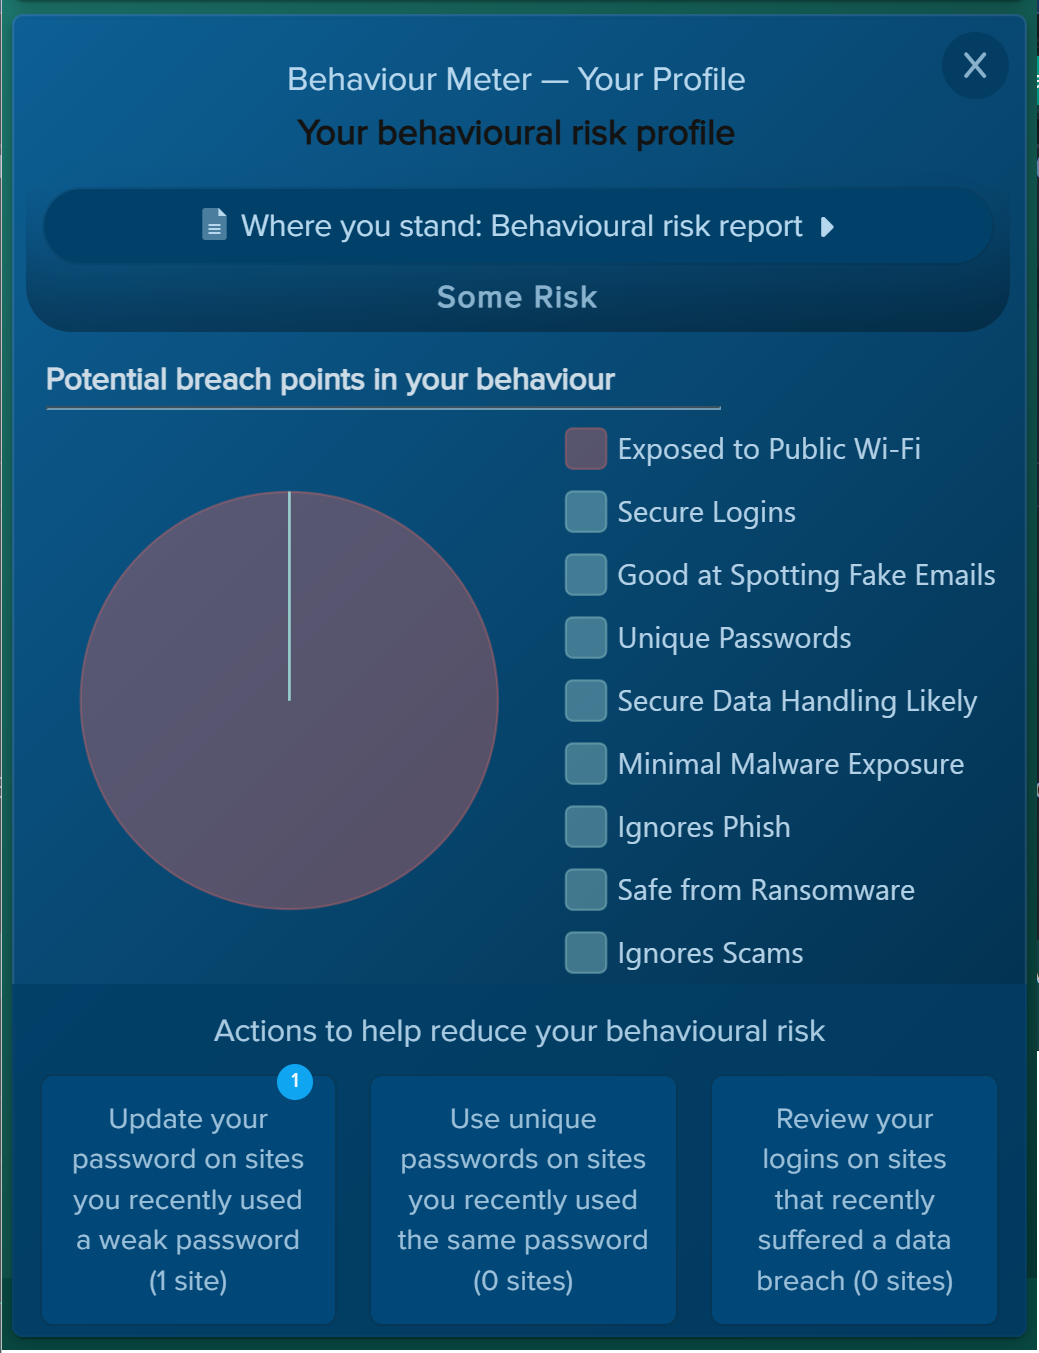
The Threat Assessment section defines which threat categories are included in your company‑level risk analysis and which additional knowledge assessments are used during the scan. Privci combines multiple knowledge assessment tools to identify both organisational and individual knowledge gaps across key areas of cybersecurity behaviour.
- Threat Scope. We recommend keeping all available threats enabled. These selections do not typically change individual user scores, but they do shape your company‑level threat profile. Your results will be benchmarked against industry averages for each selected threat category.
-
Knowledge Evaluation.
In addition to baseline training, you can enable three key assessment types:
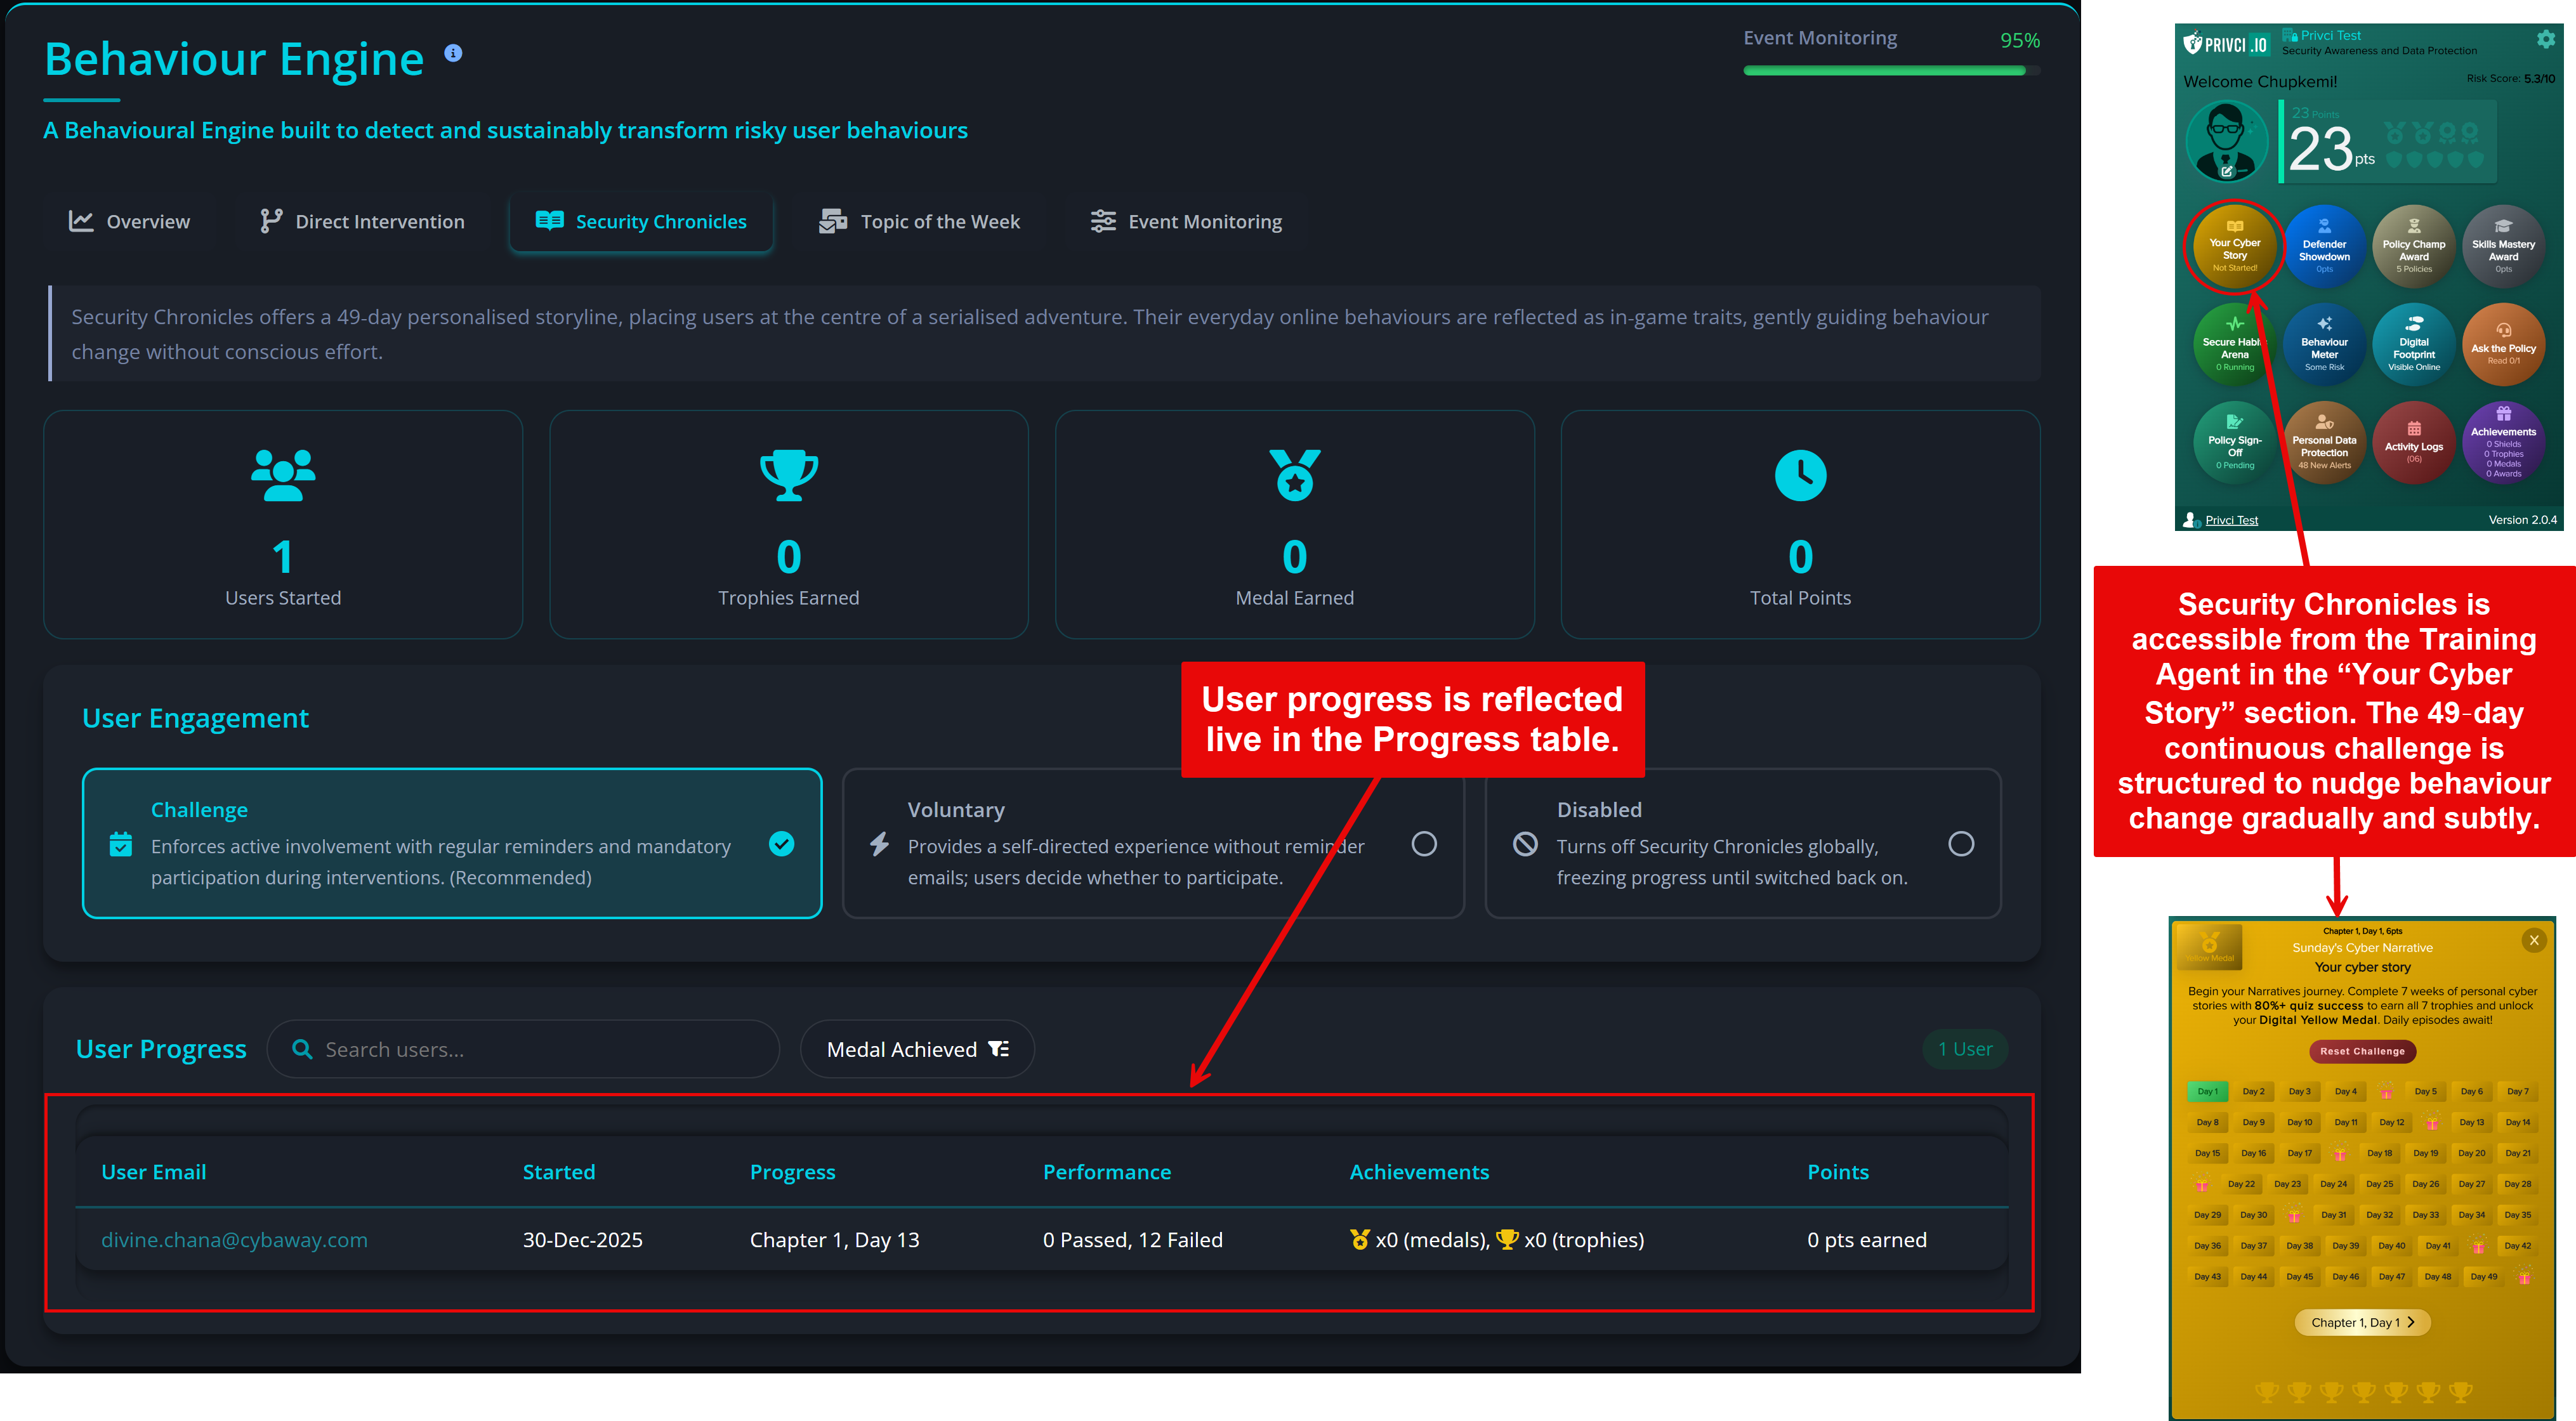
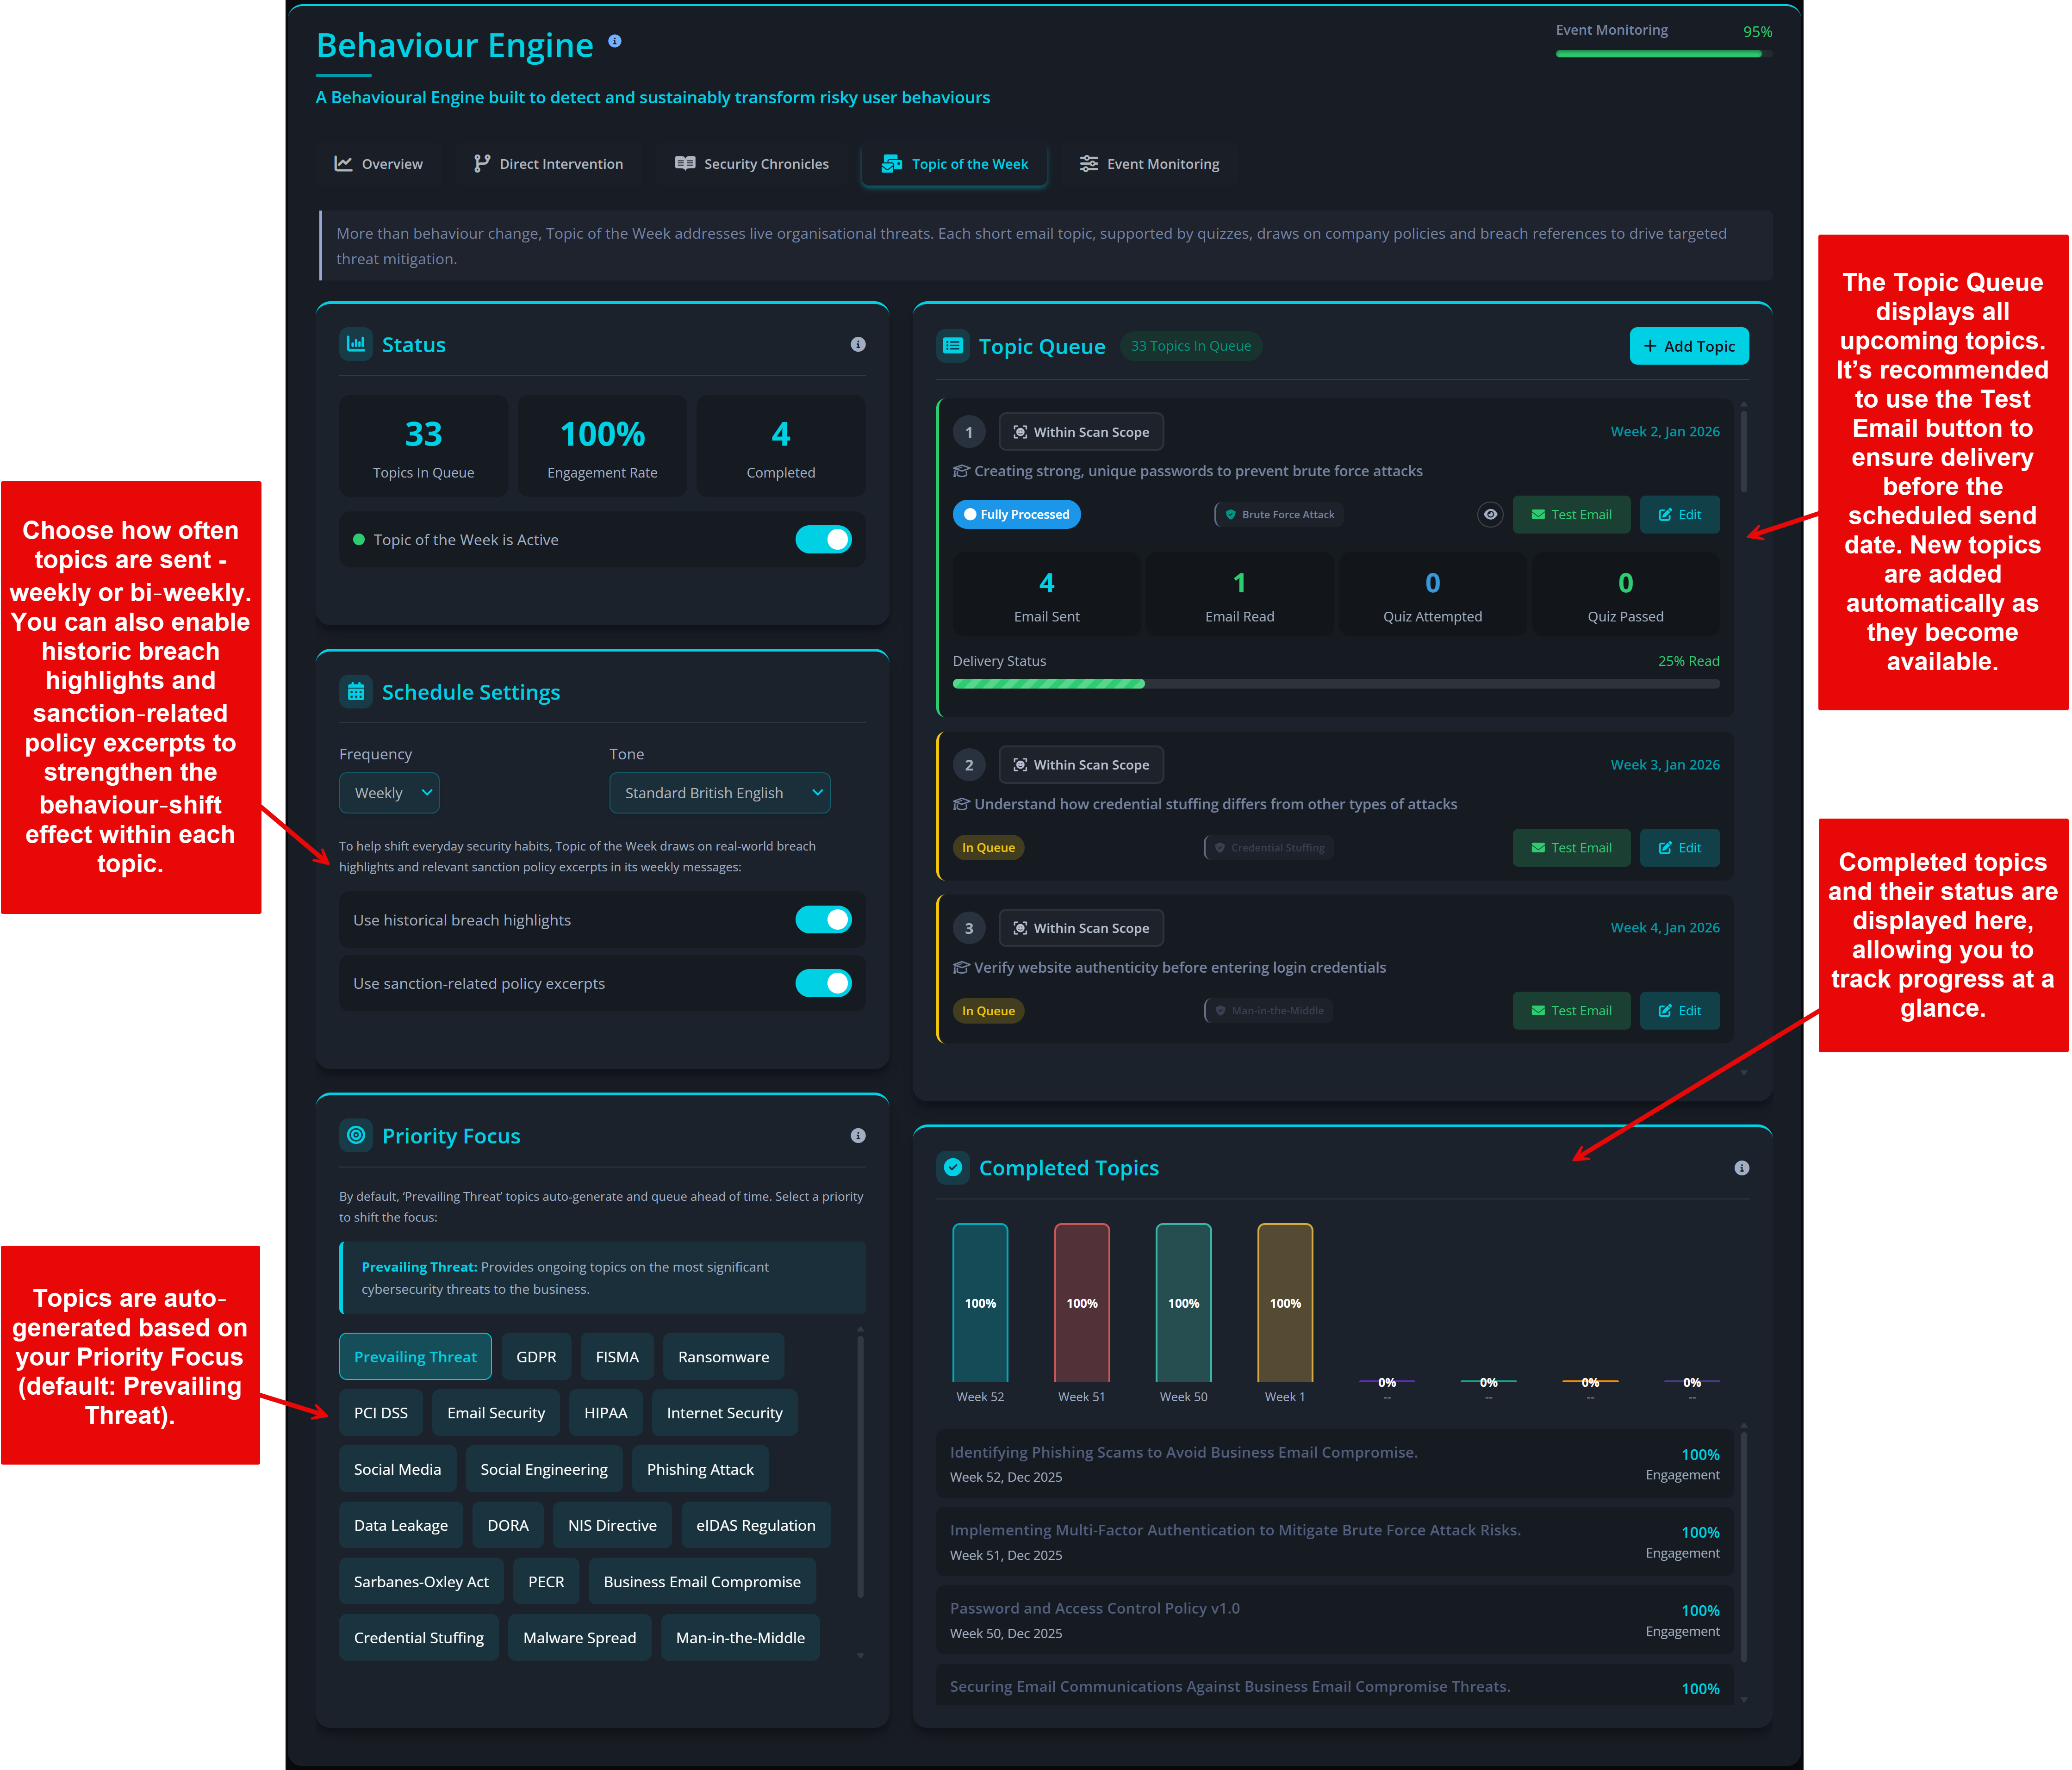
- Topic of the Week Weekly micro‑assessments delivered via email throughout the scan. Use the “Test Email” option to confirm delivery before the scan begins.
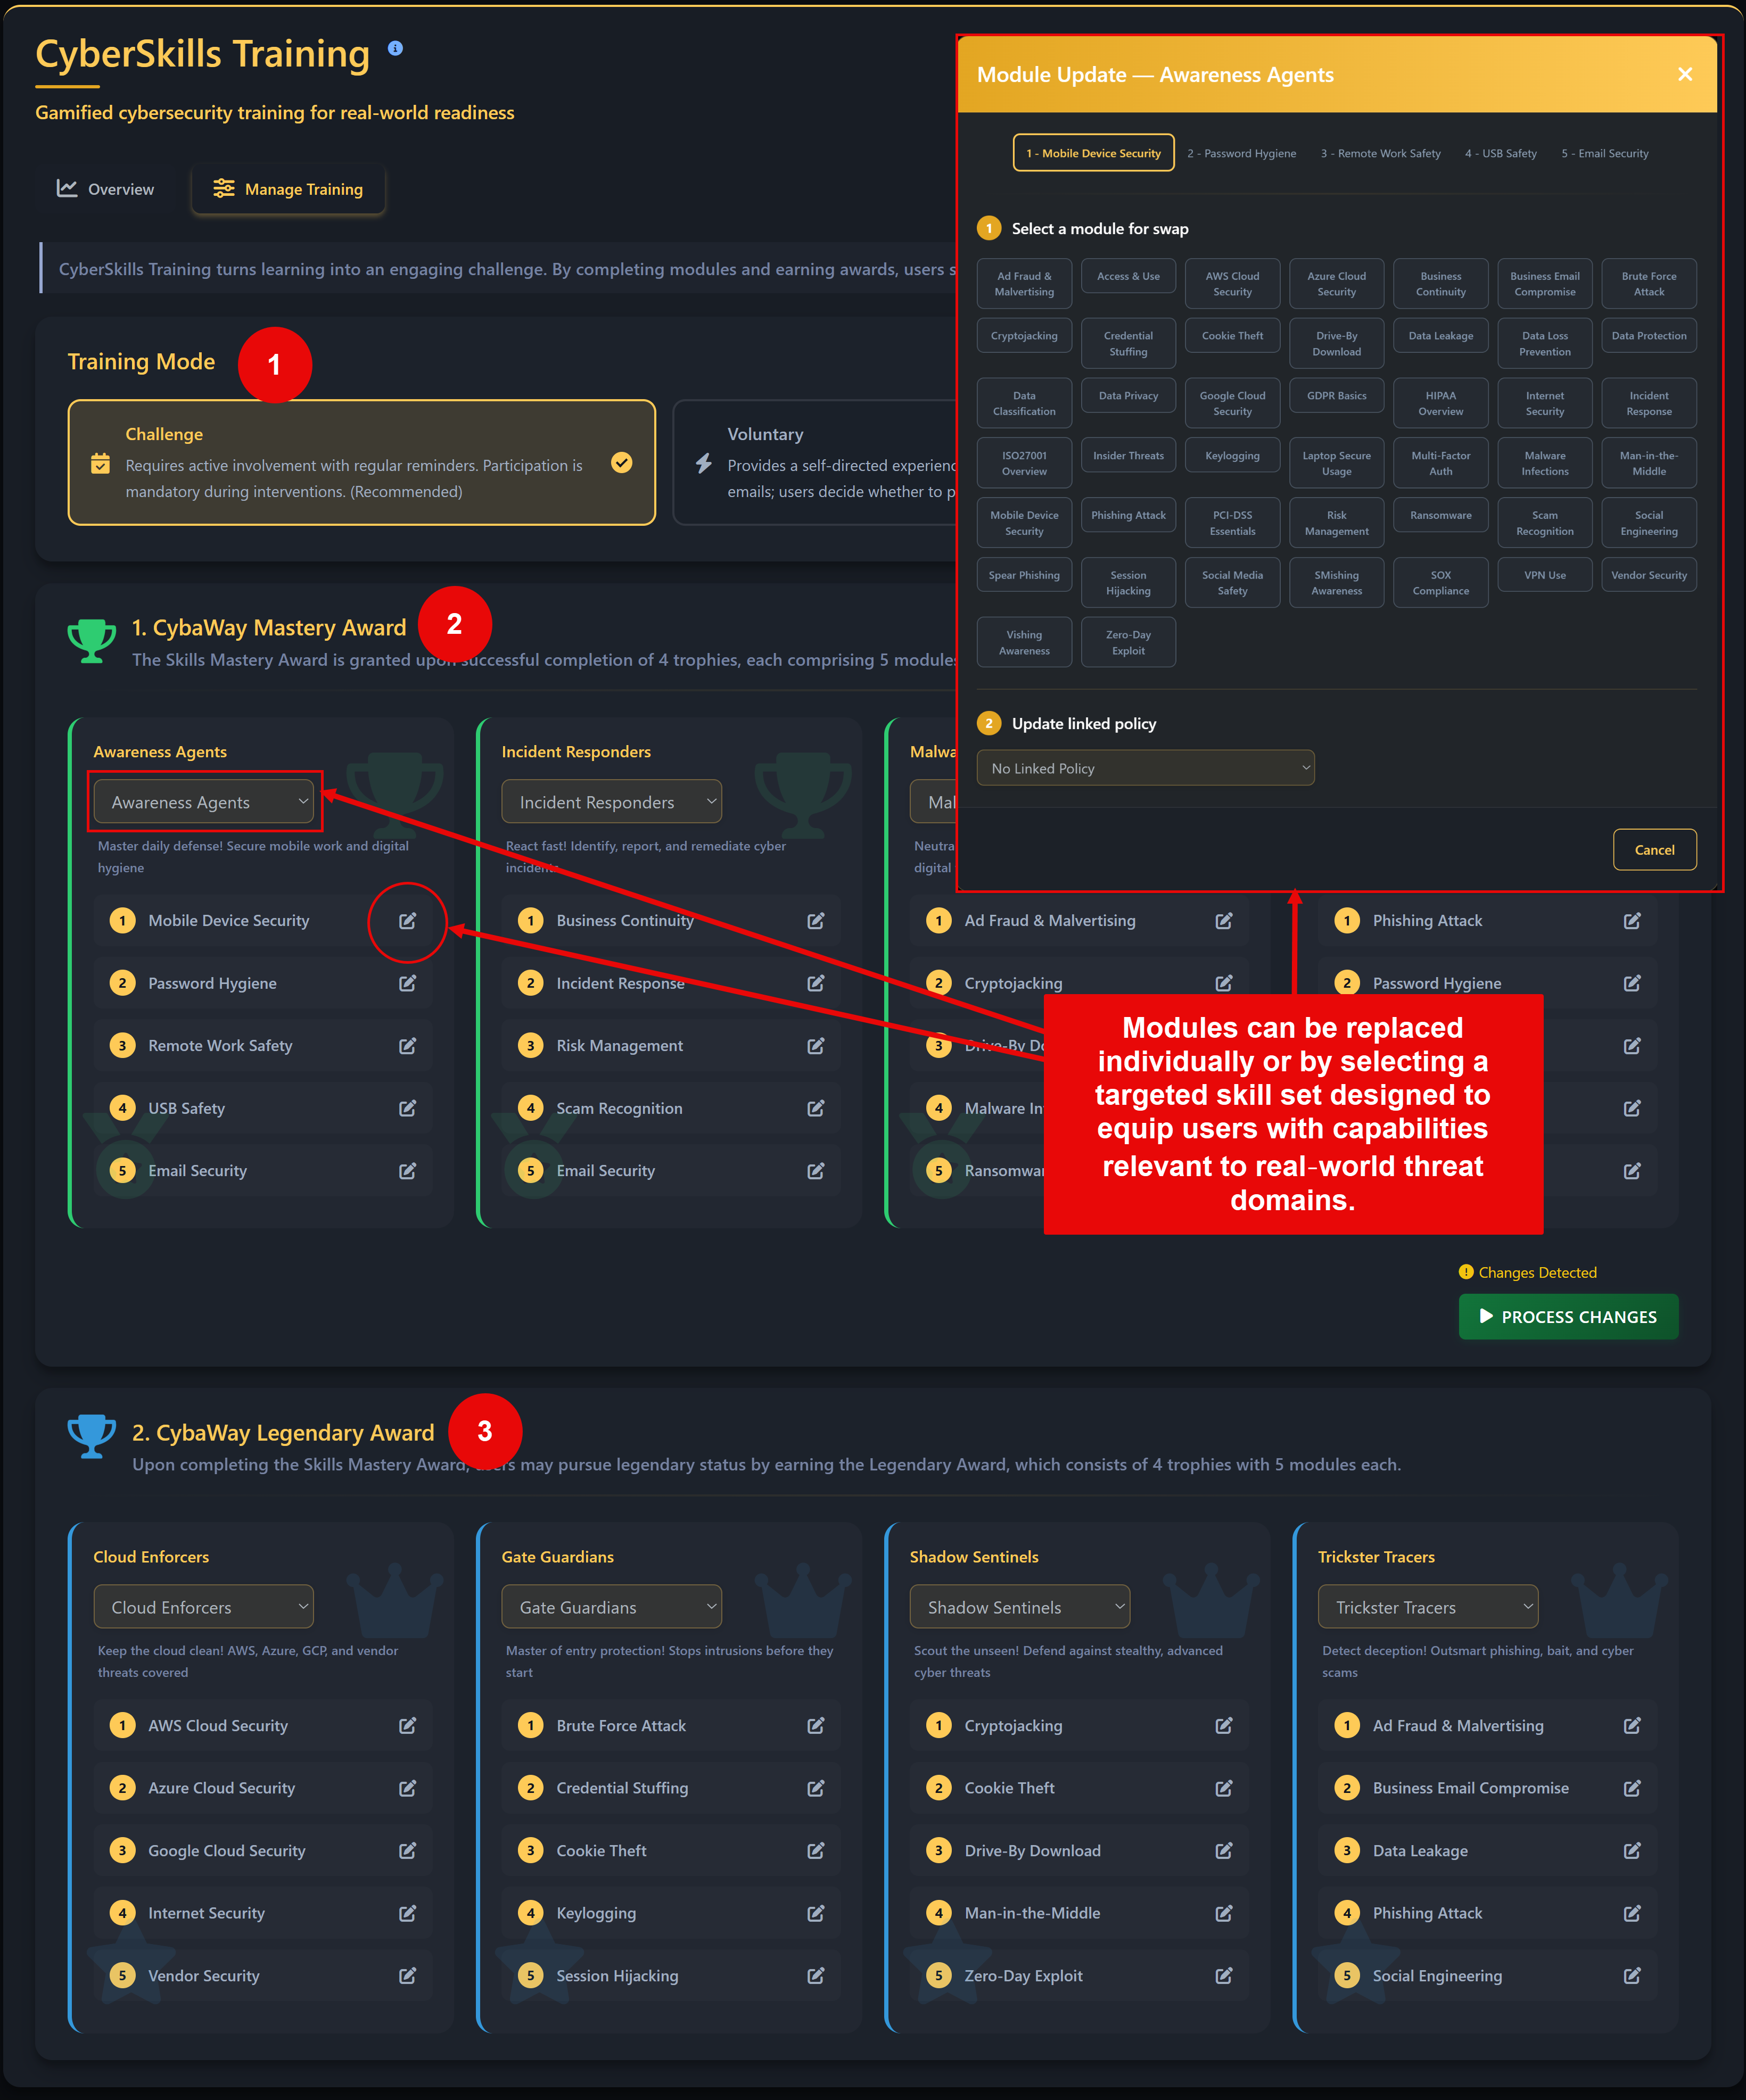
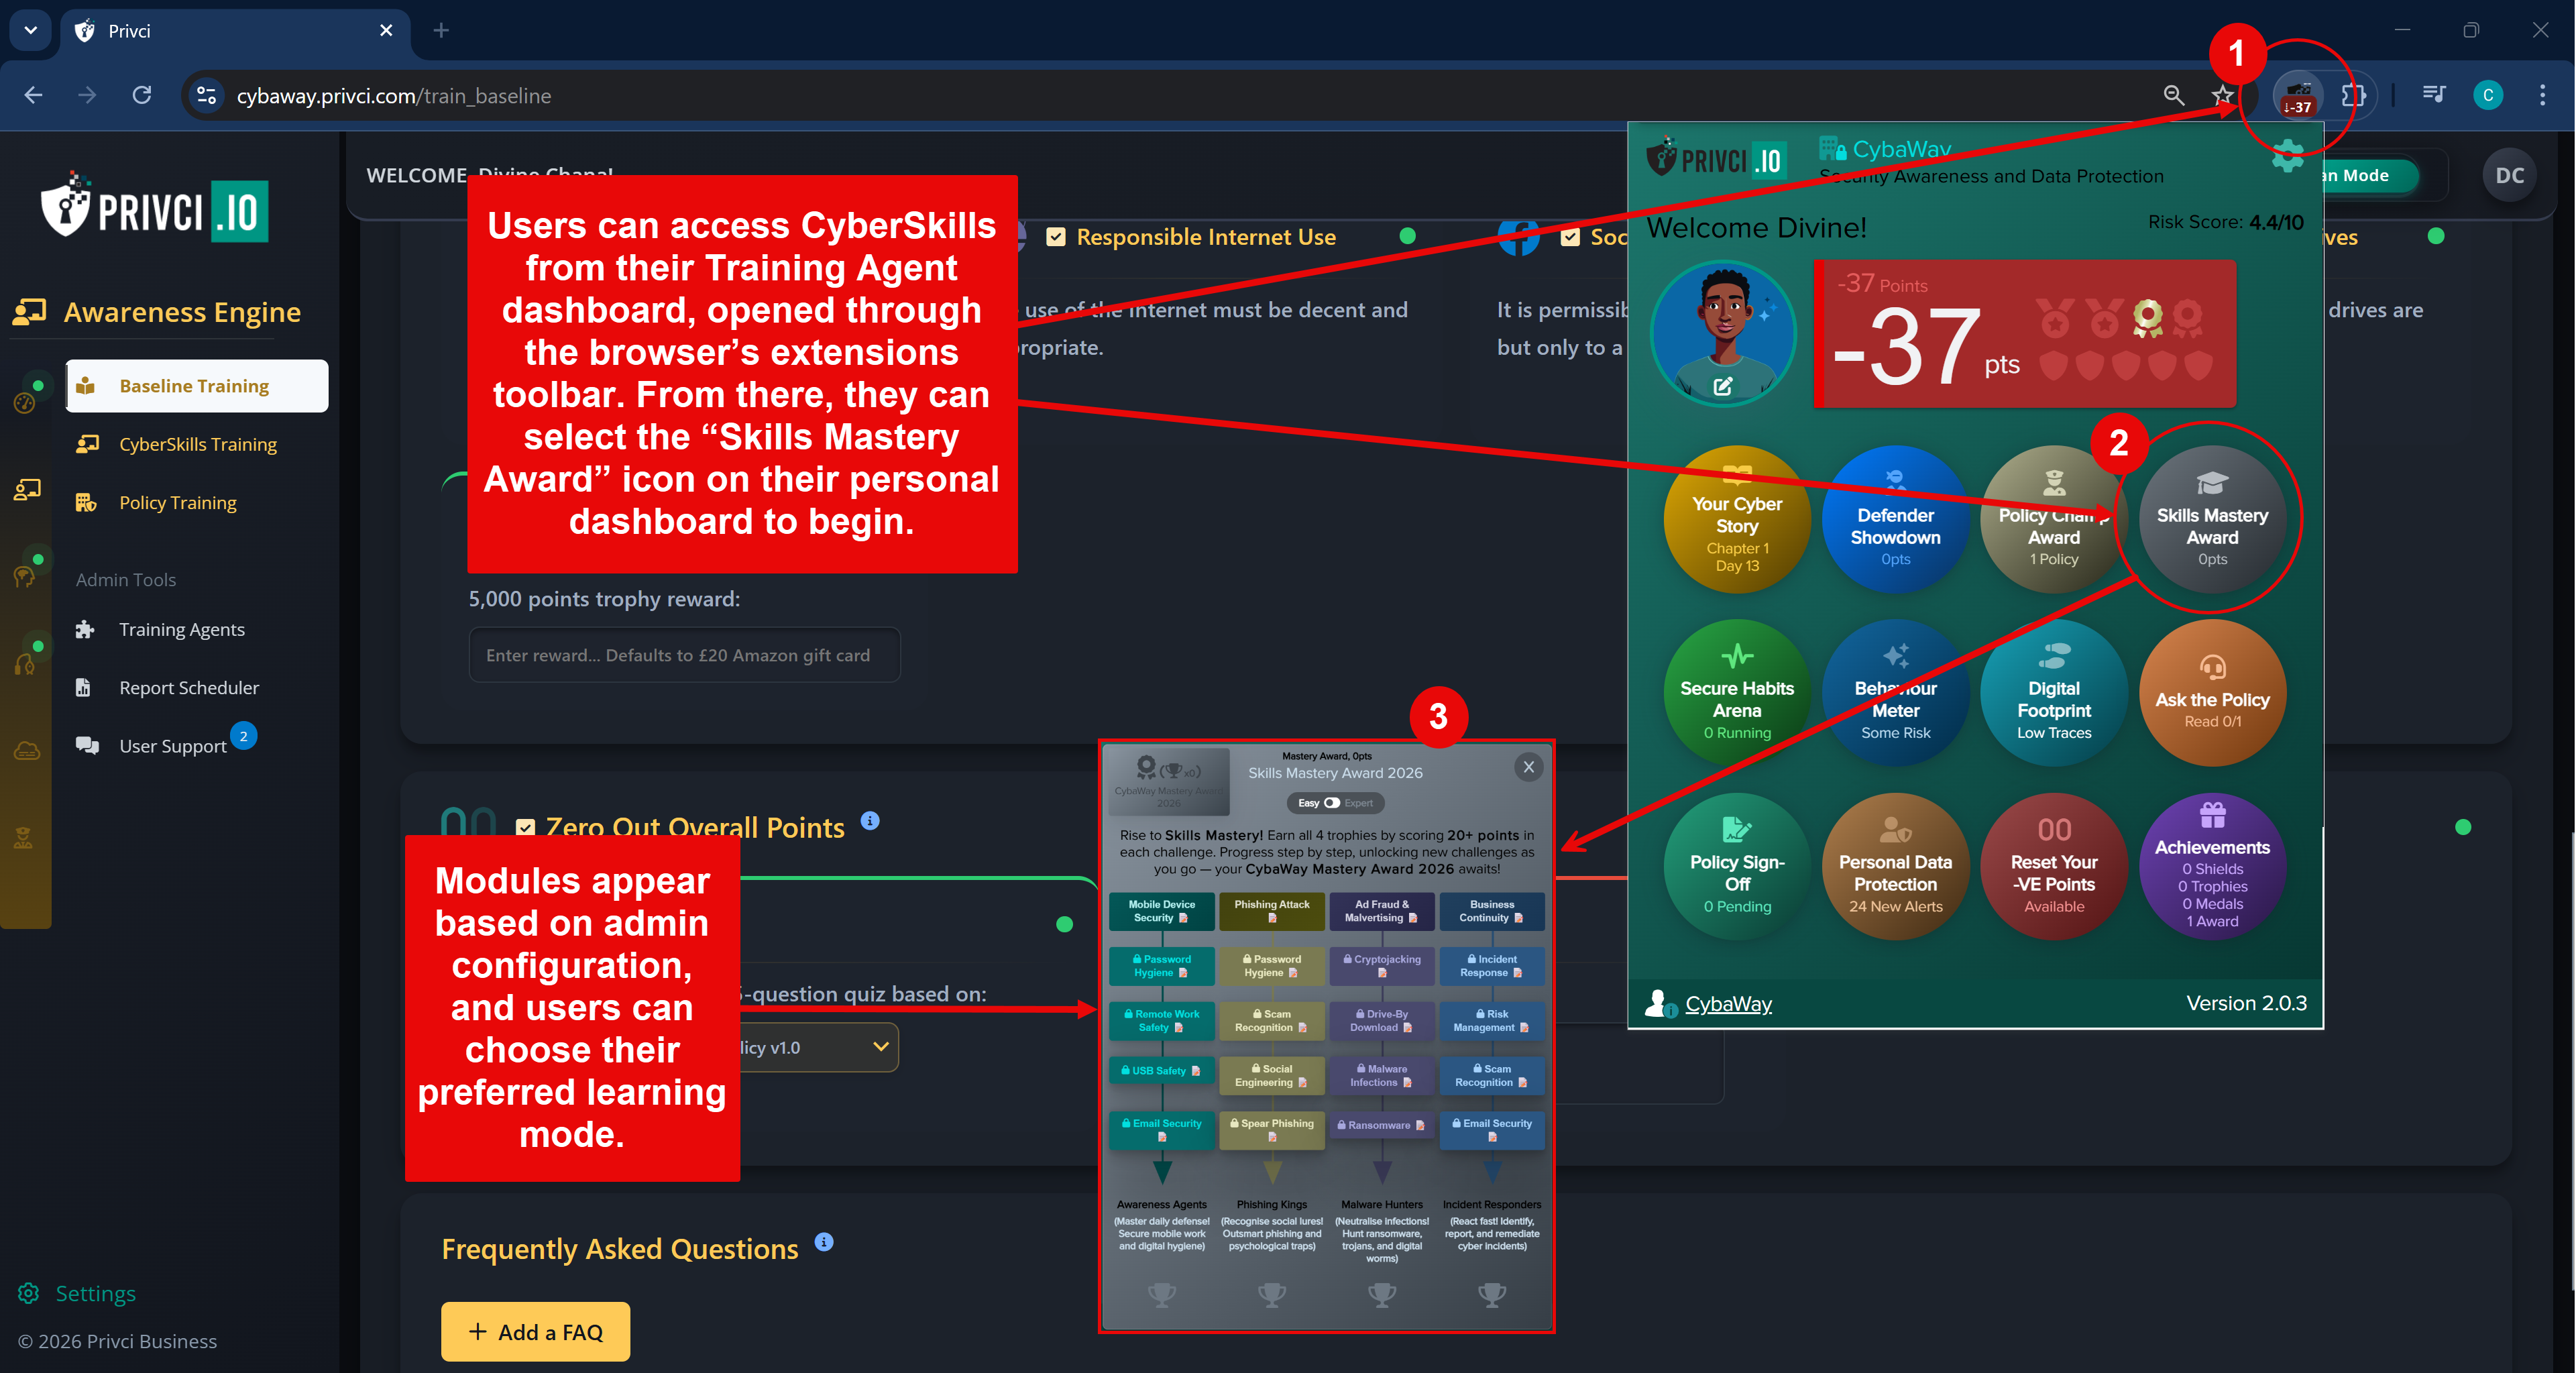
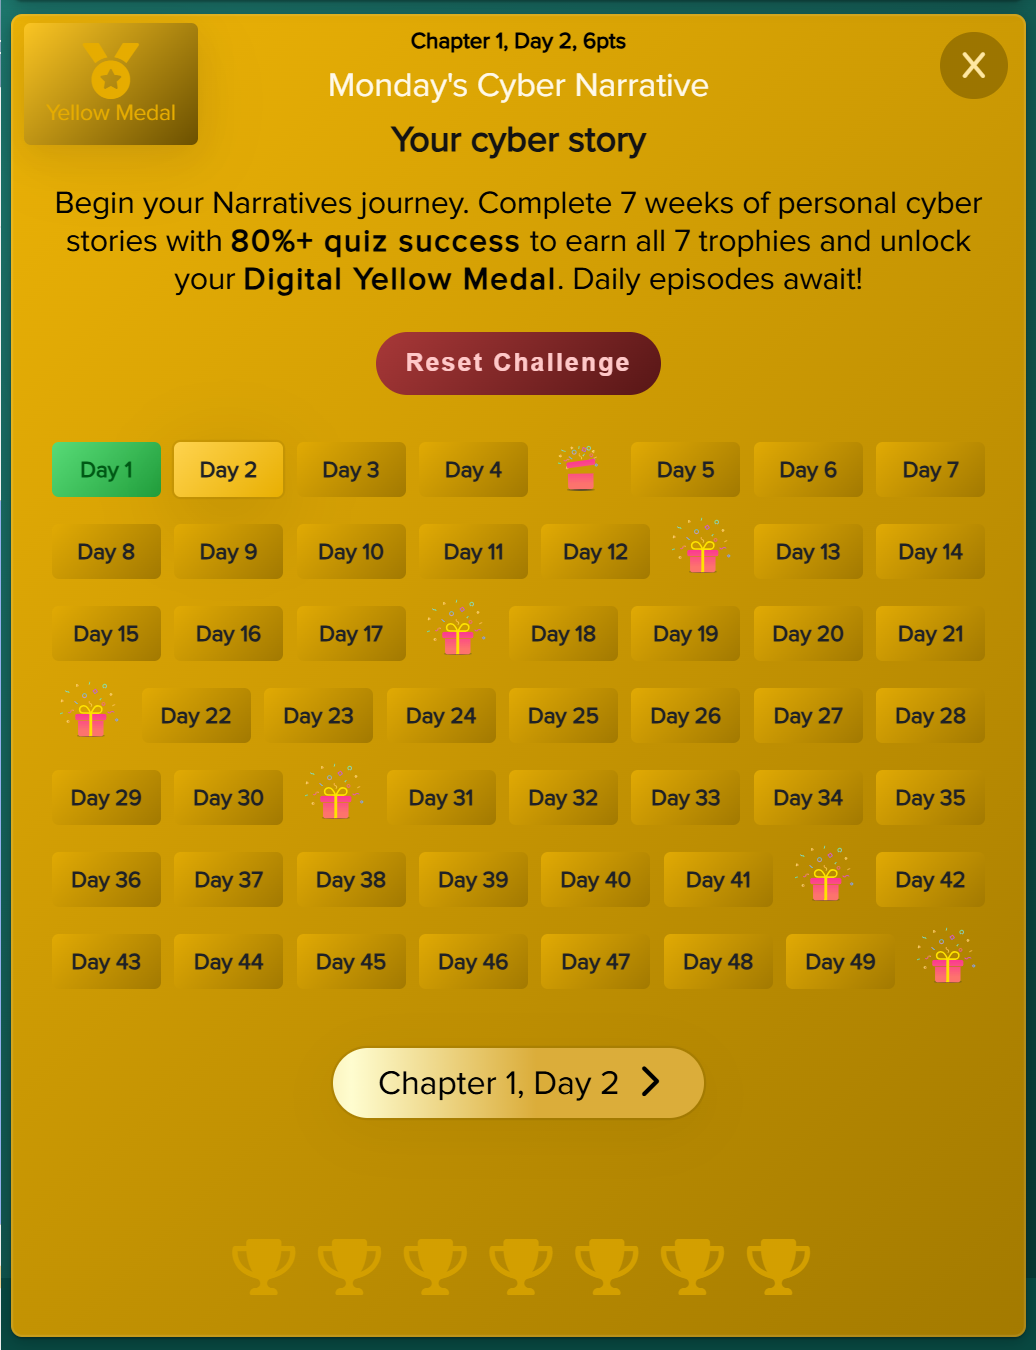
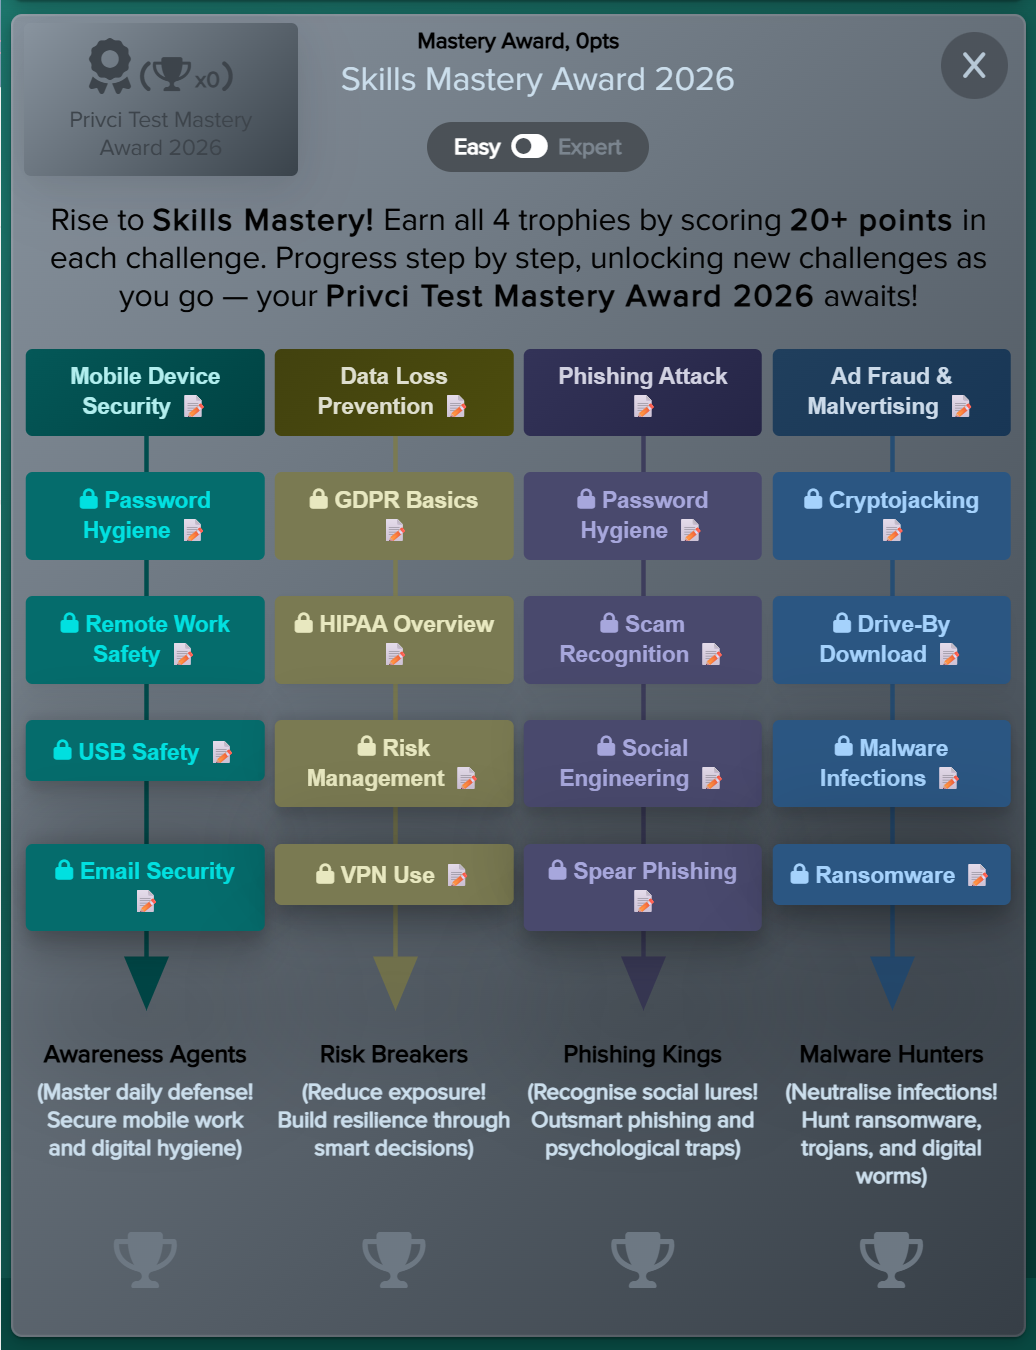
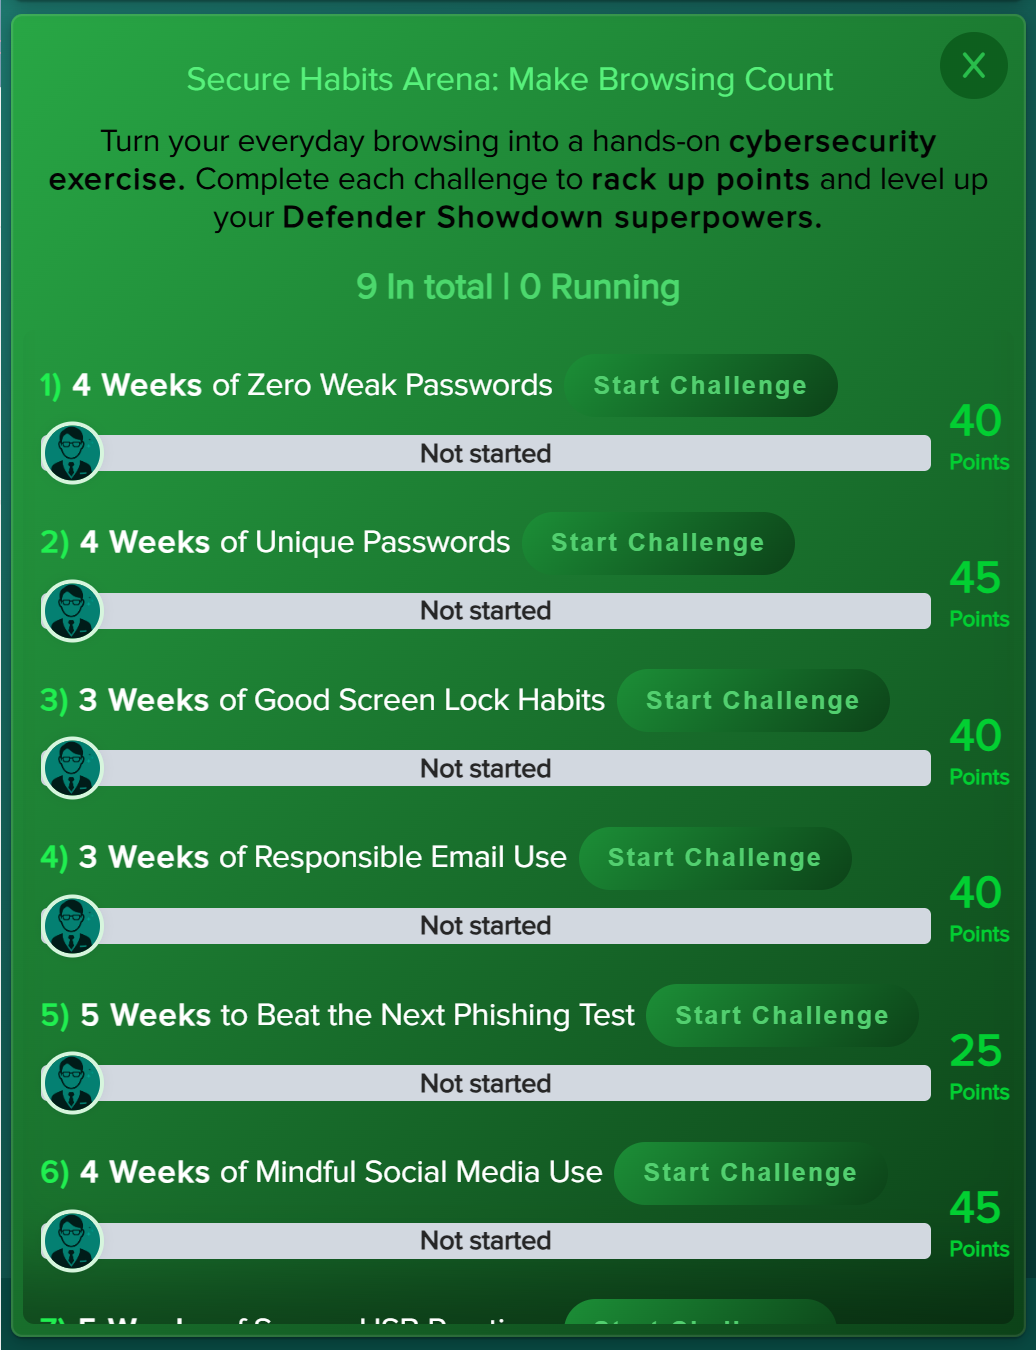
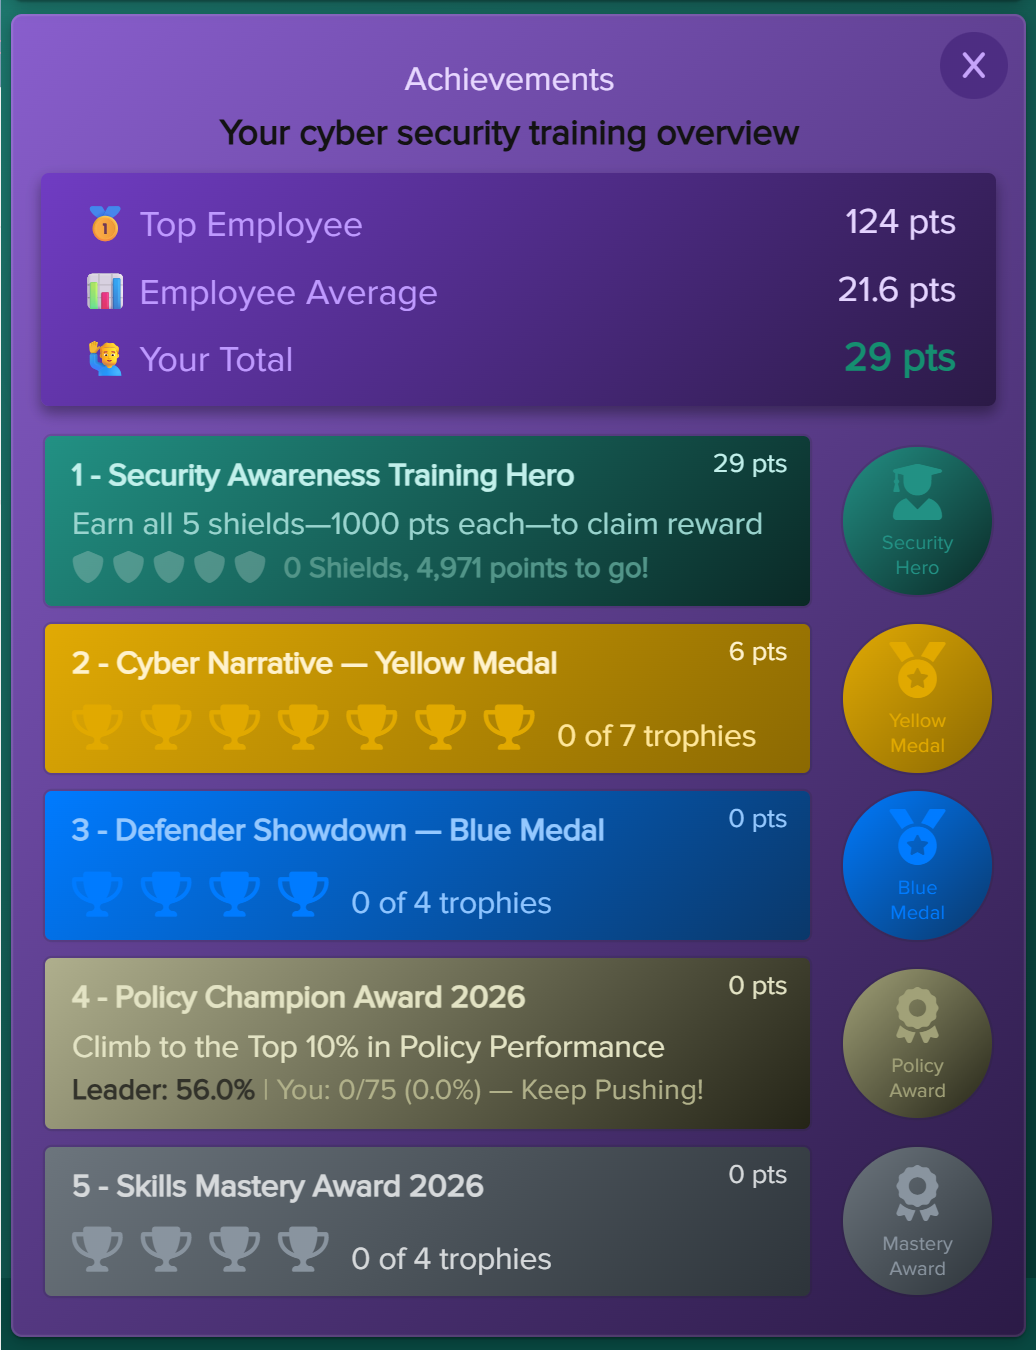
- Cyberskills Mastery A skills challenge delivered via the training agent. Users complete trophies made up of targeted modules across areas such as awareness, compliance, risk, privacy, malware, and social behaviour.
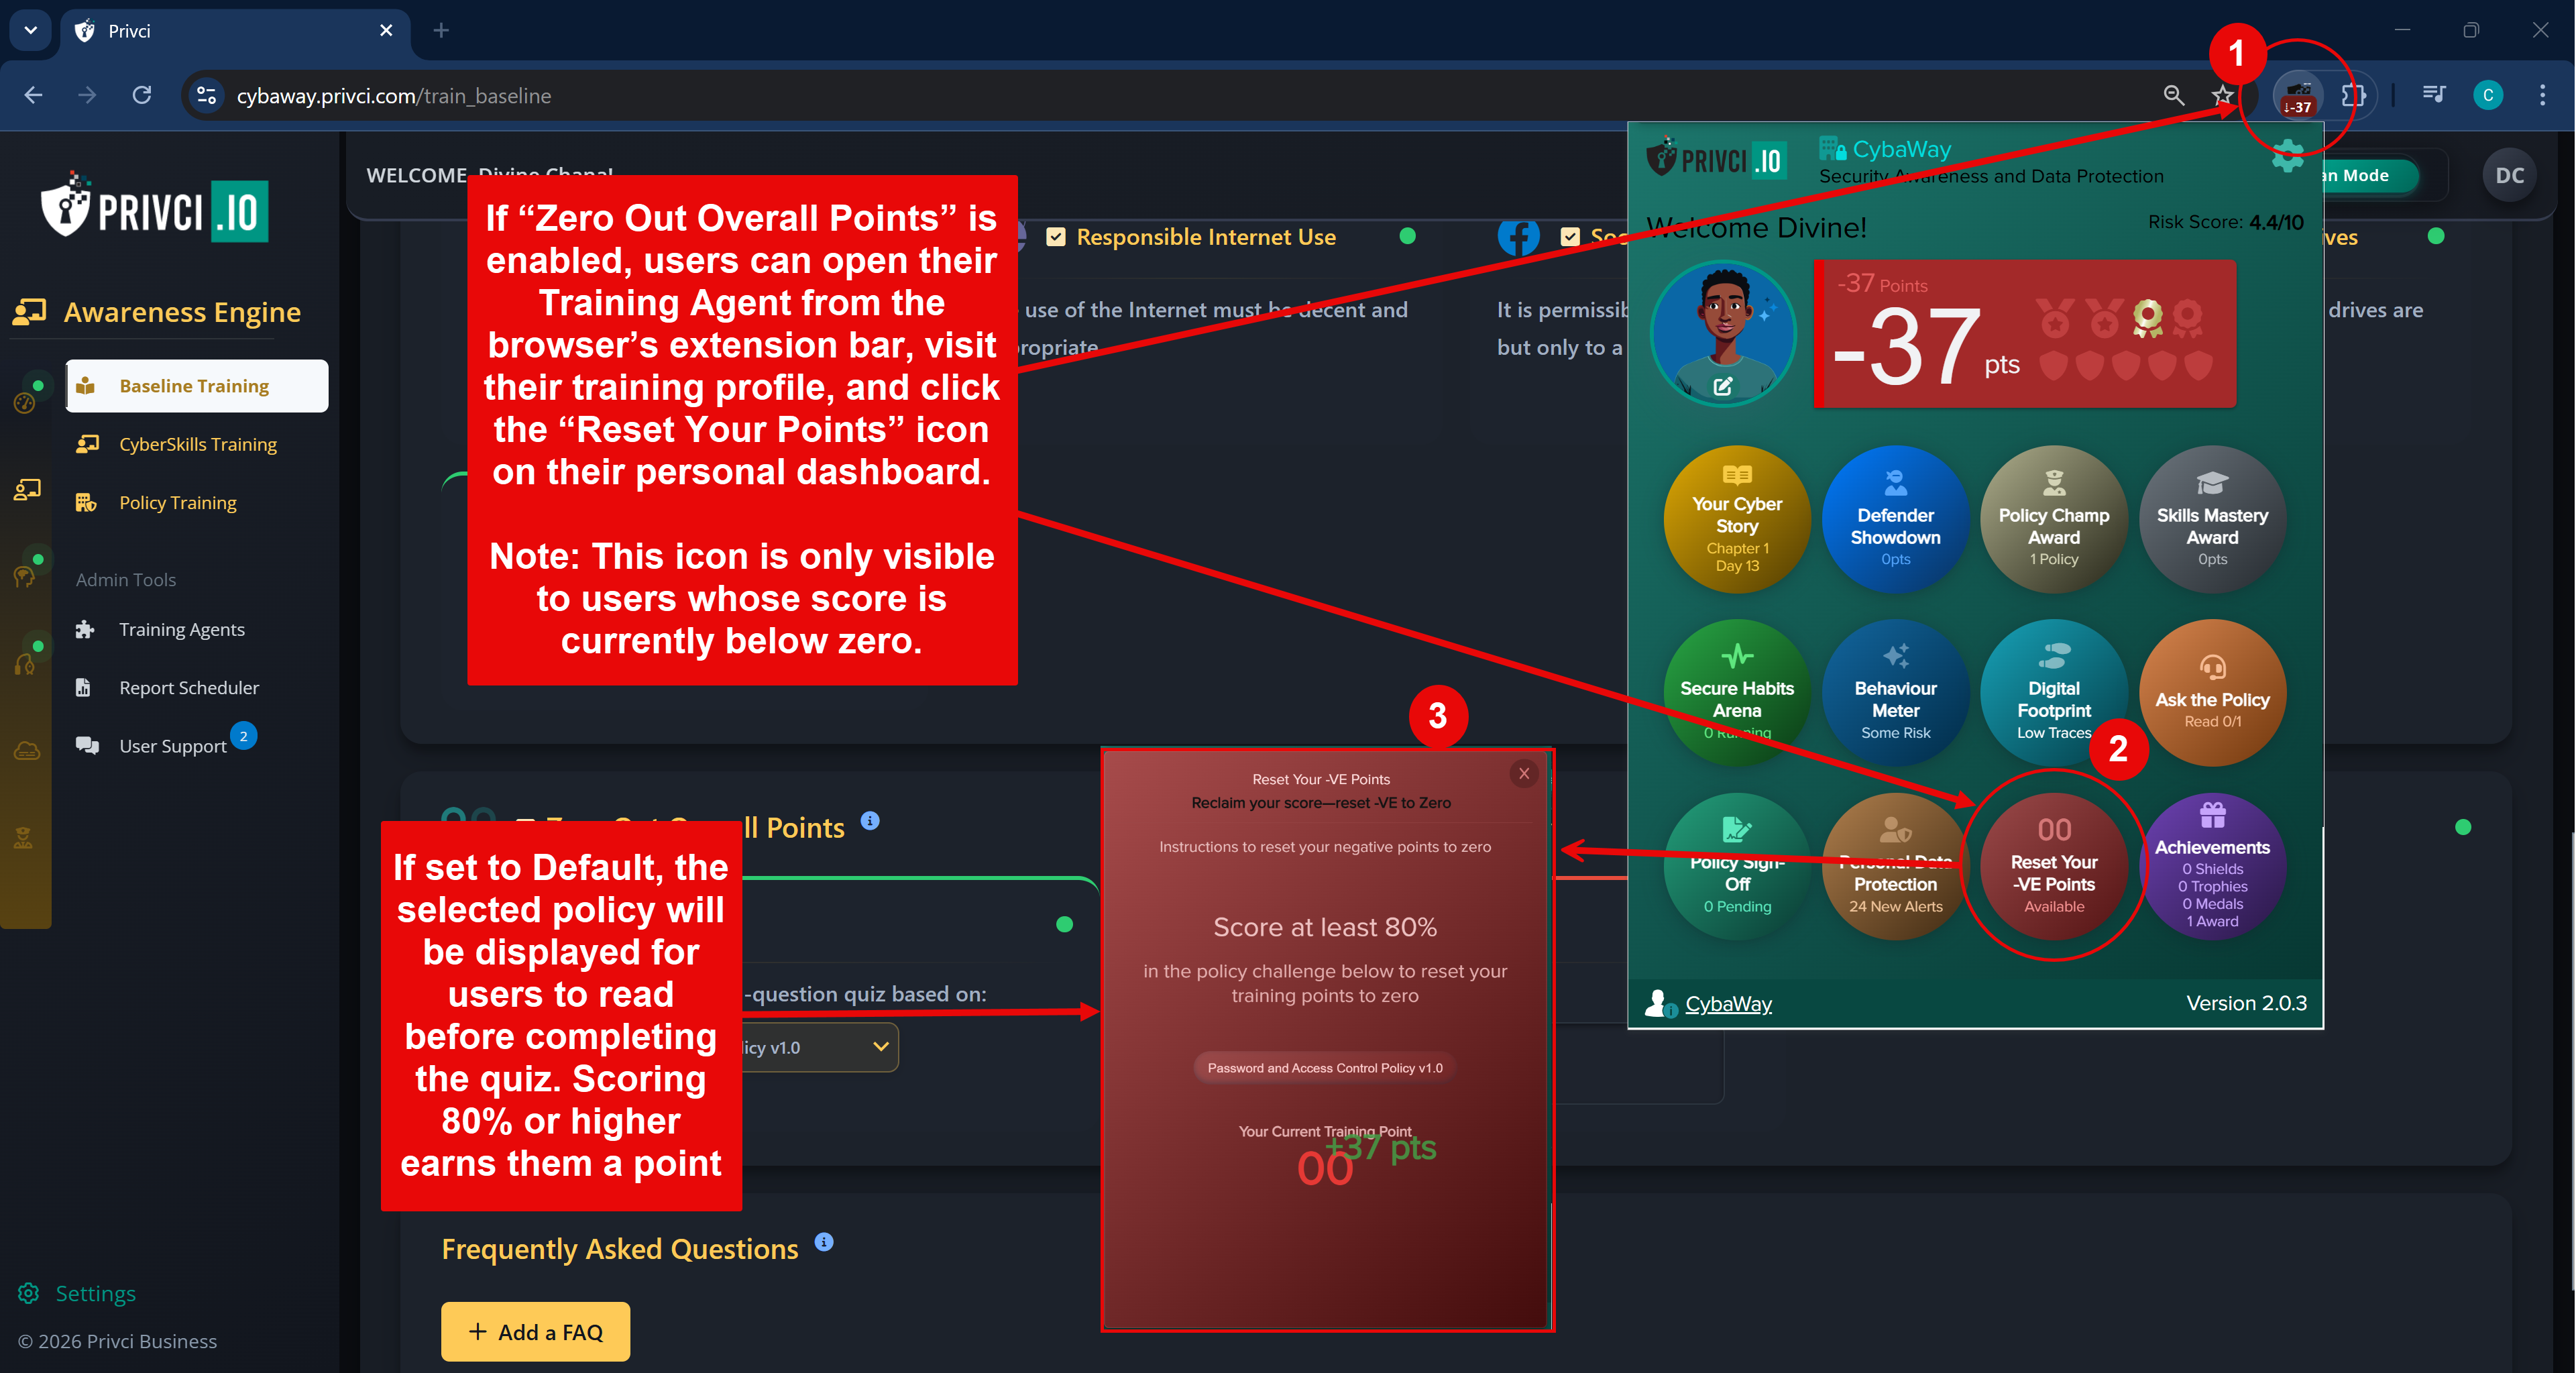
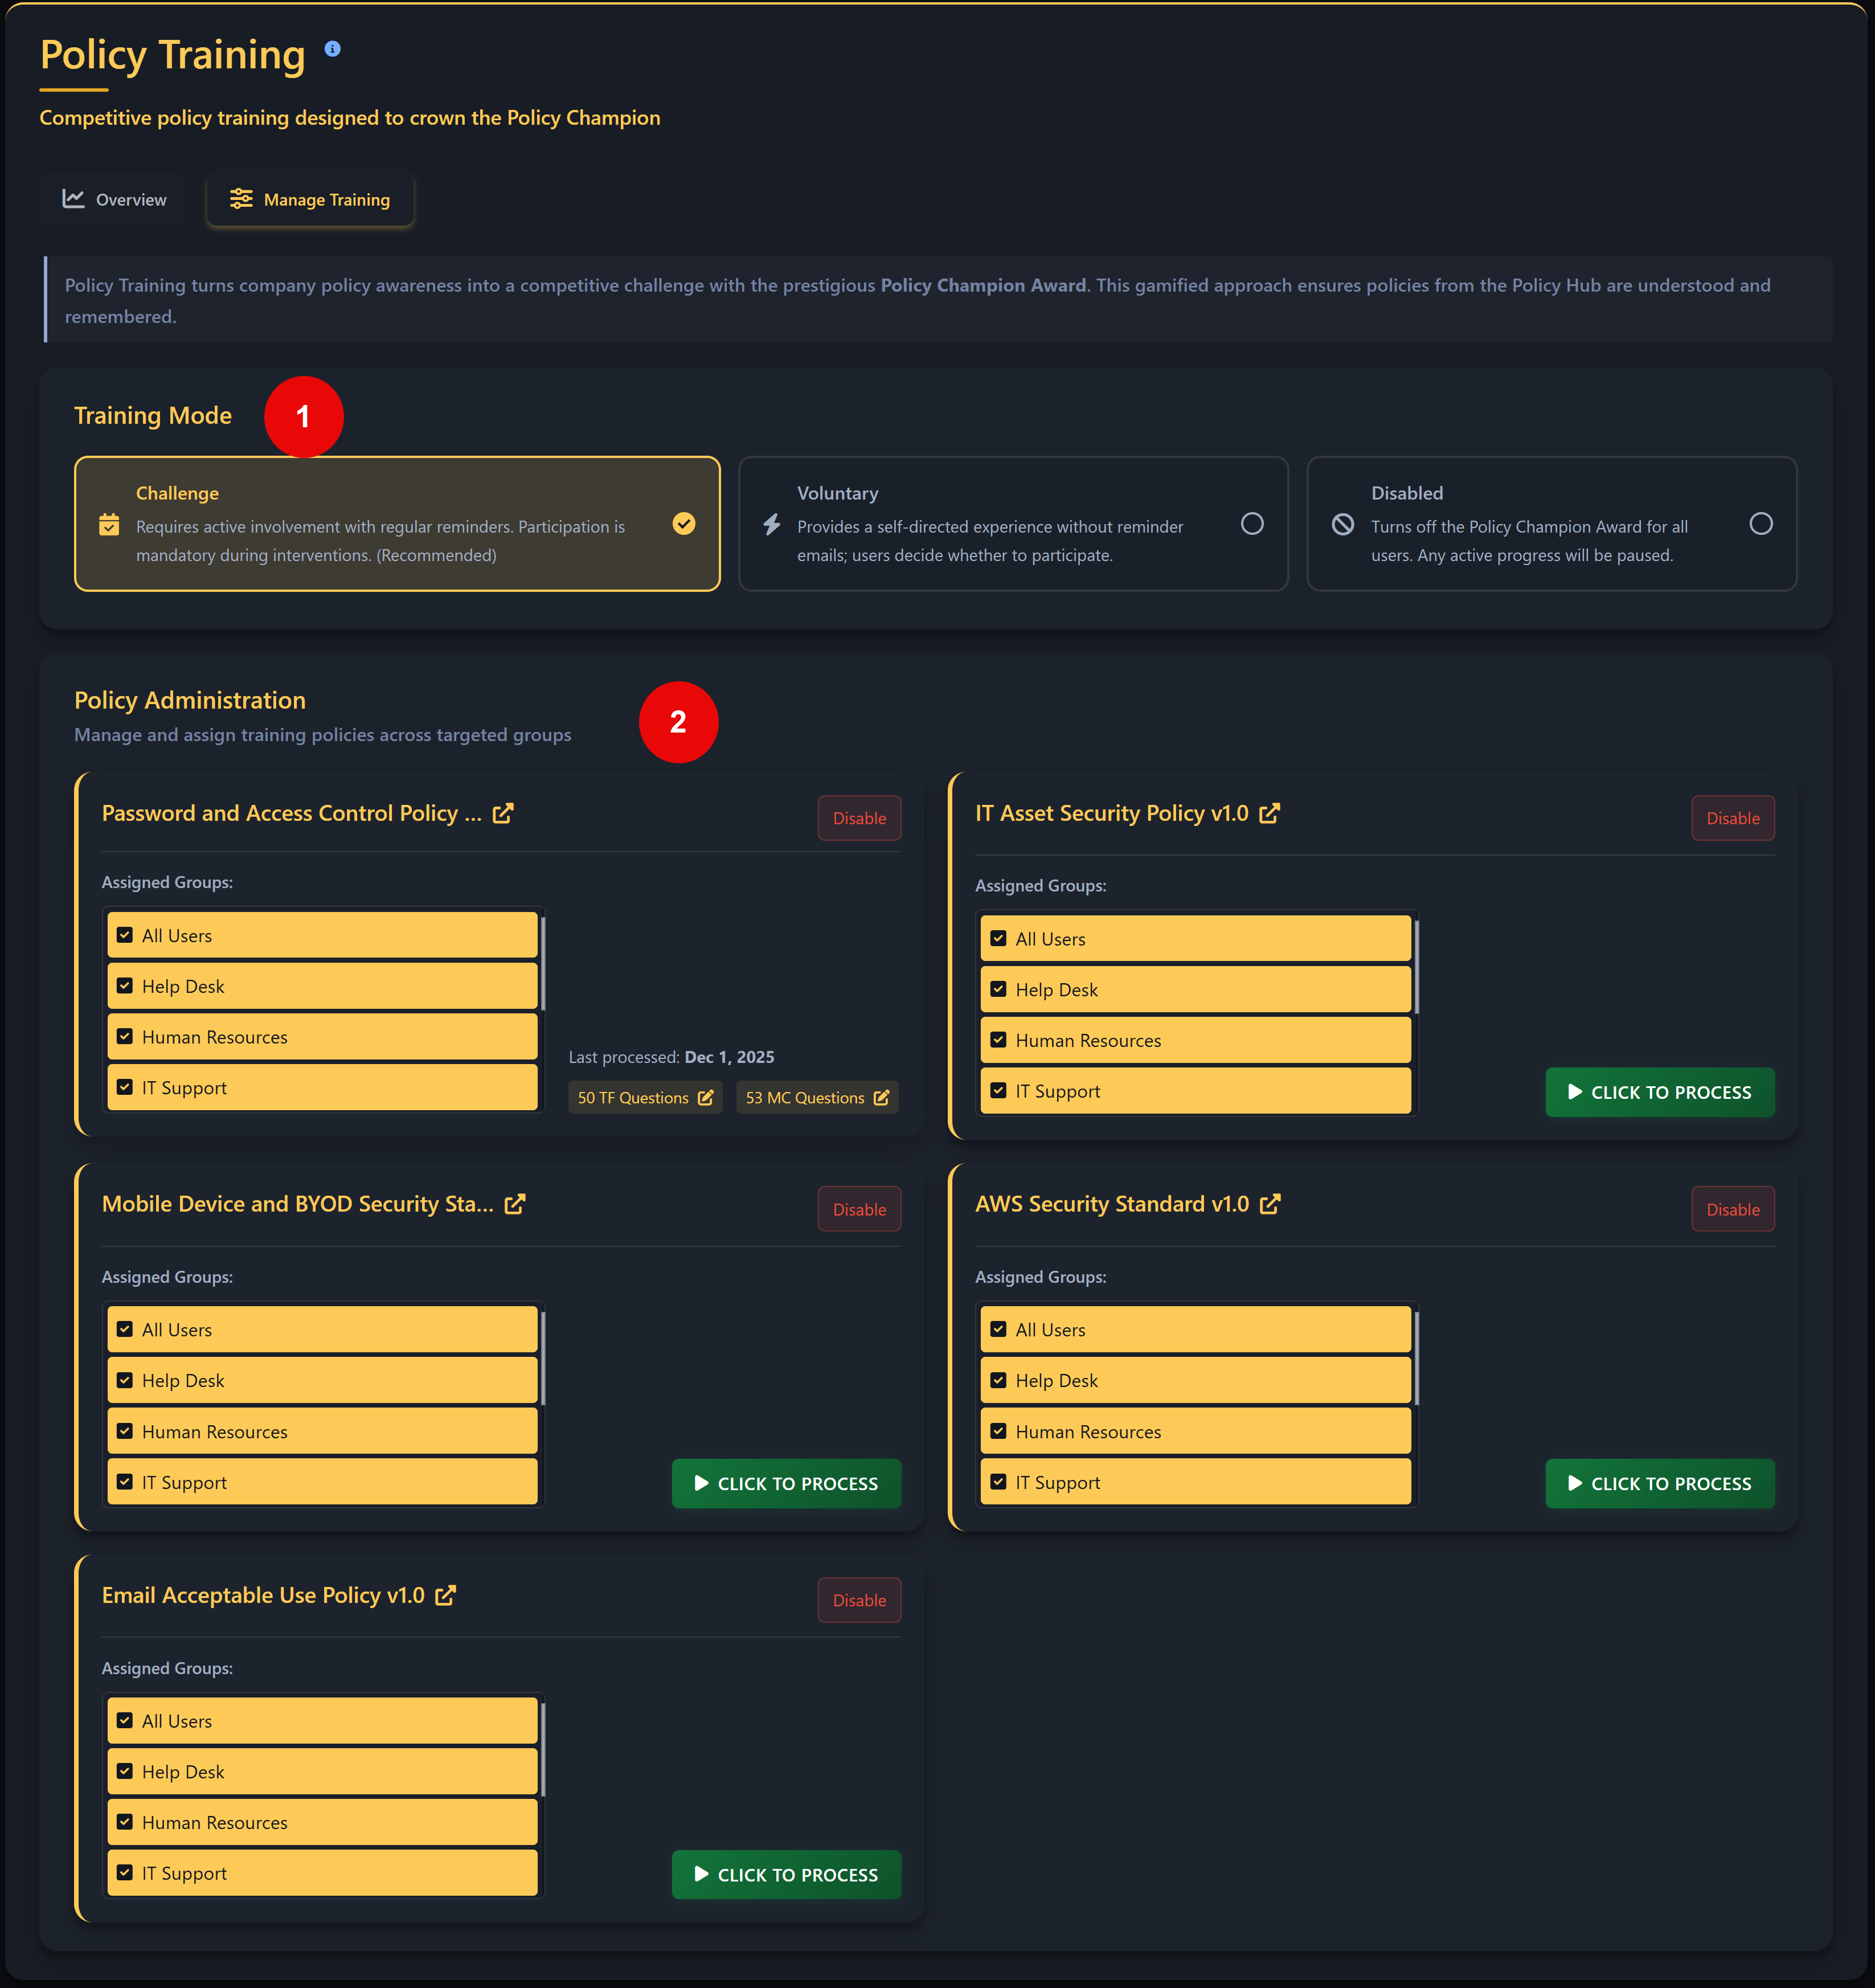
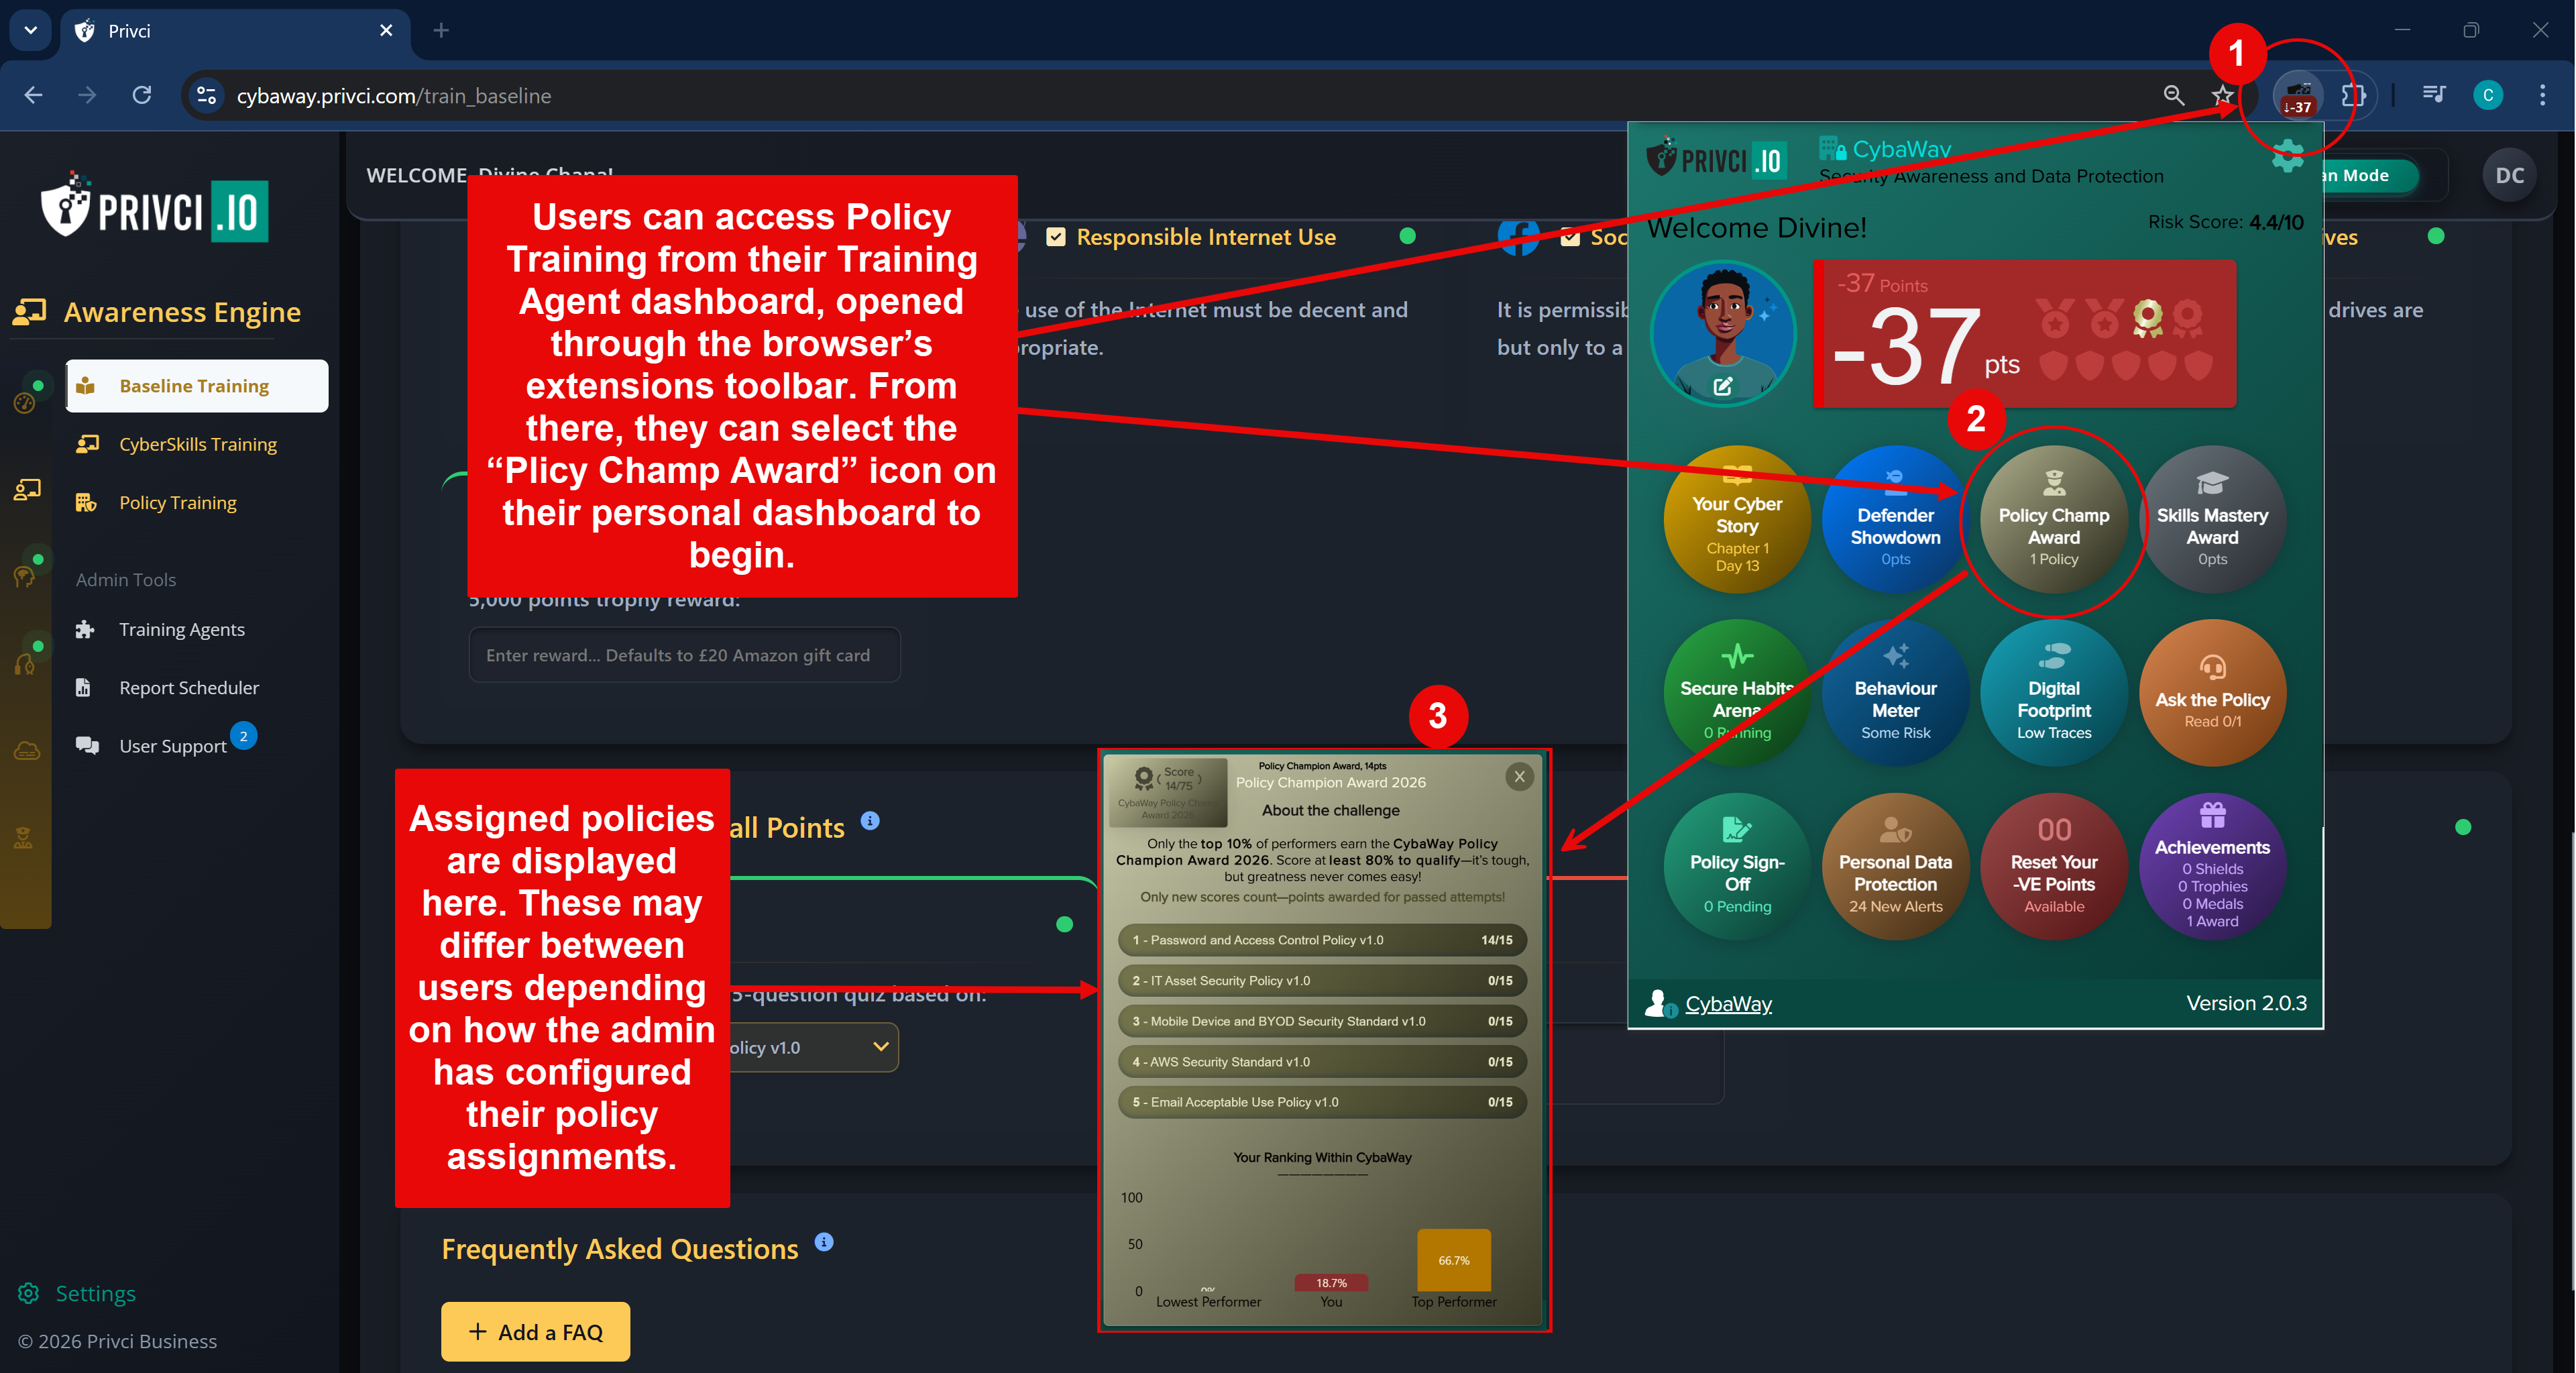
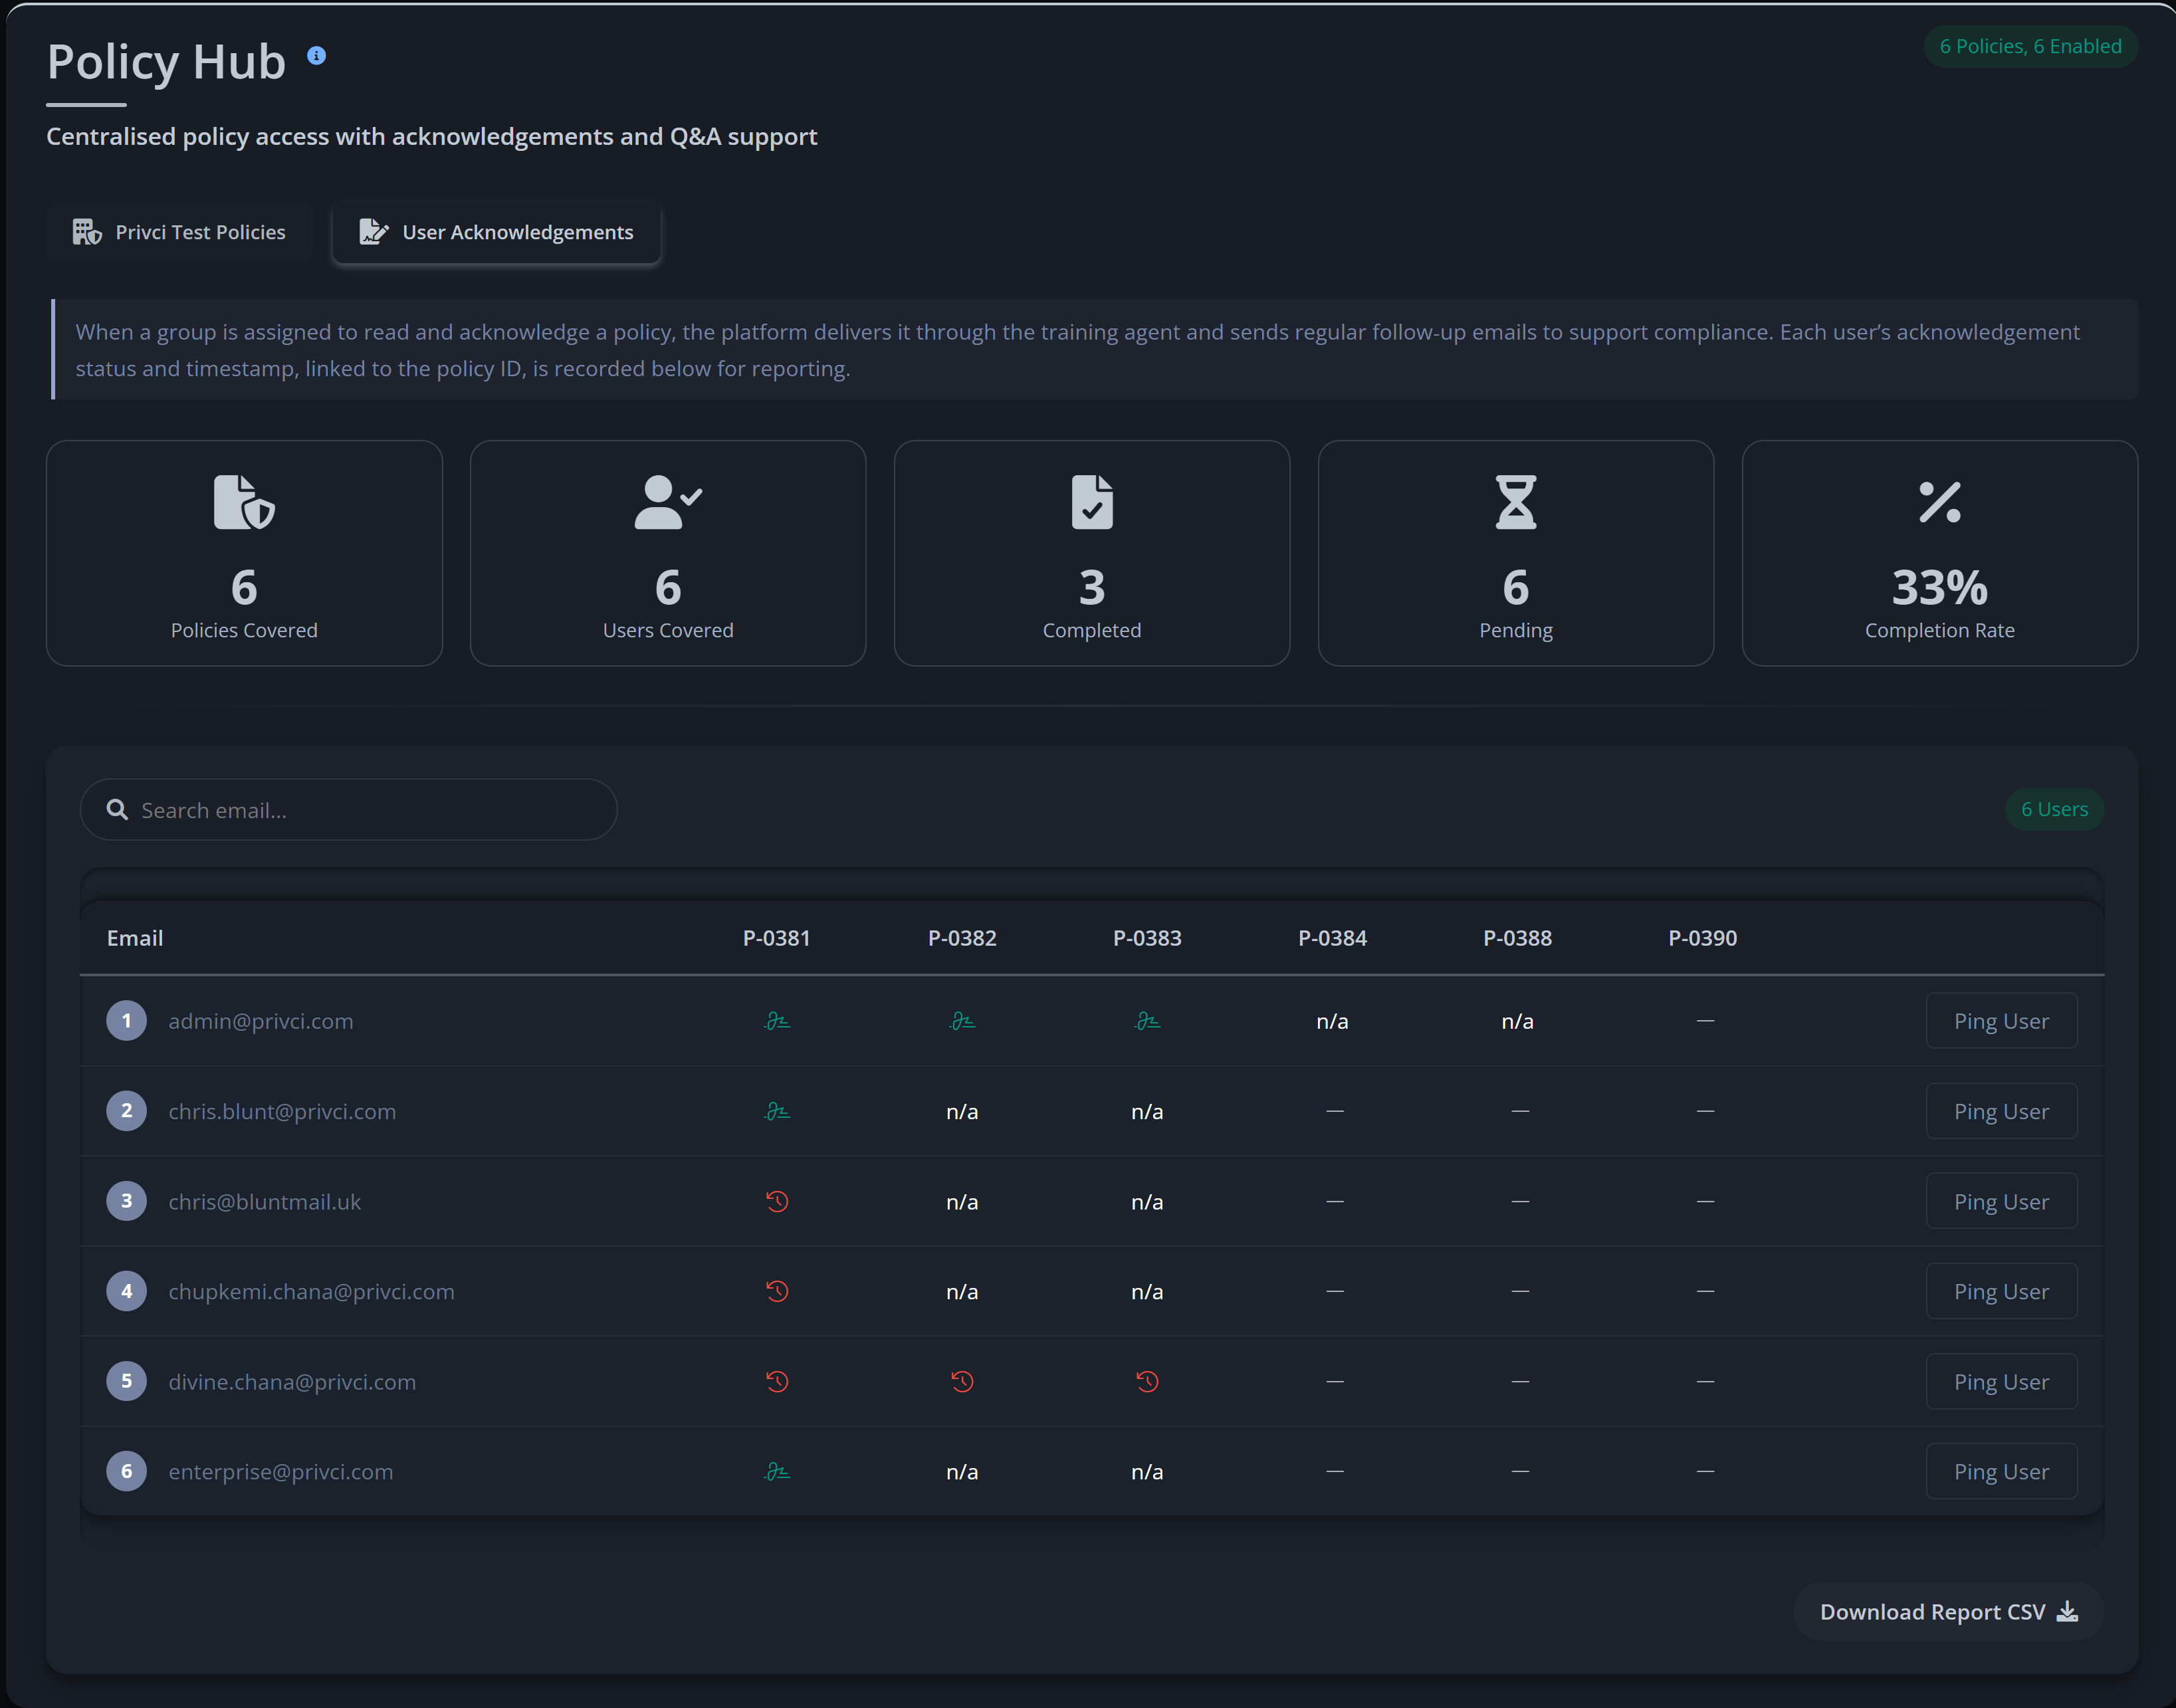
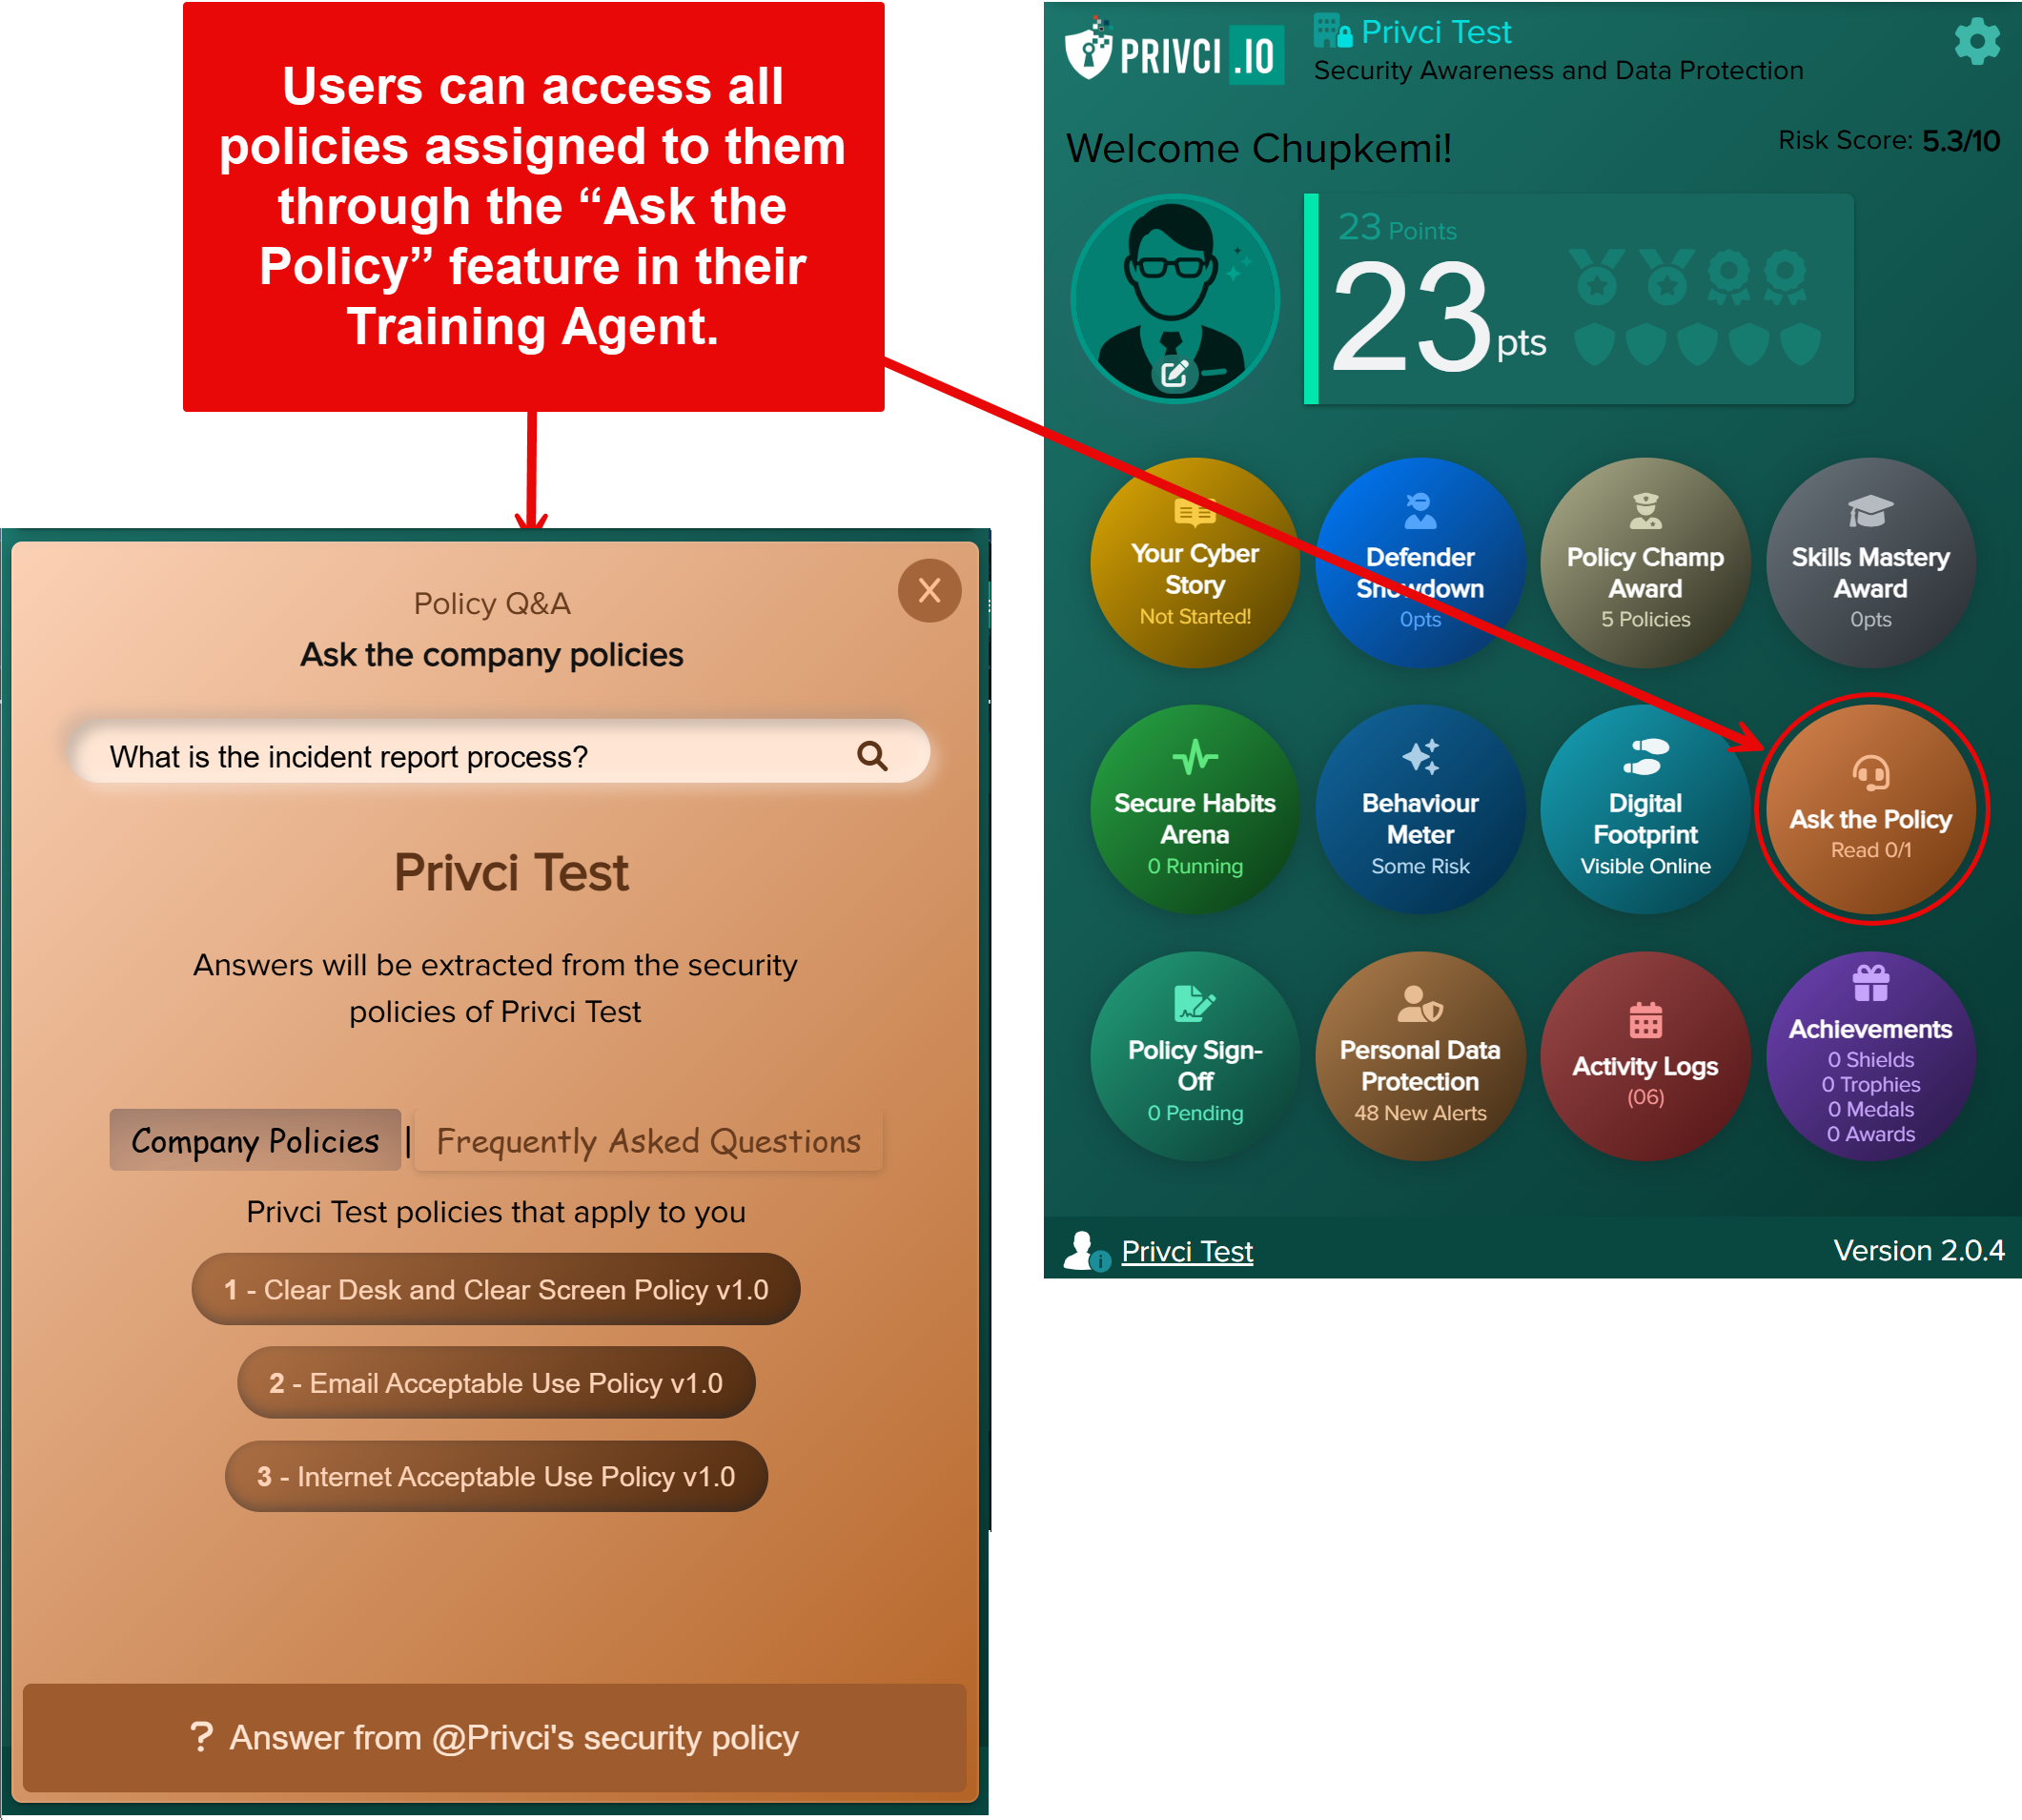
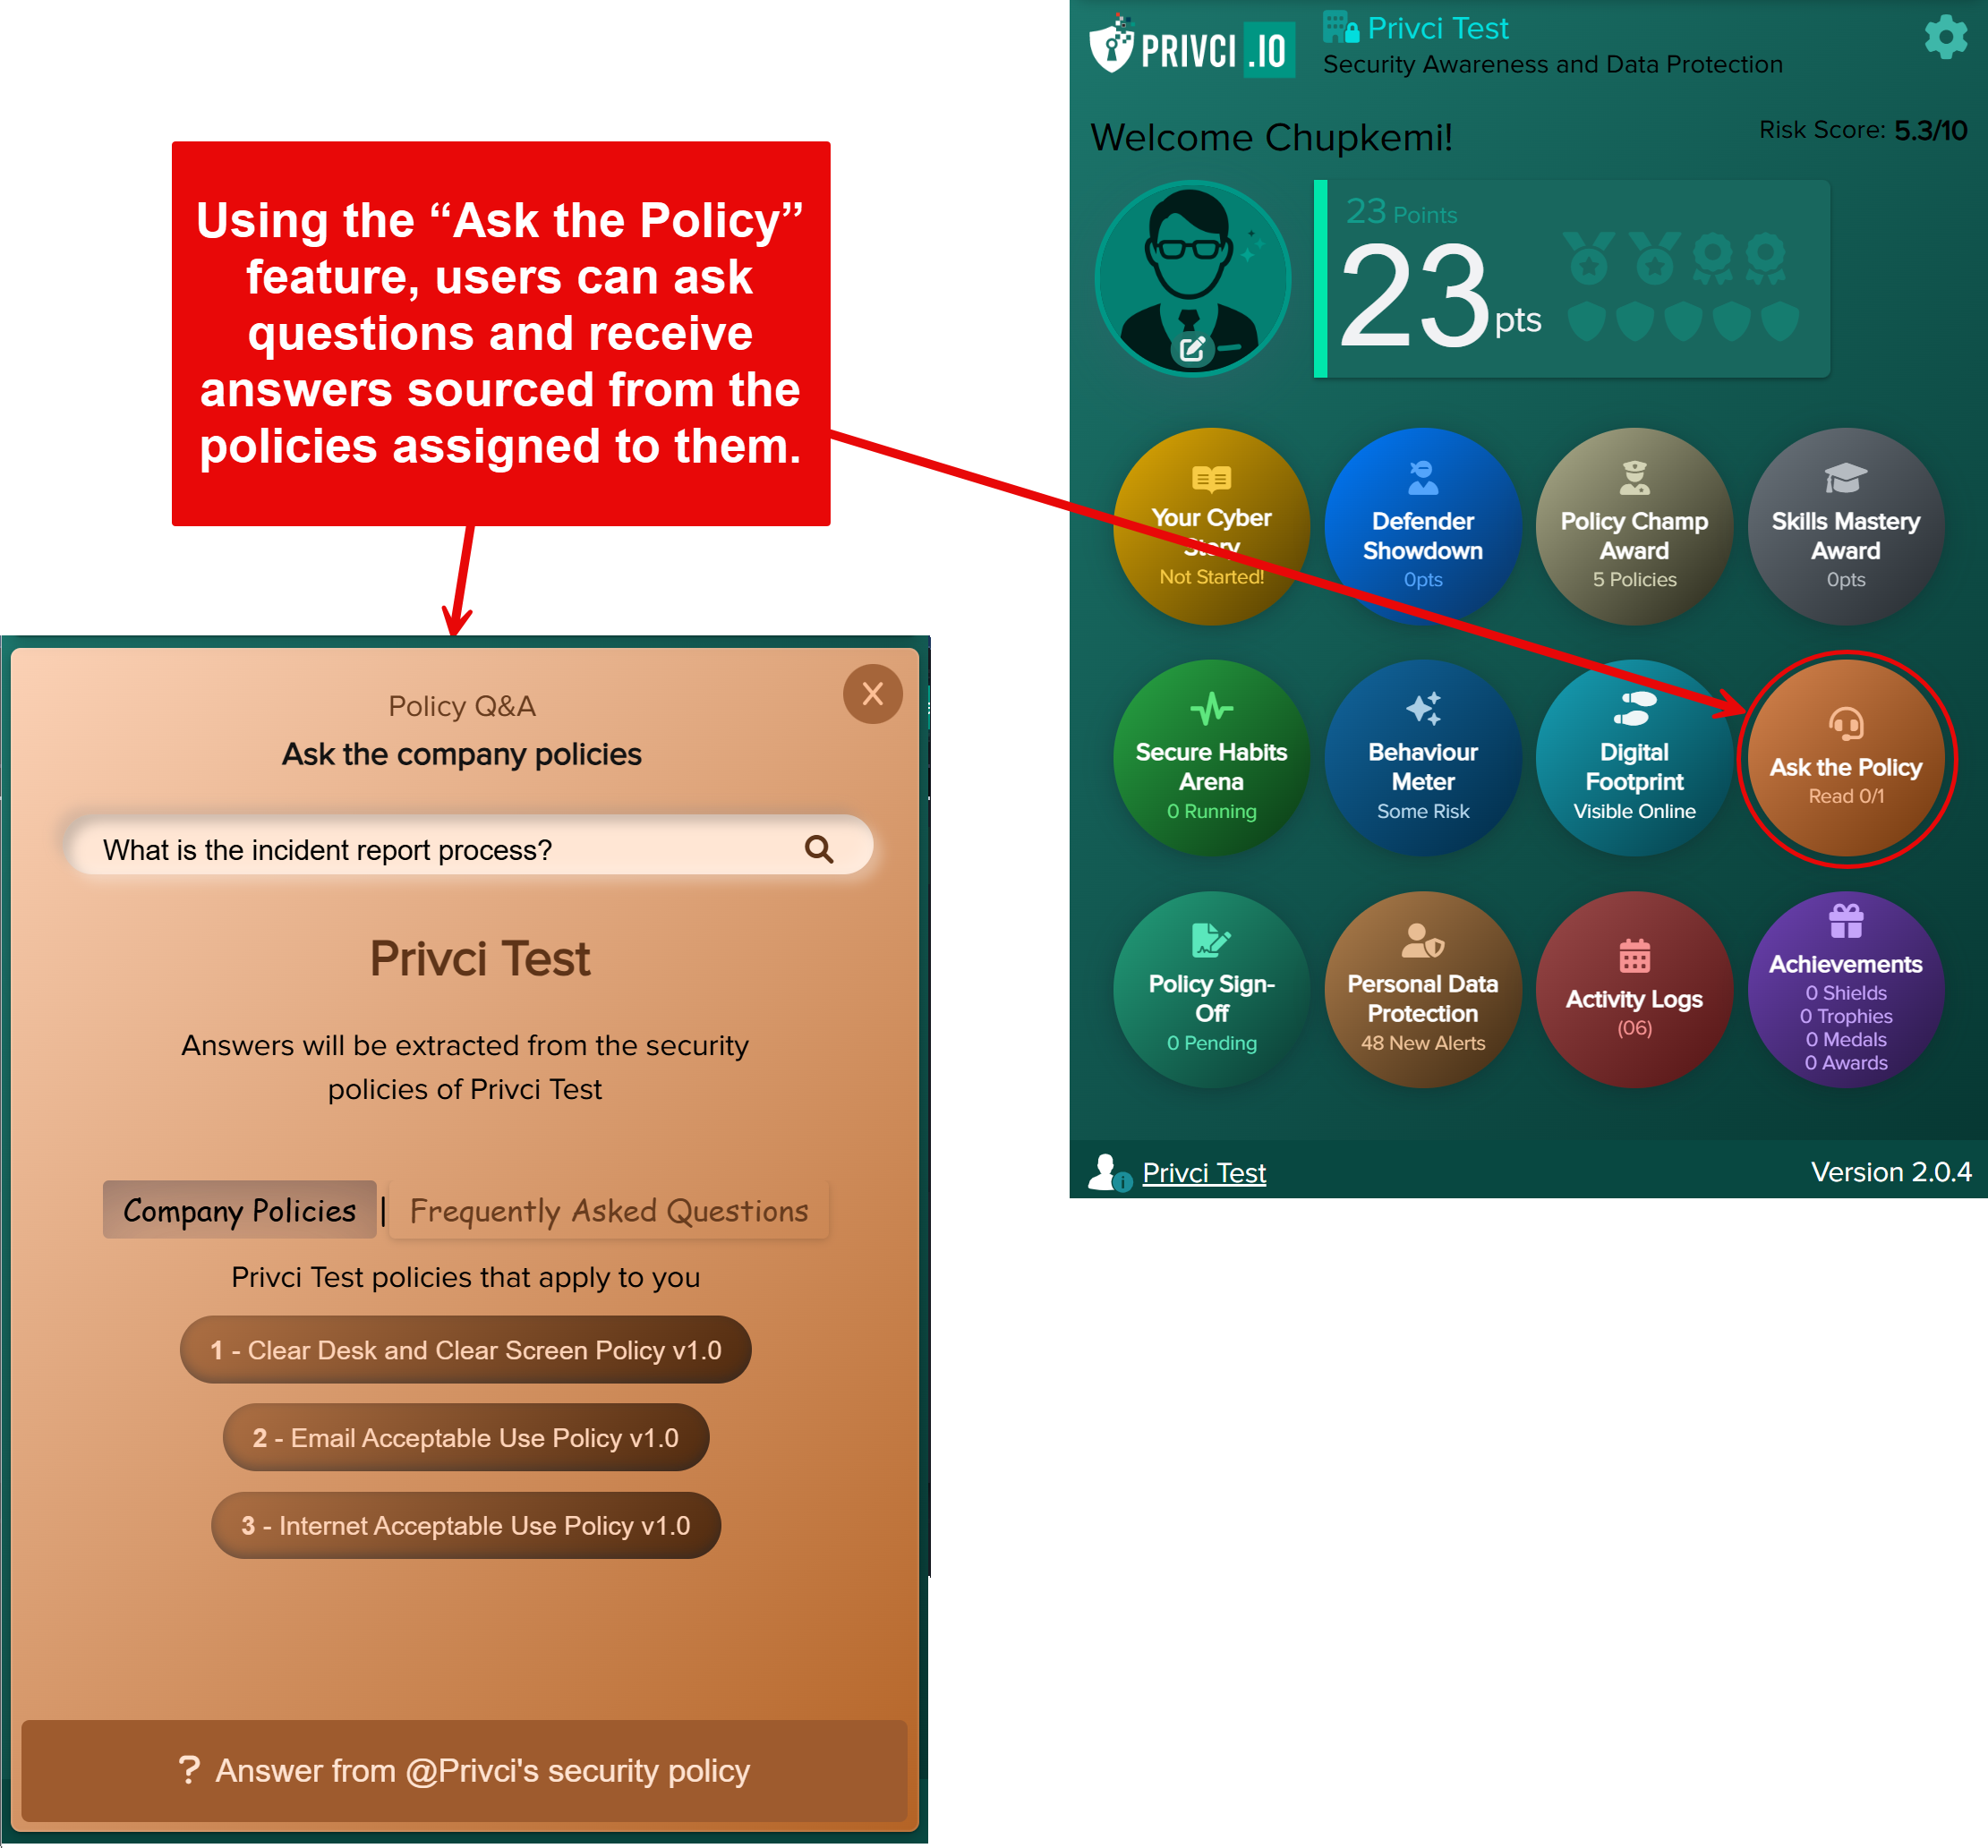
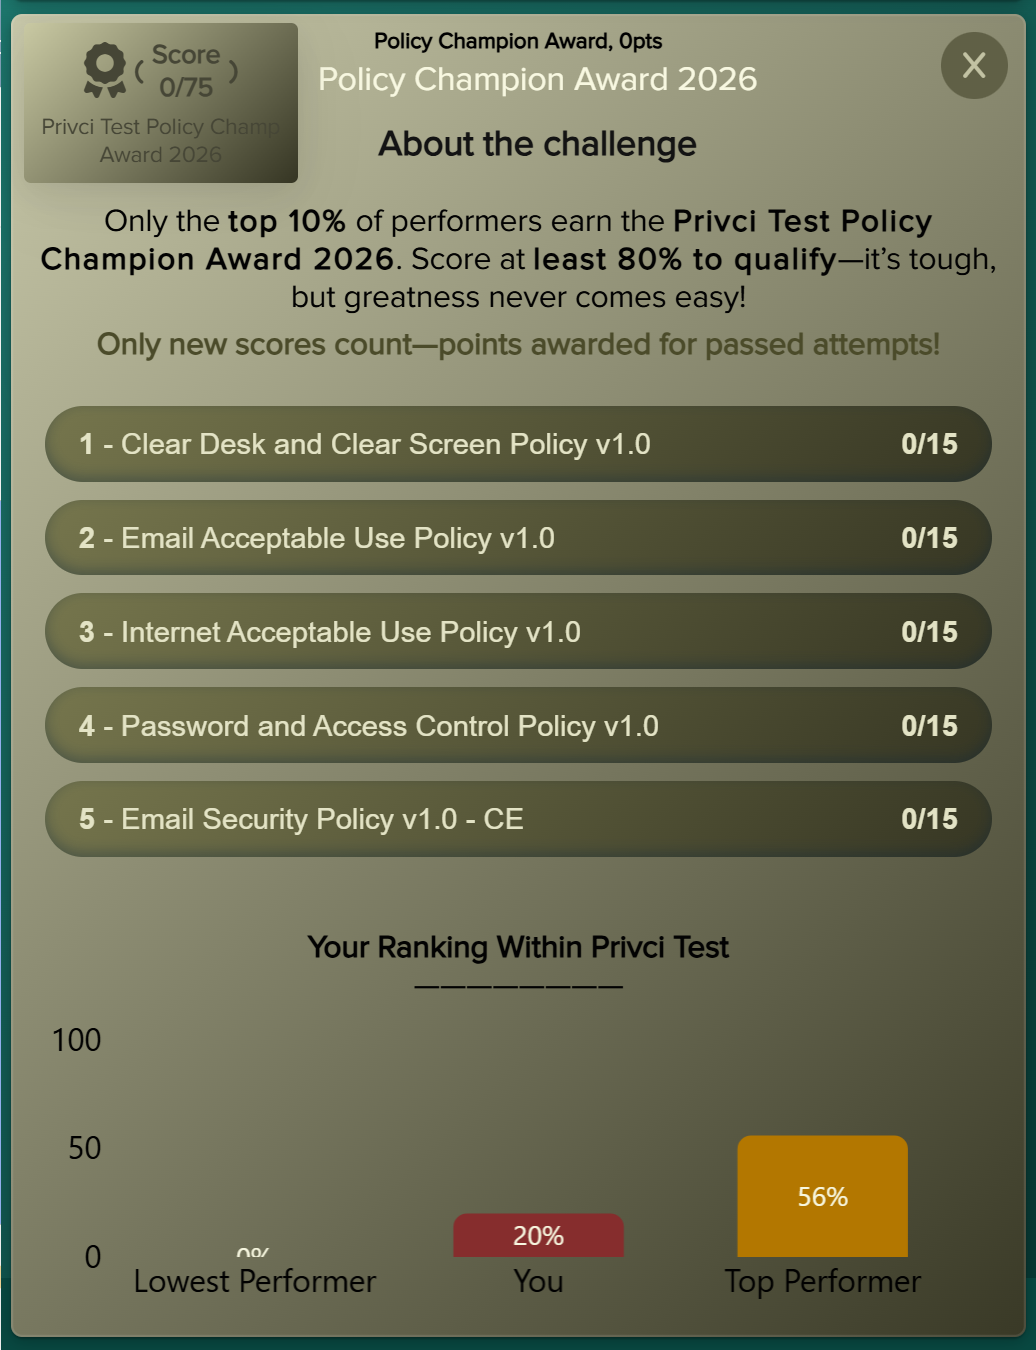
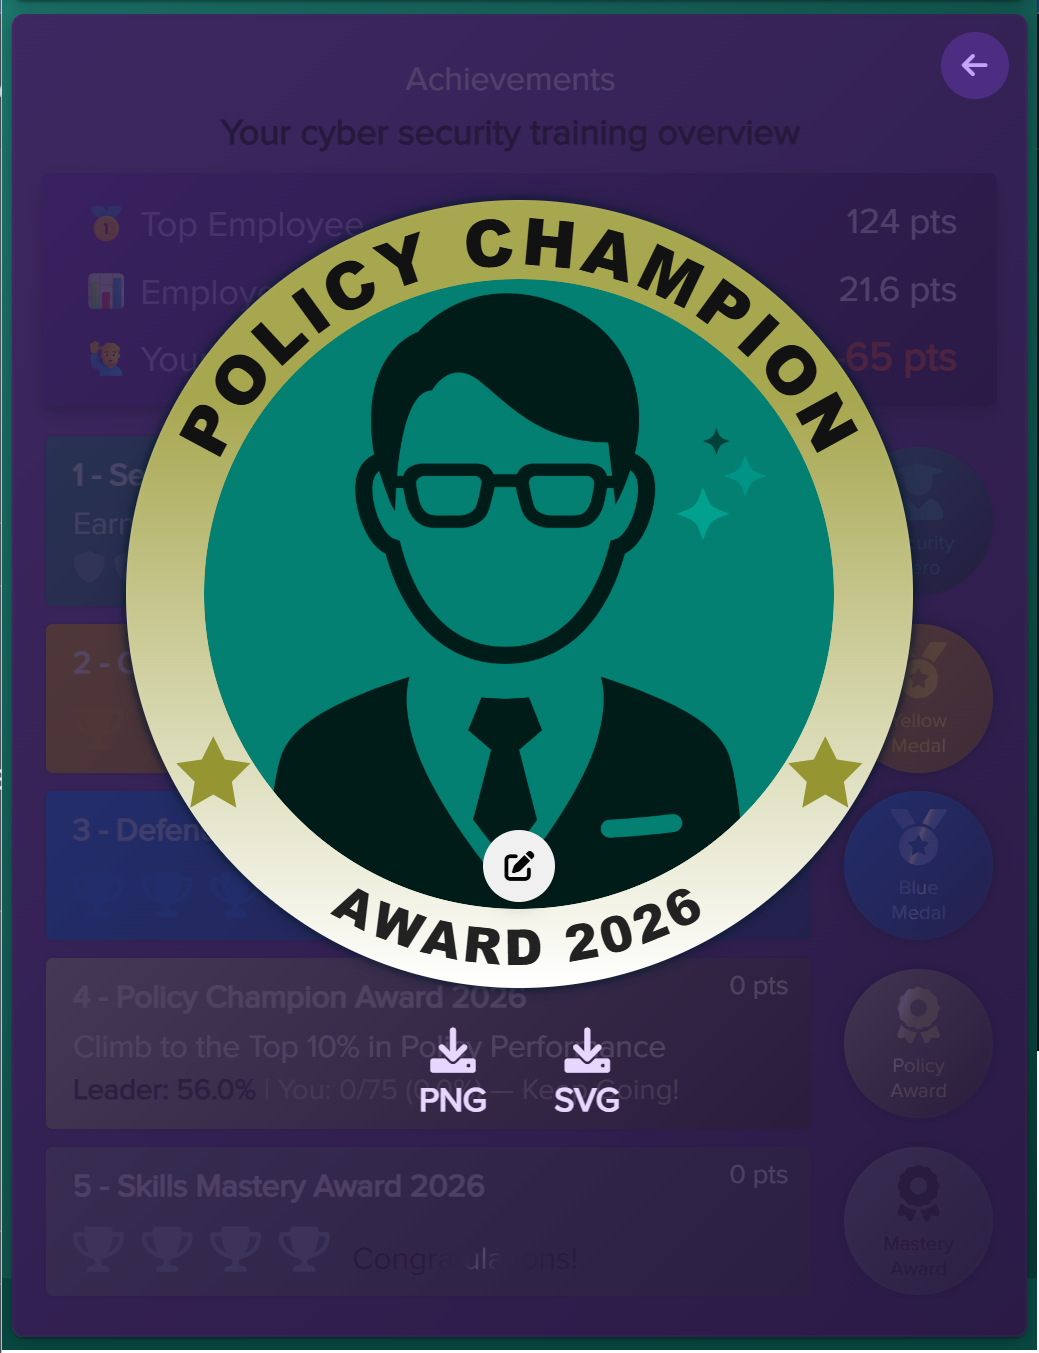
- Policy Challenge A policy‑focused challenge delivered via the training agent. Users compete for the Policy Champion Award (top 10% of performers), helping you measure how well your internal policies are understood and applied. By default, all uploaded policies are included.
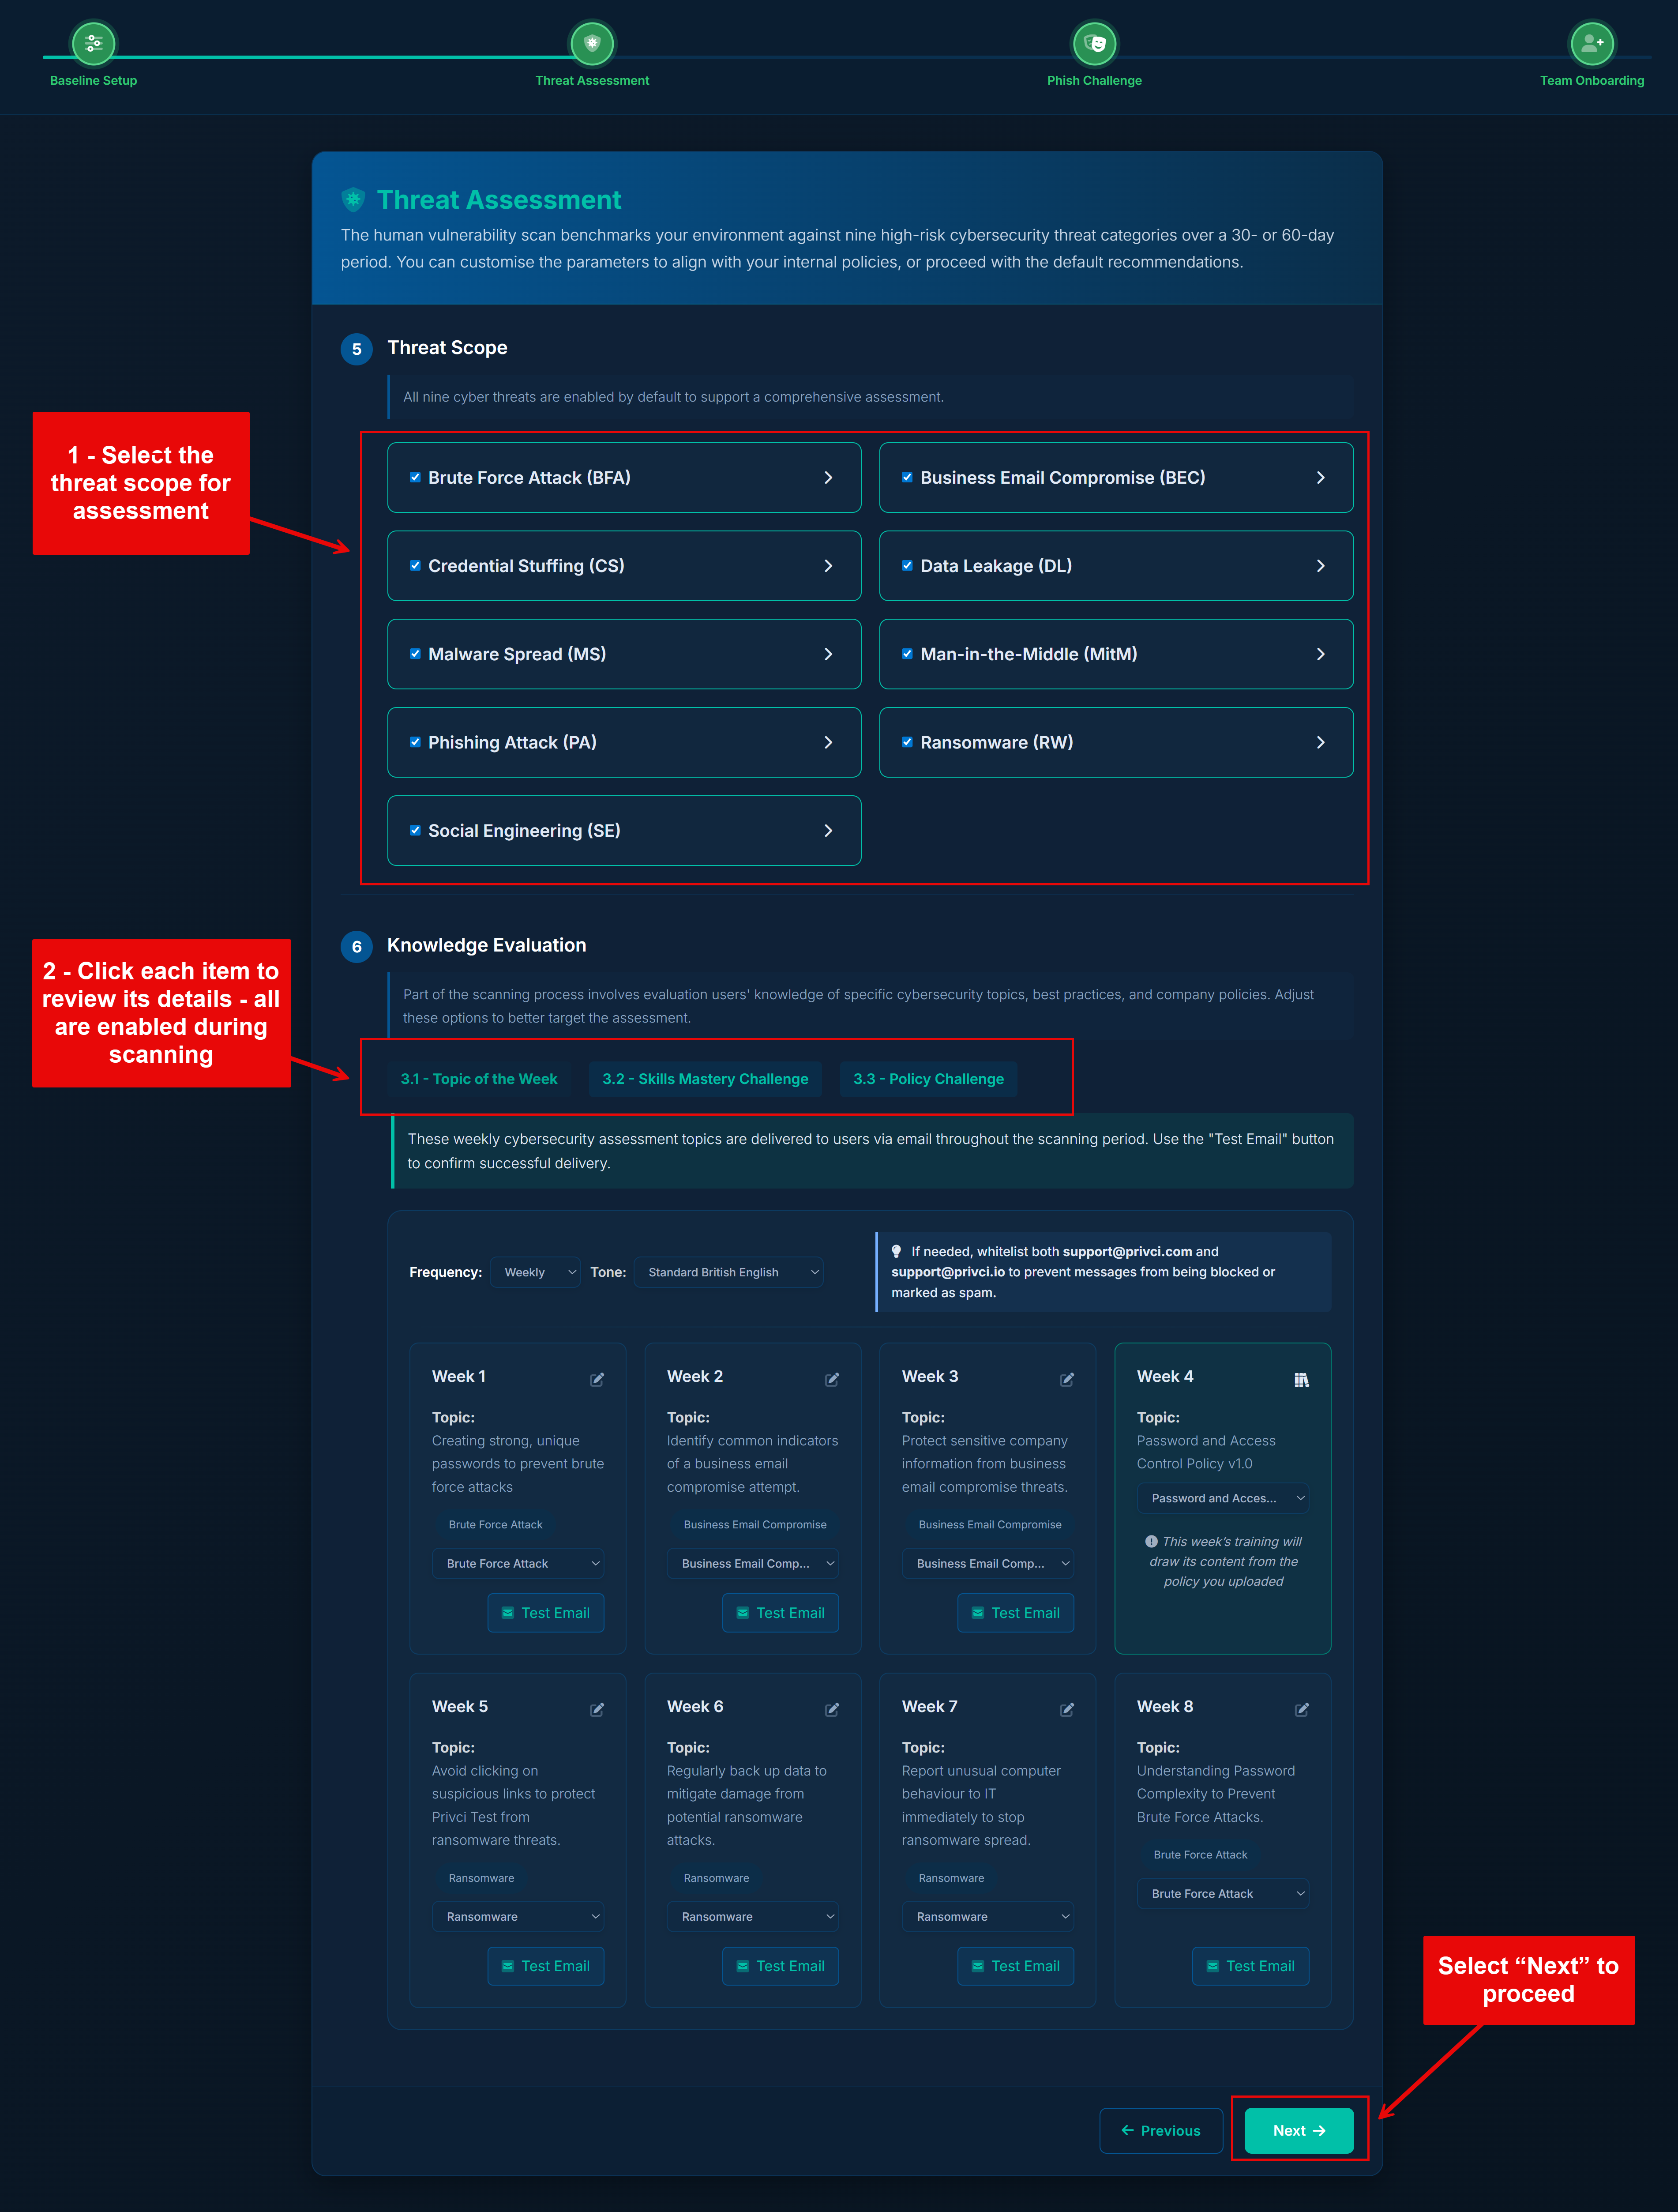
Note: Default settings are designed to work well for most organisations. You generally do not need to change these options for your first scan. Advanced configuration can be fine‑tuned later from the admin portal under Awareness Engine and Change Engine settings.
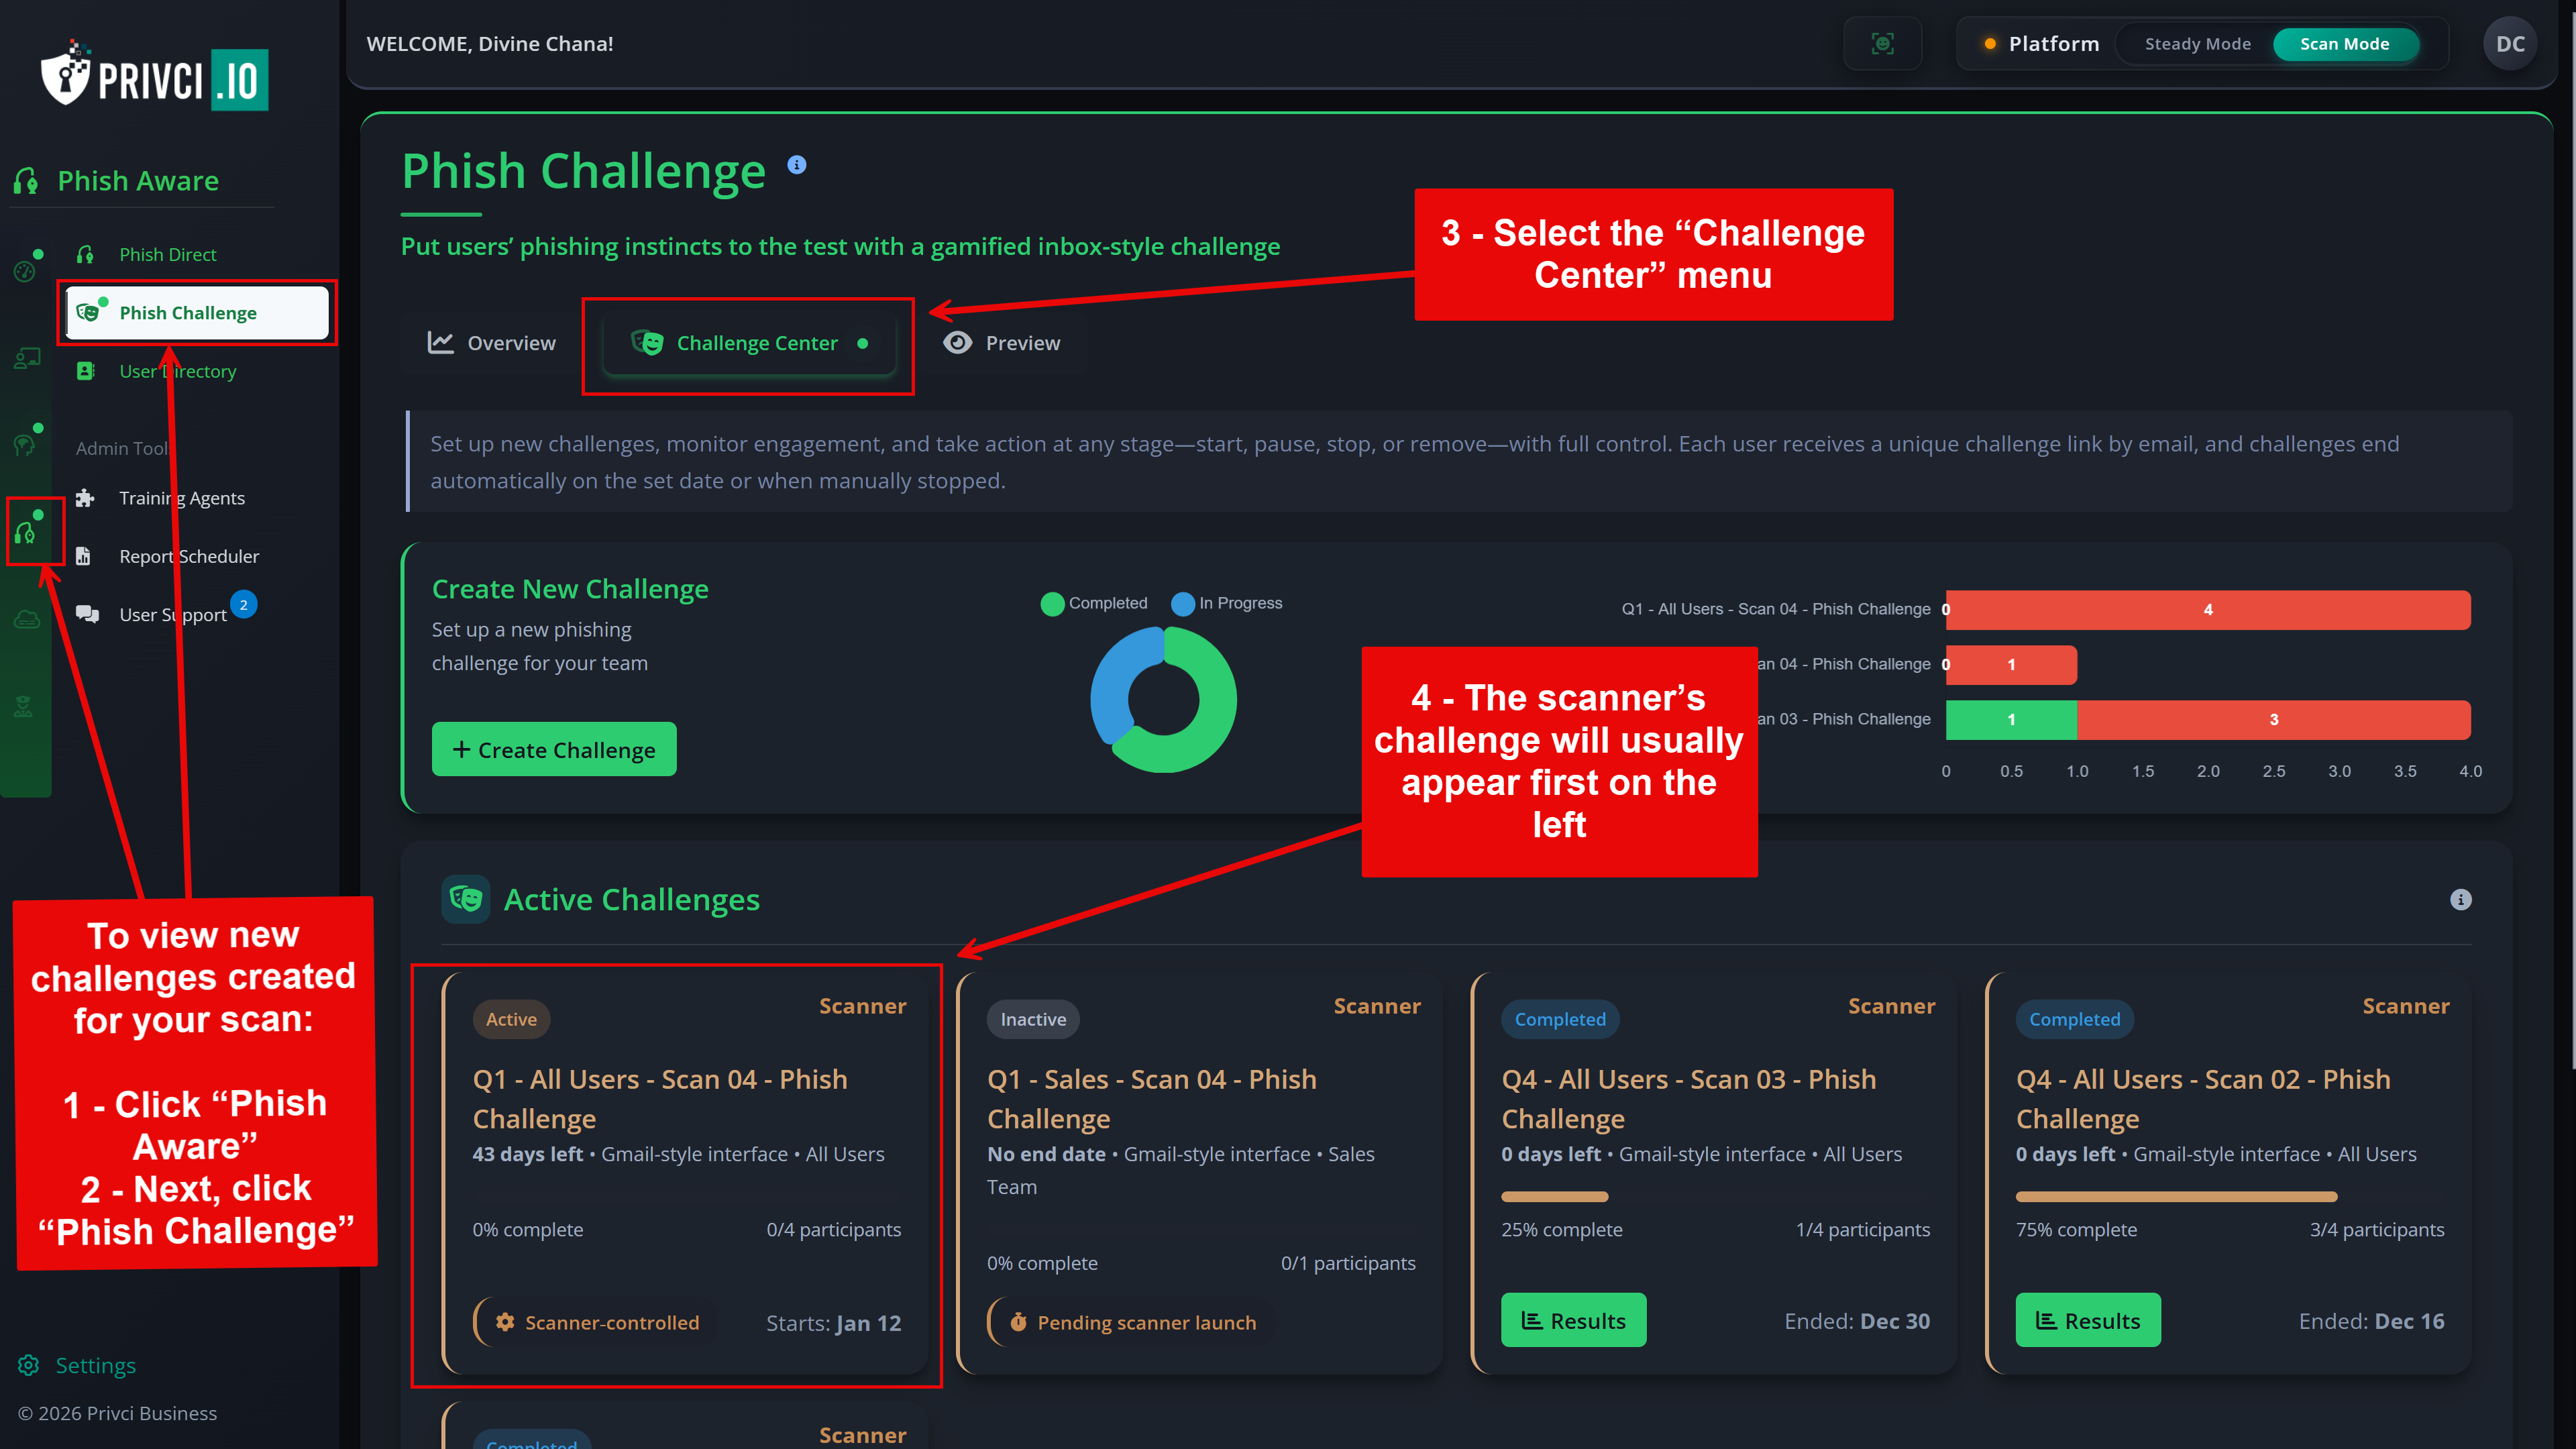
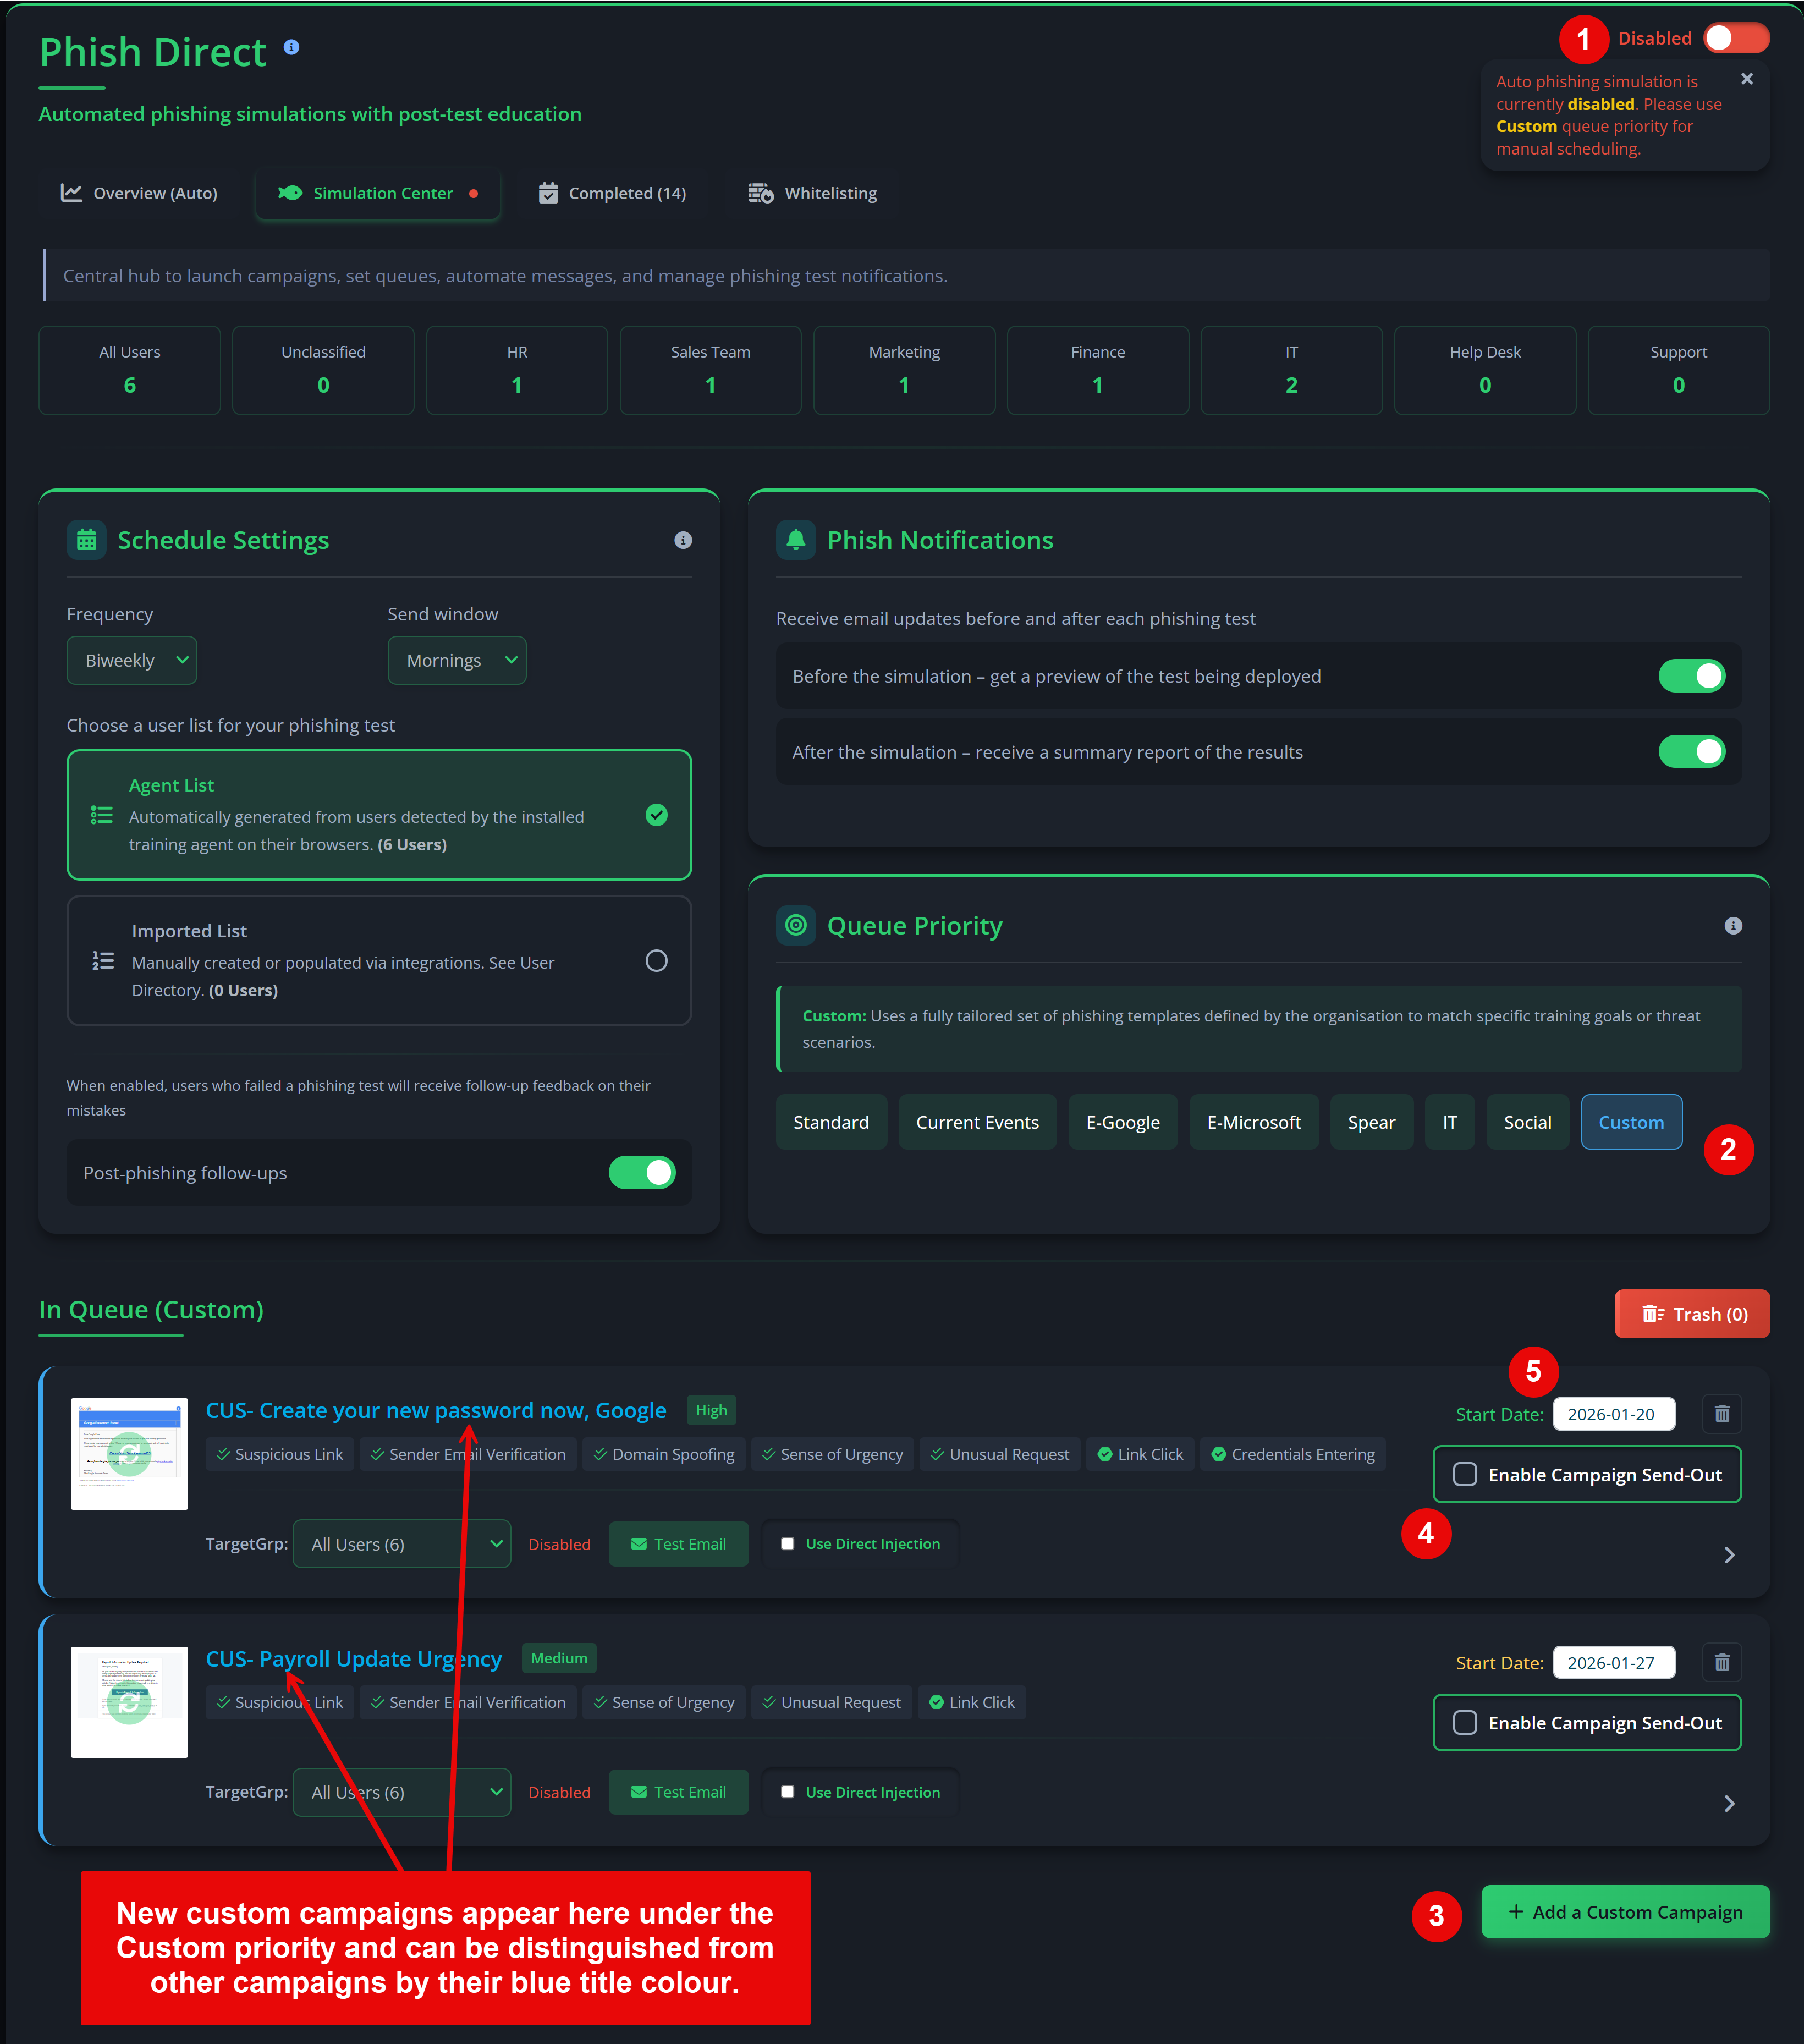
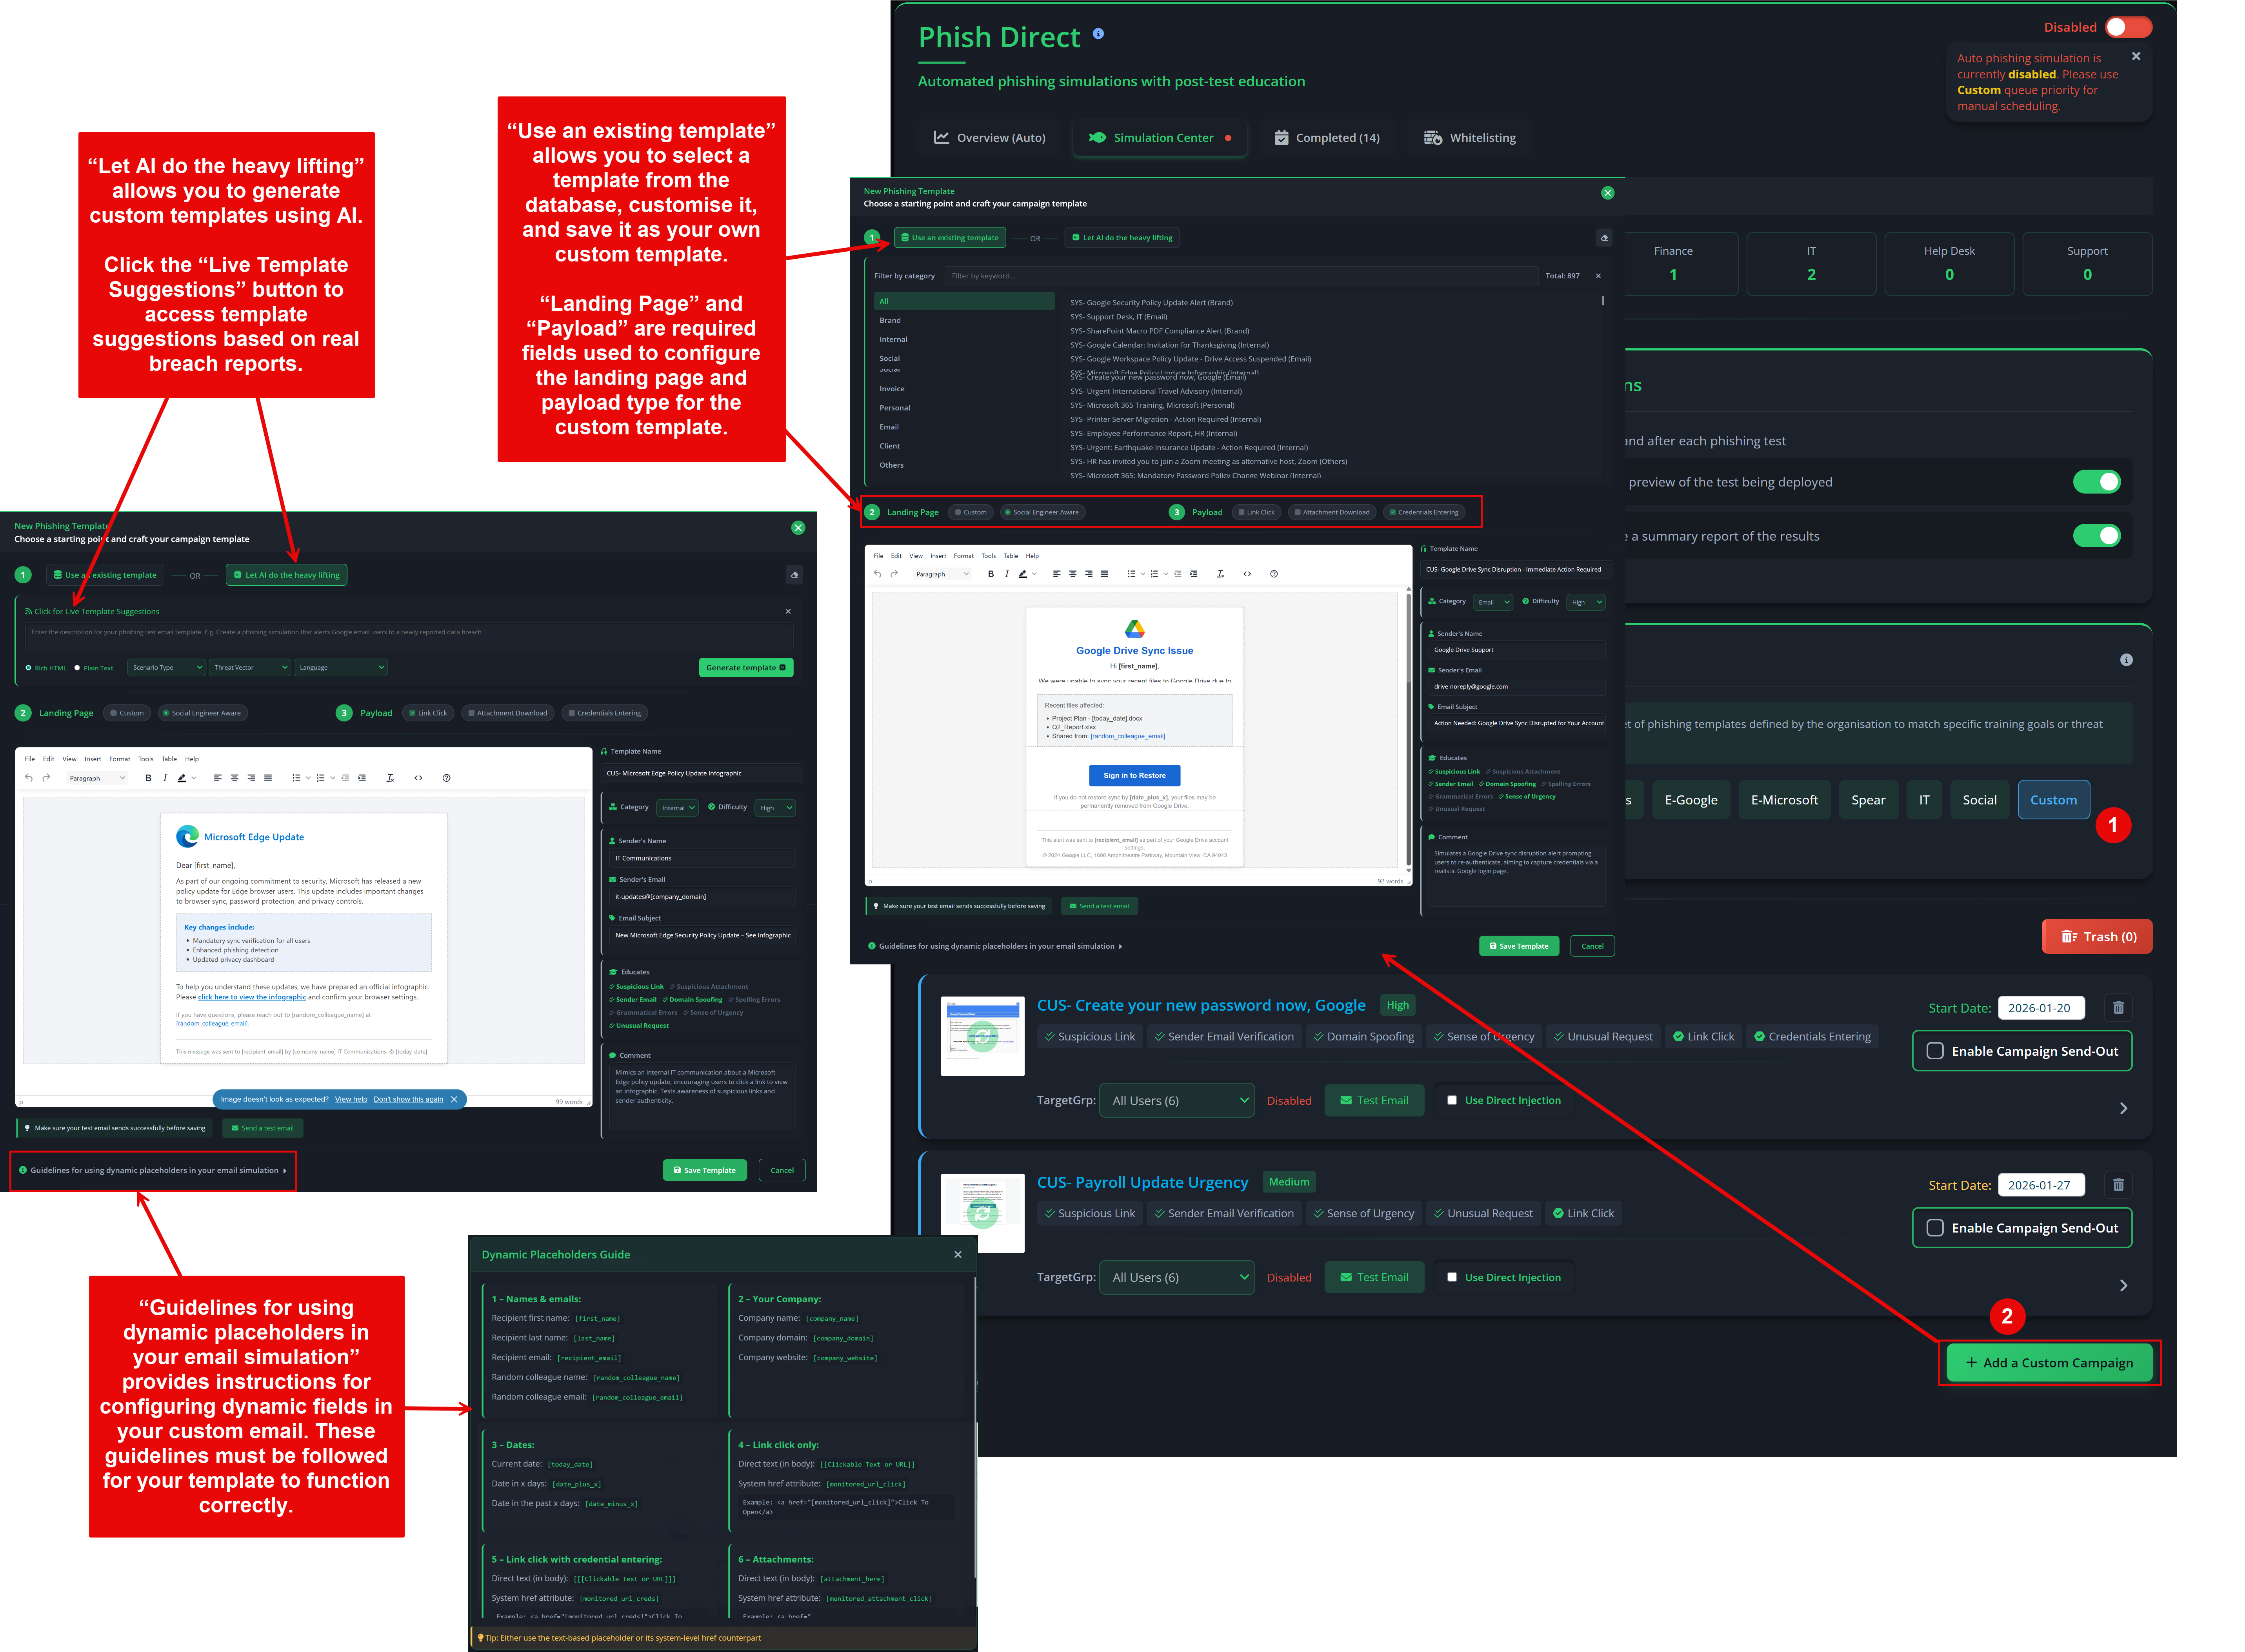
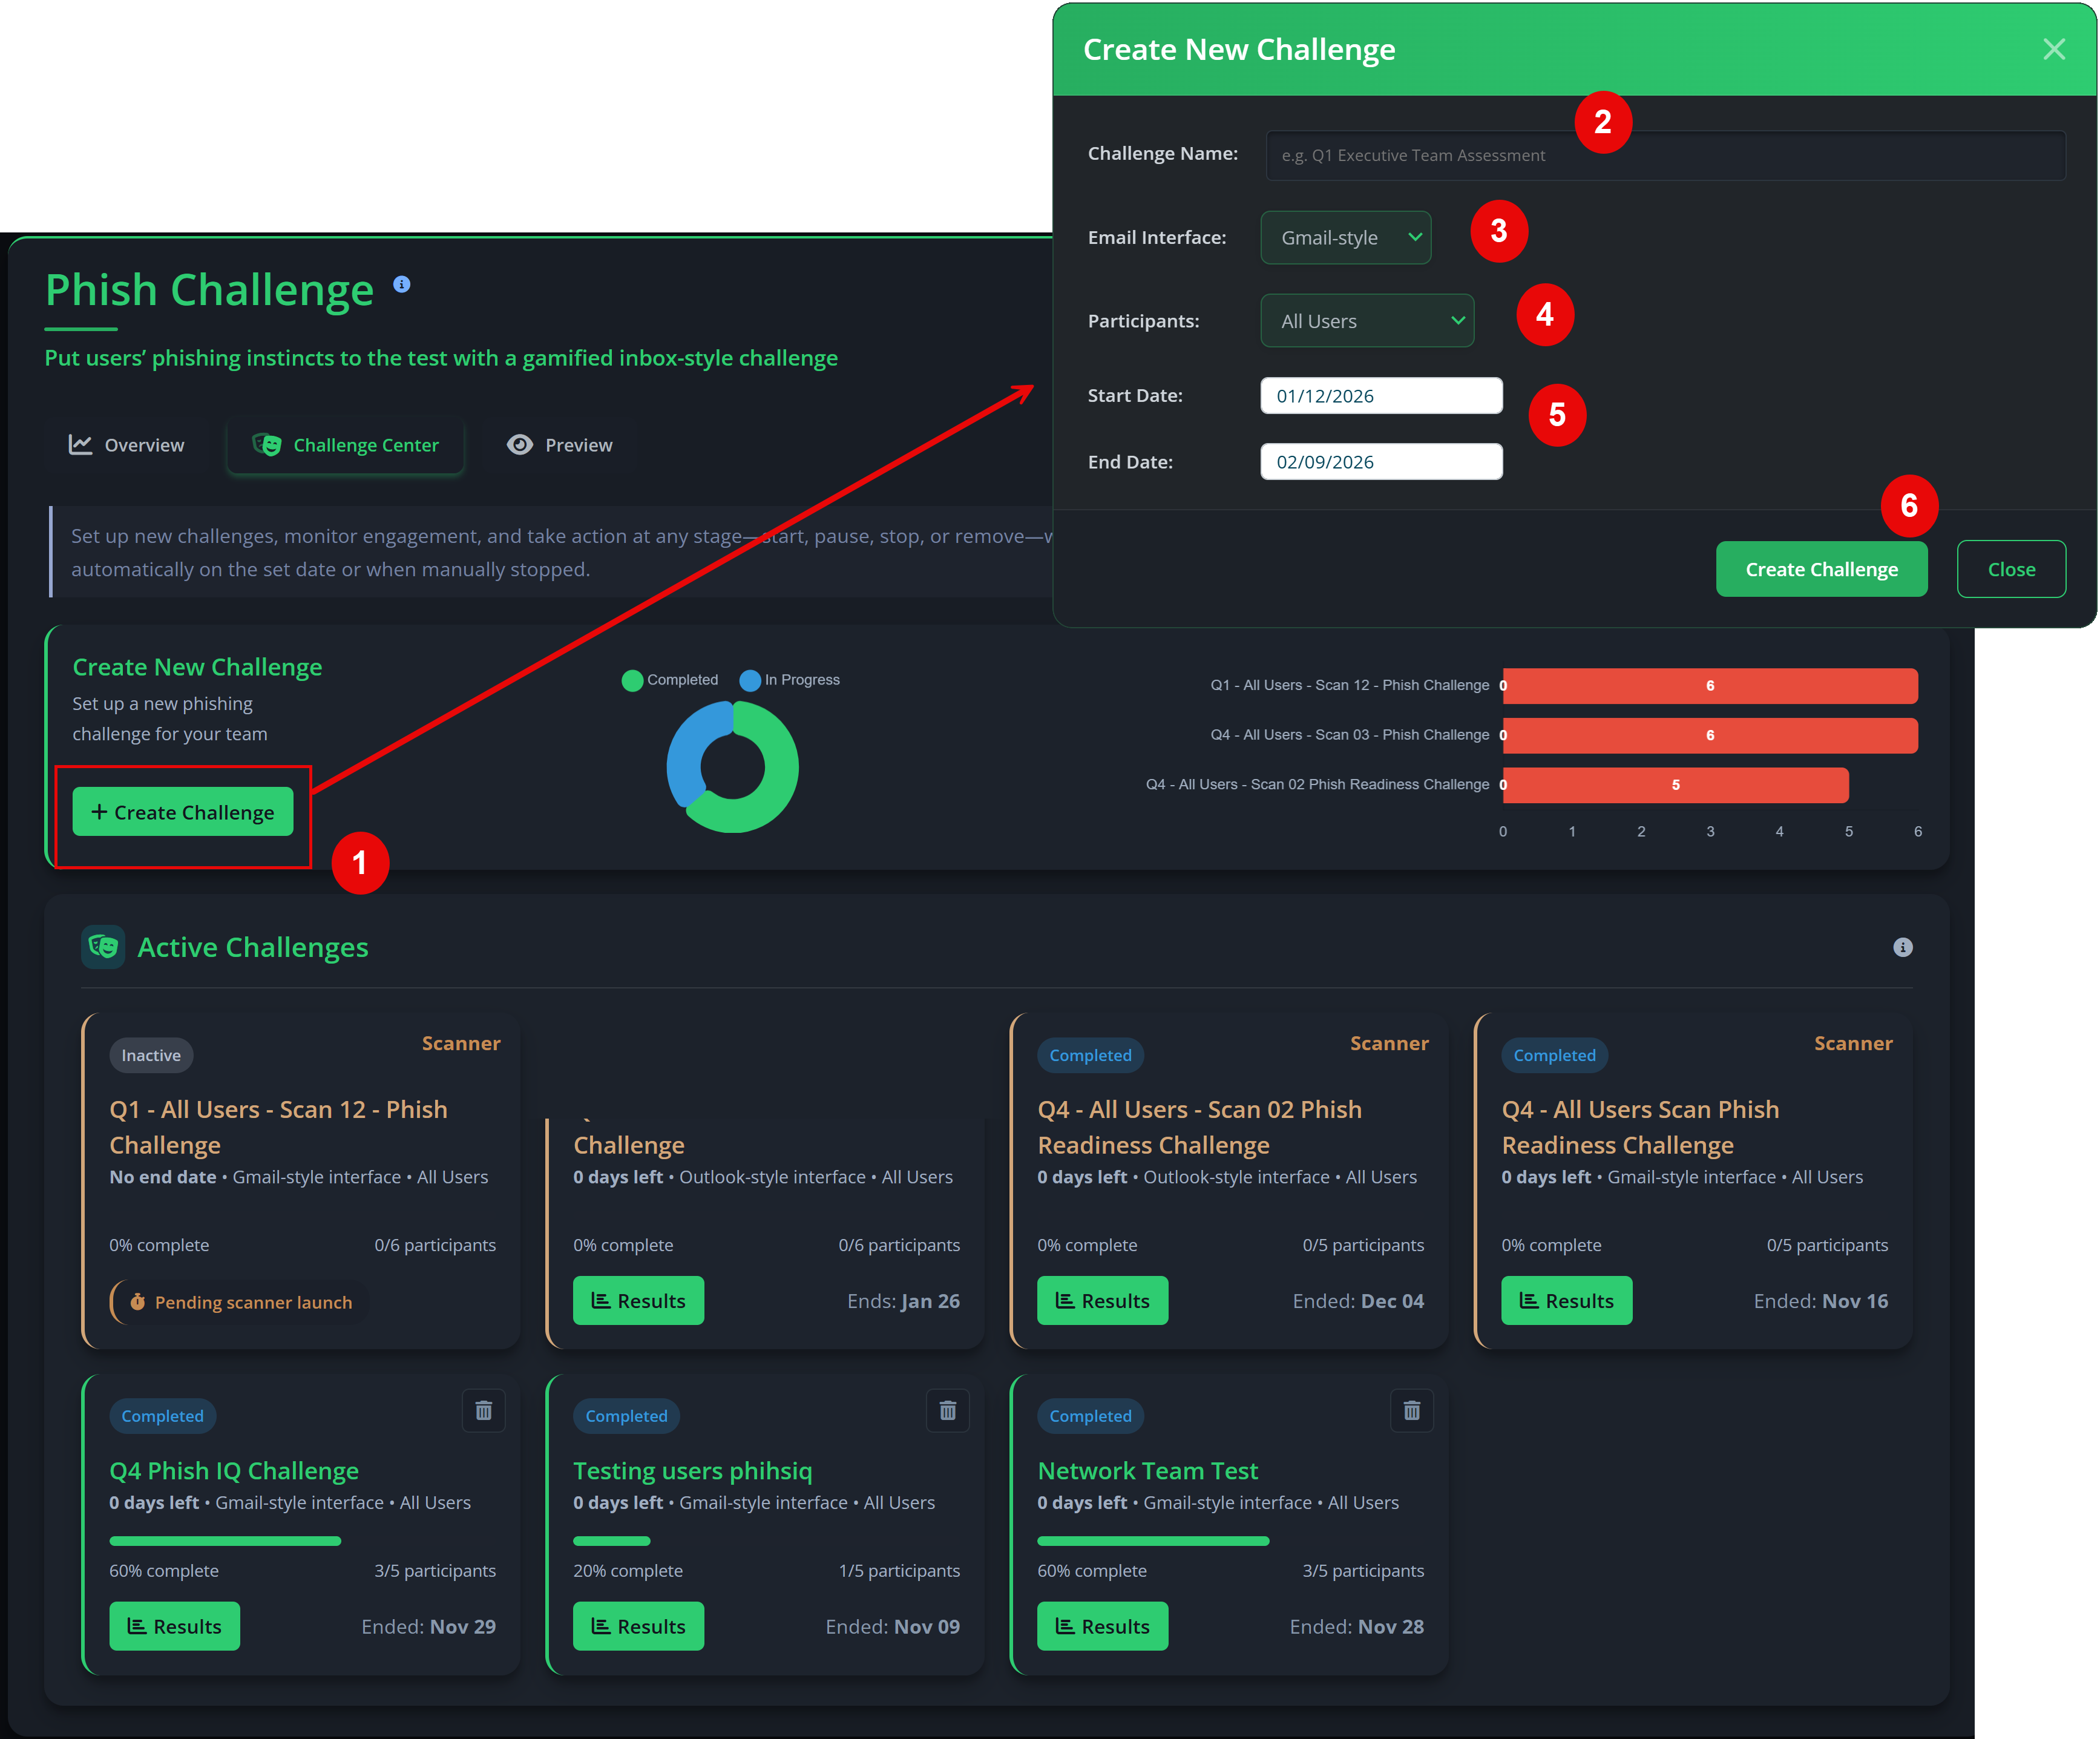
Phish Challenge
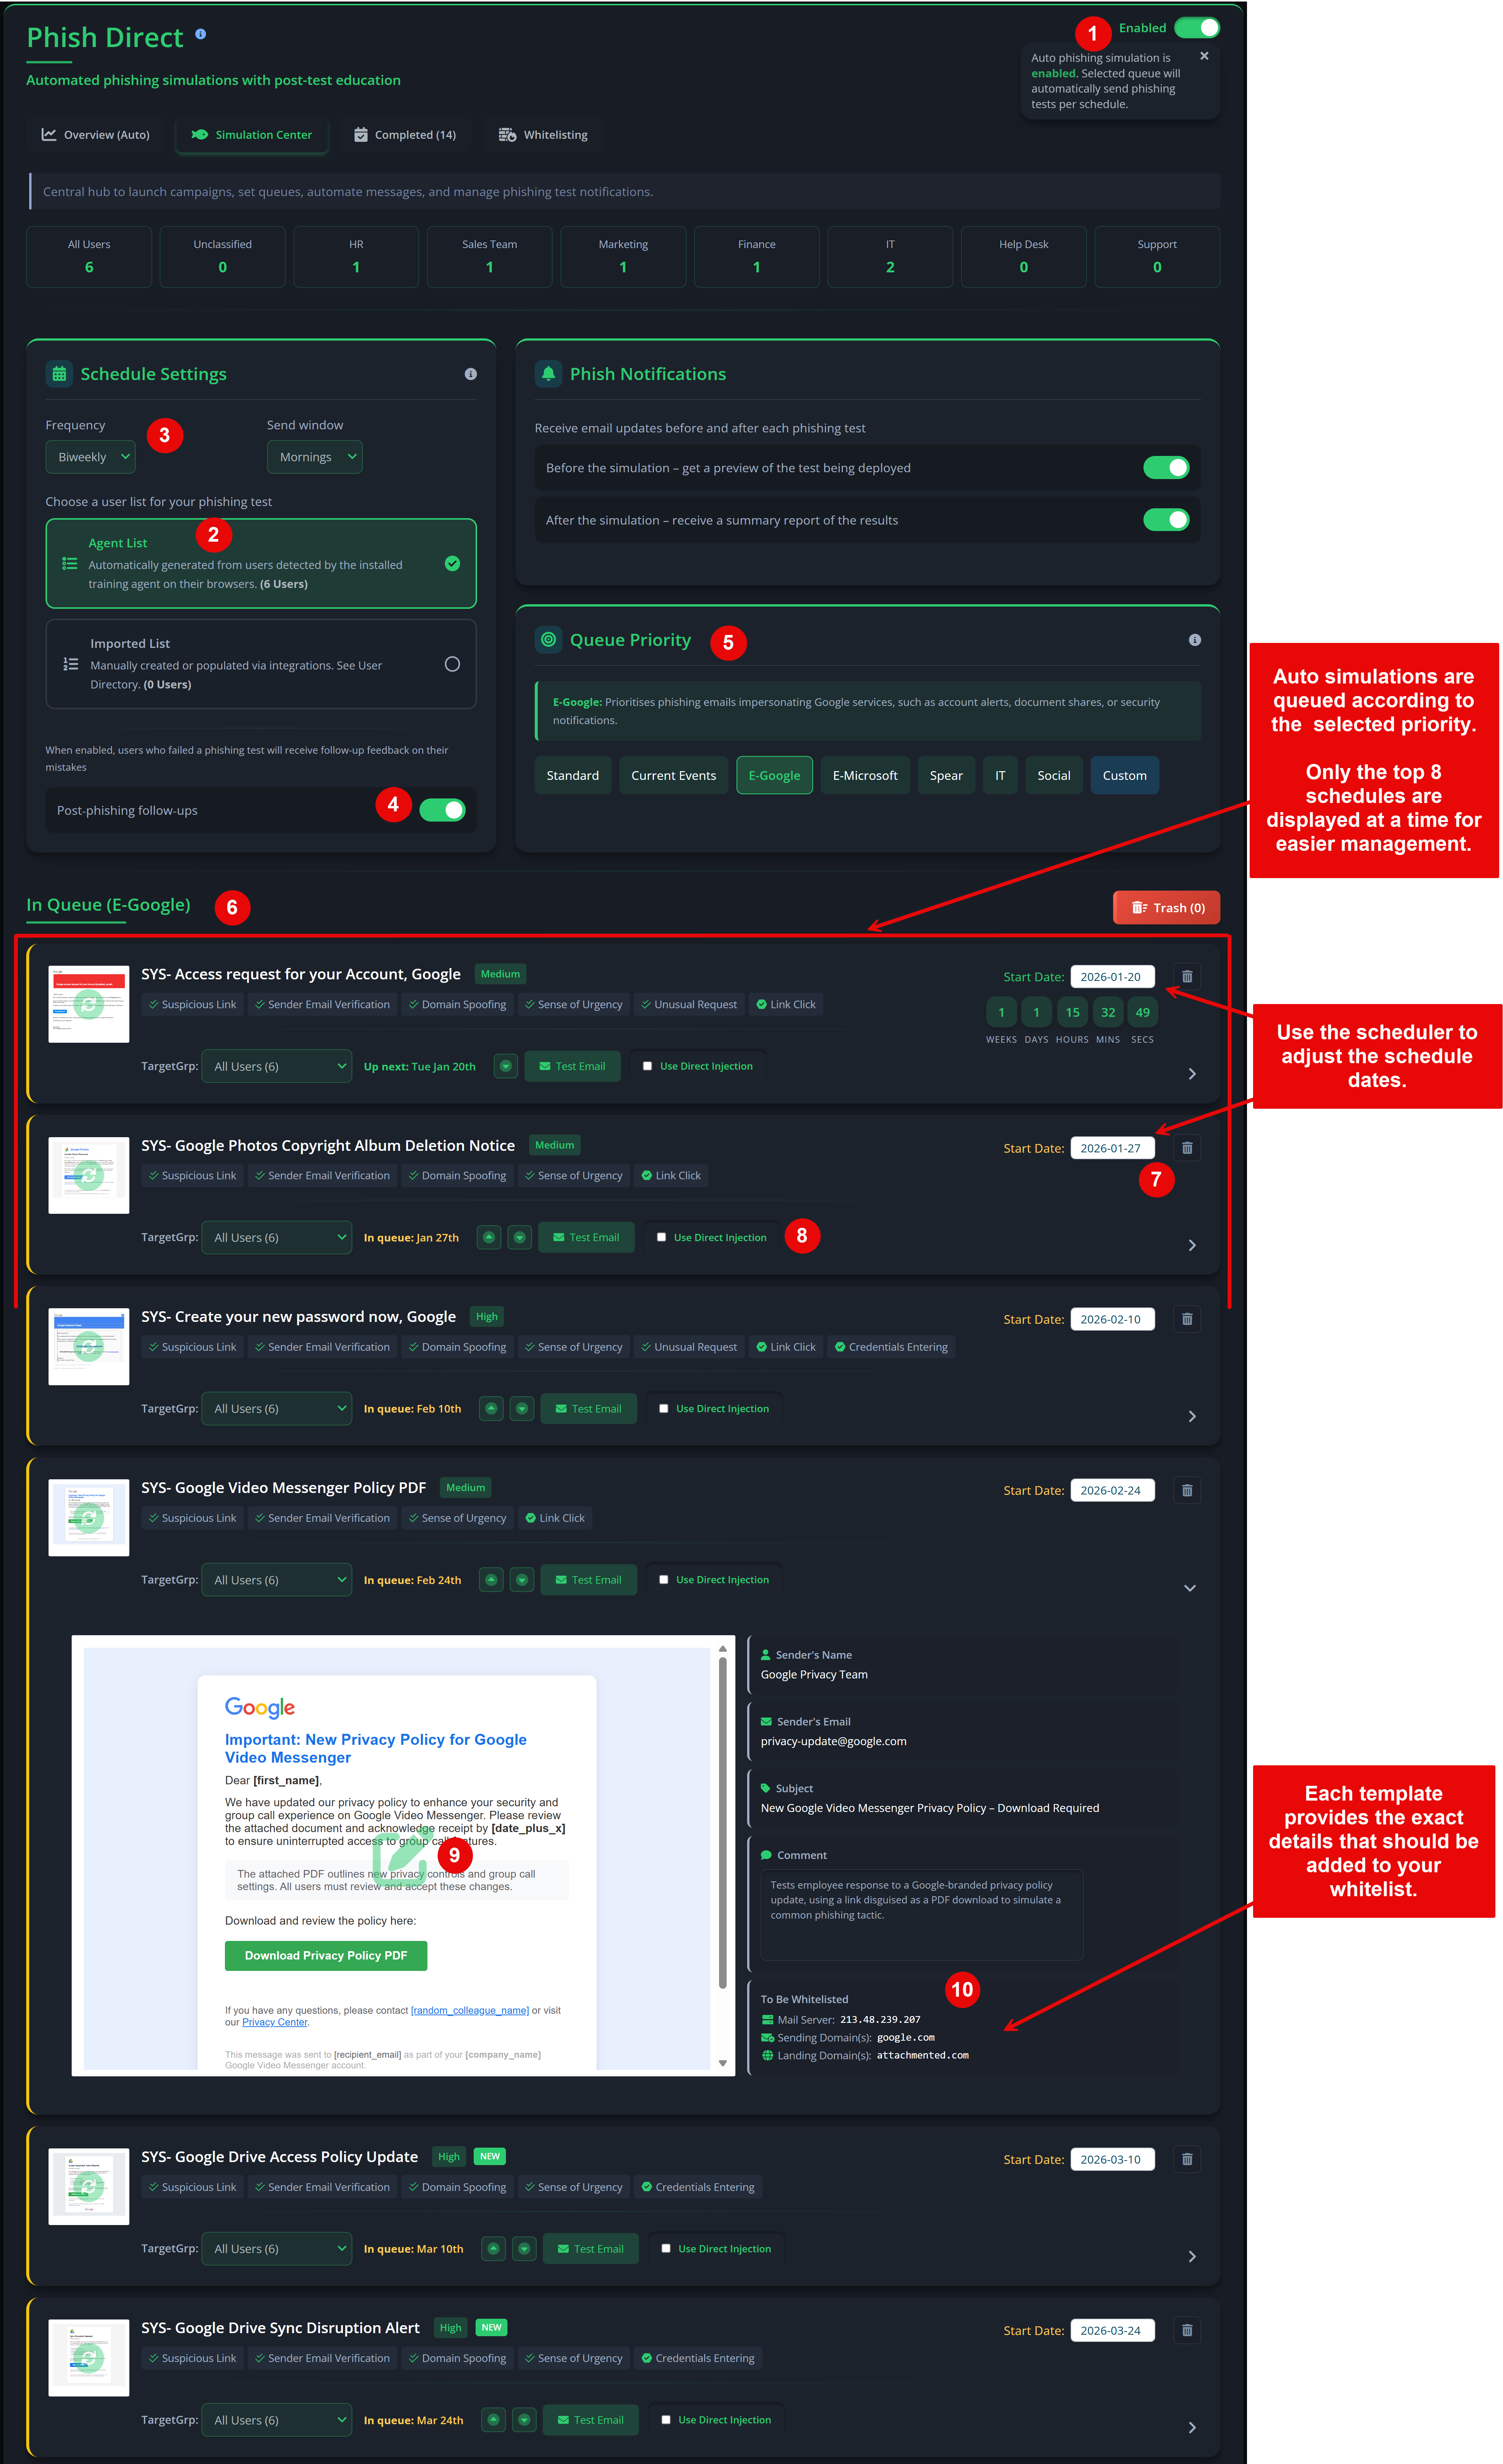
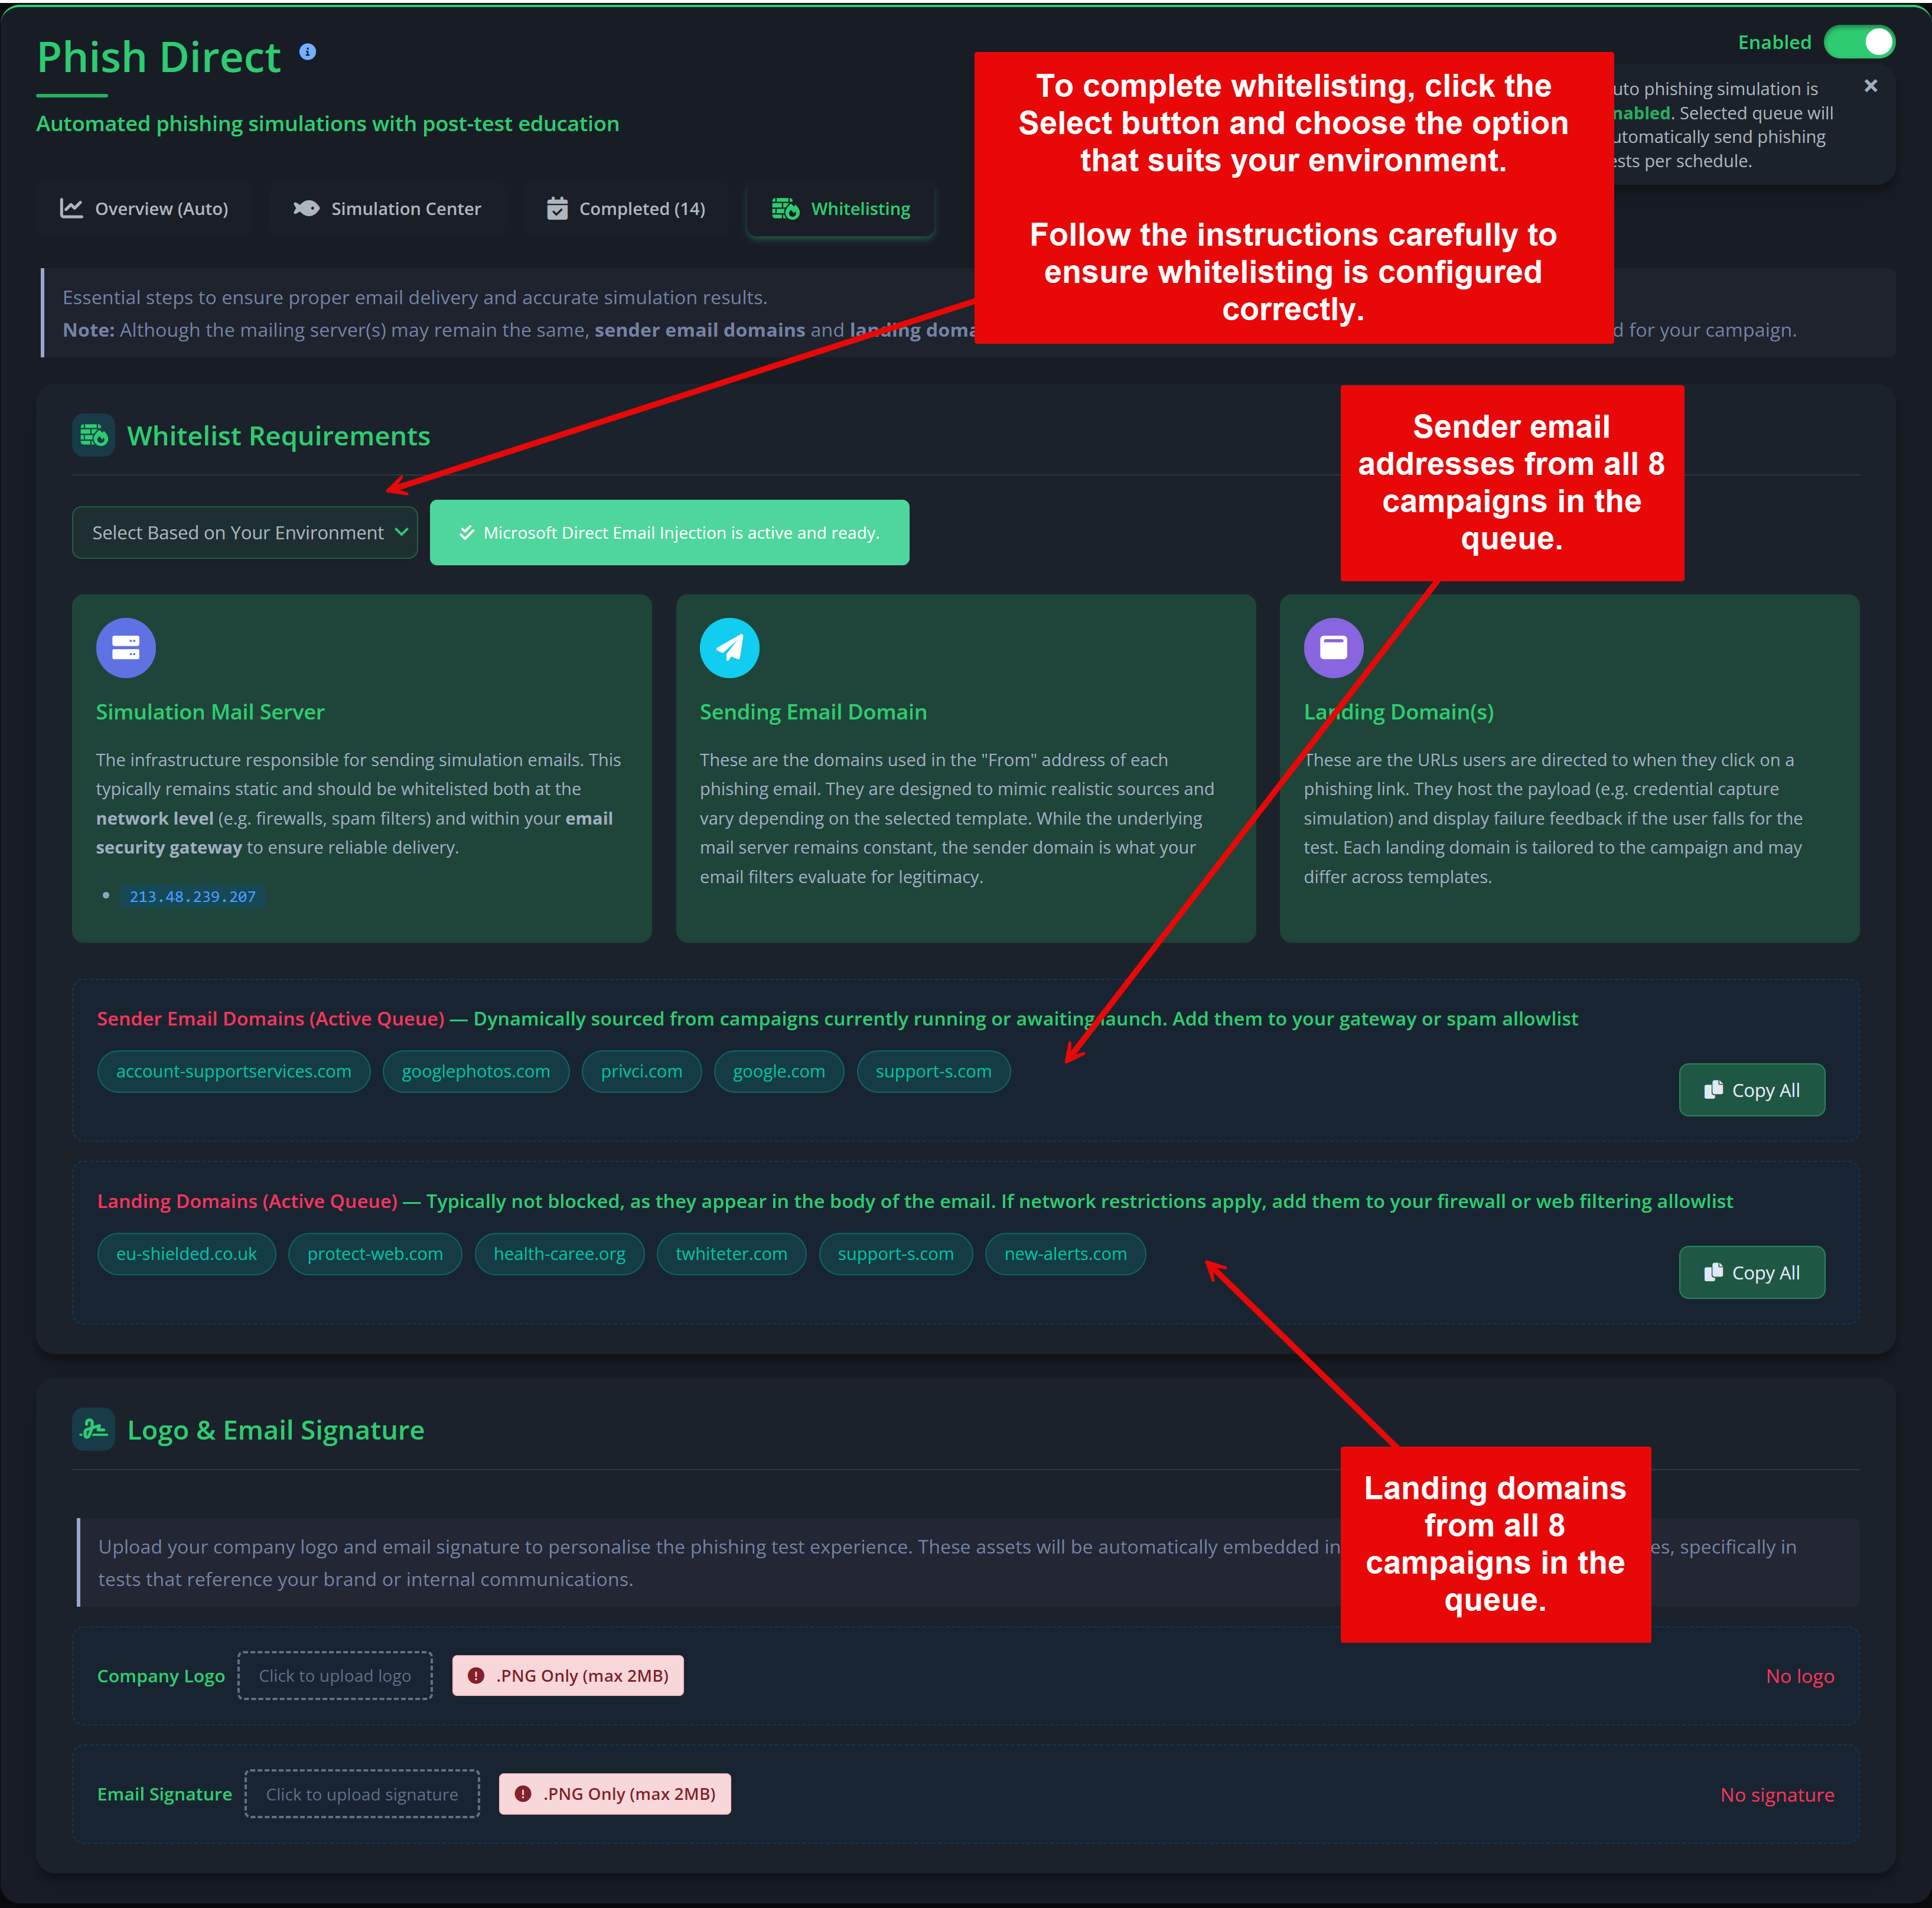
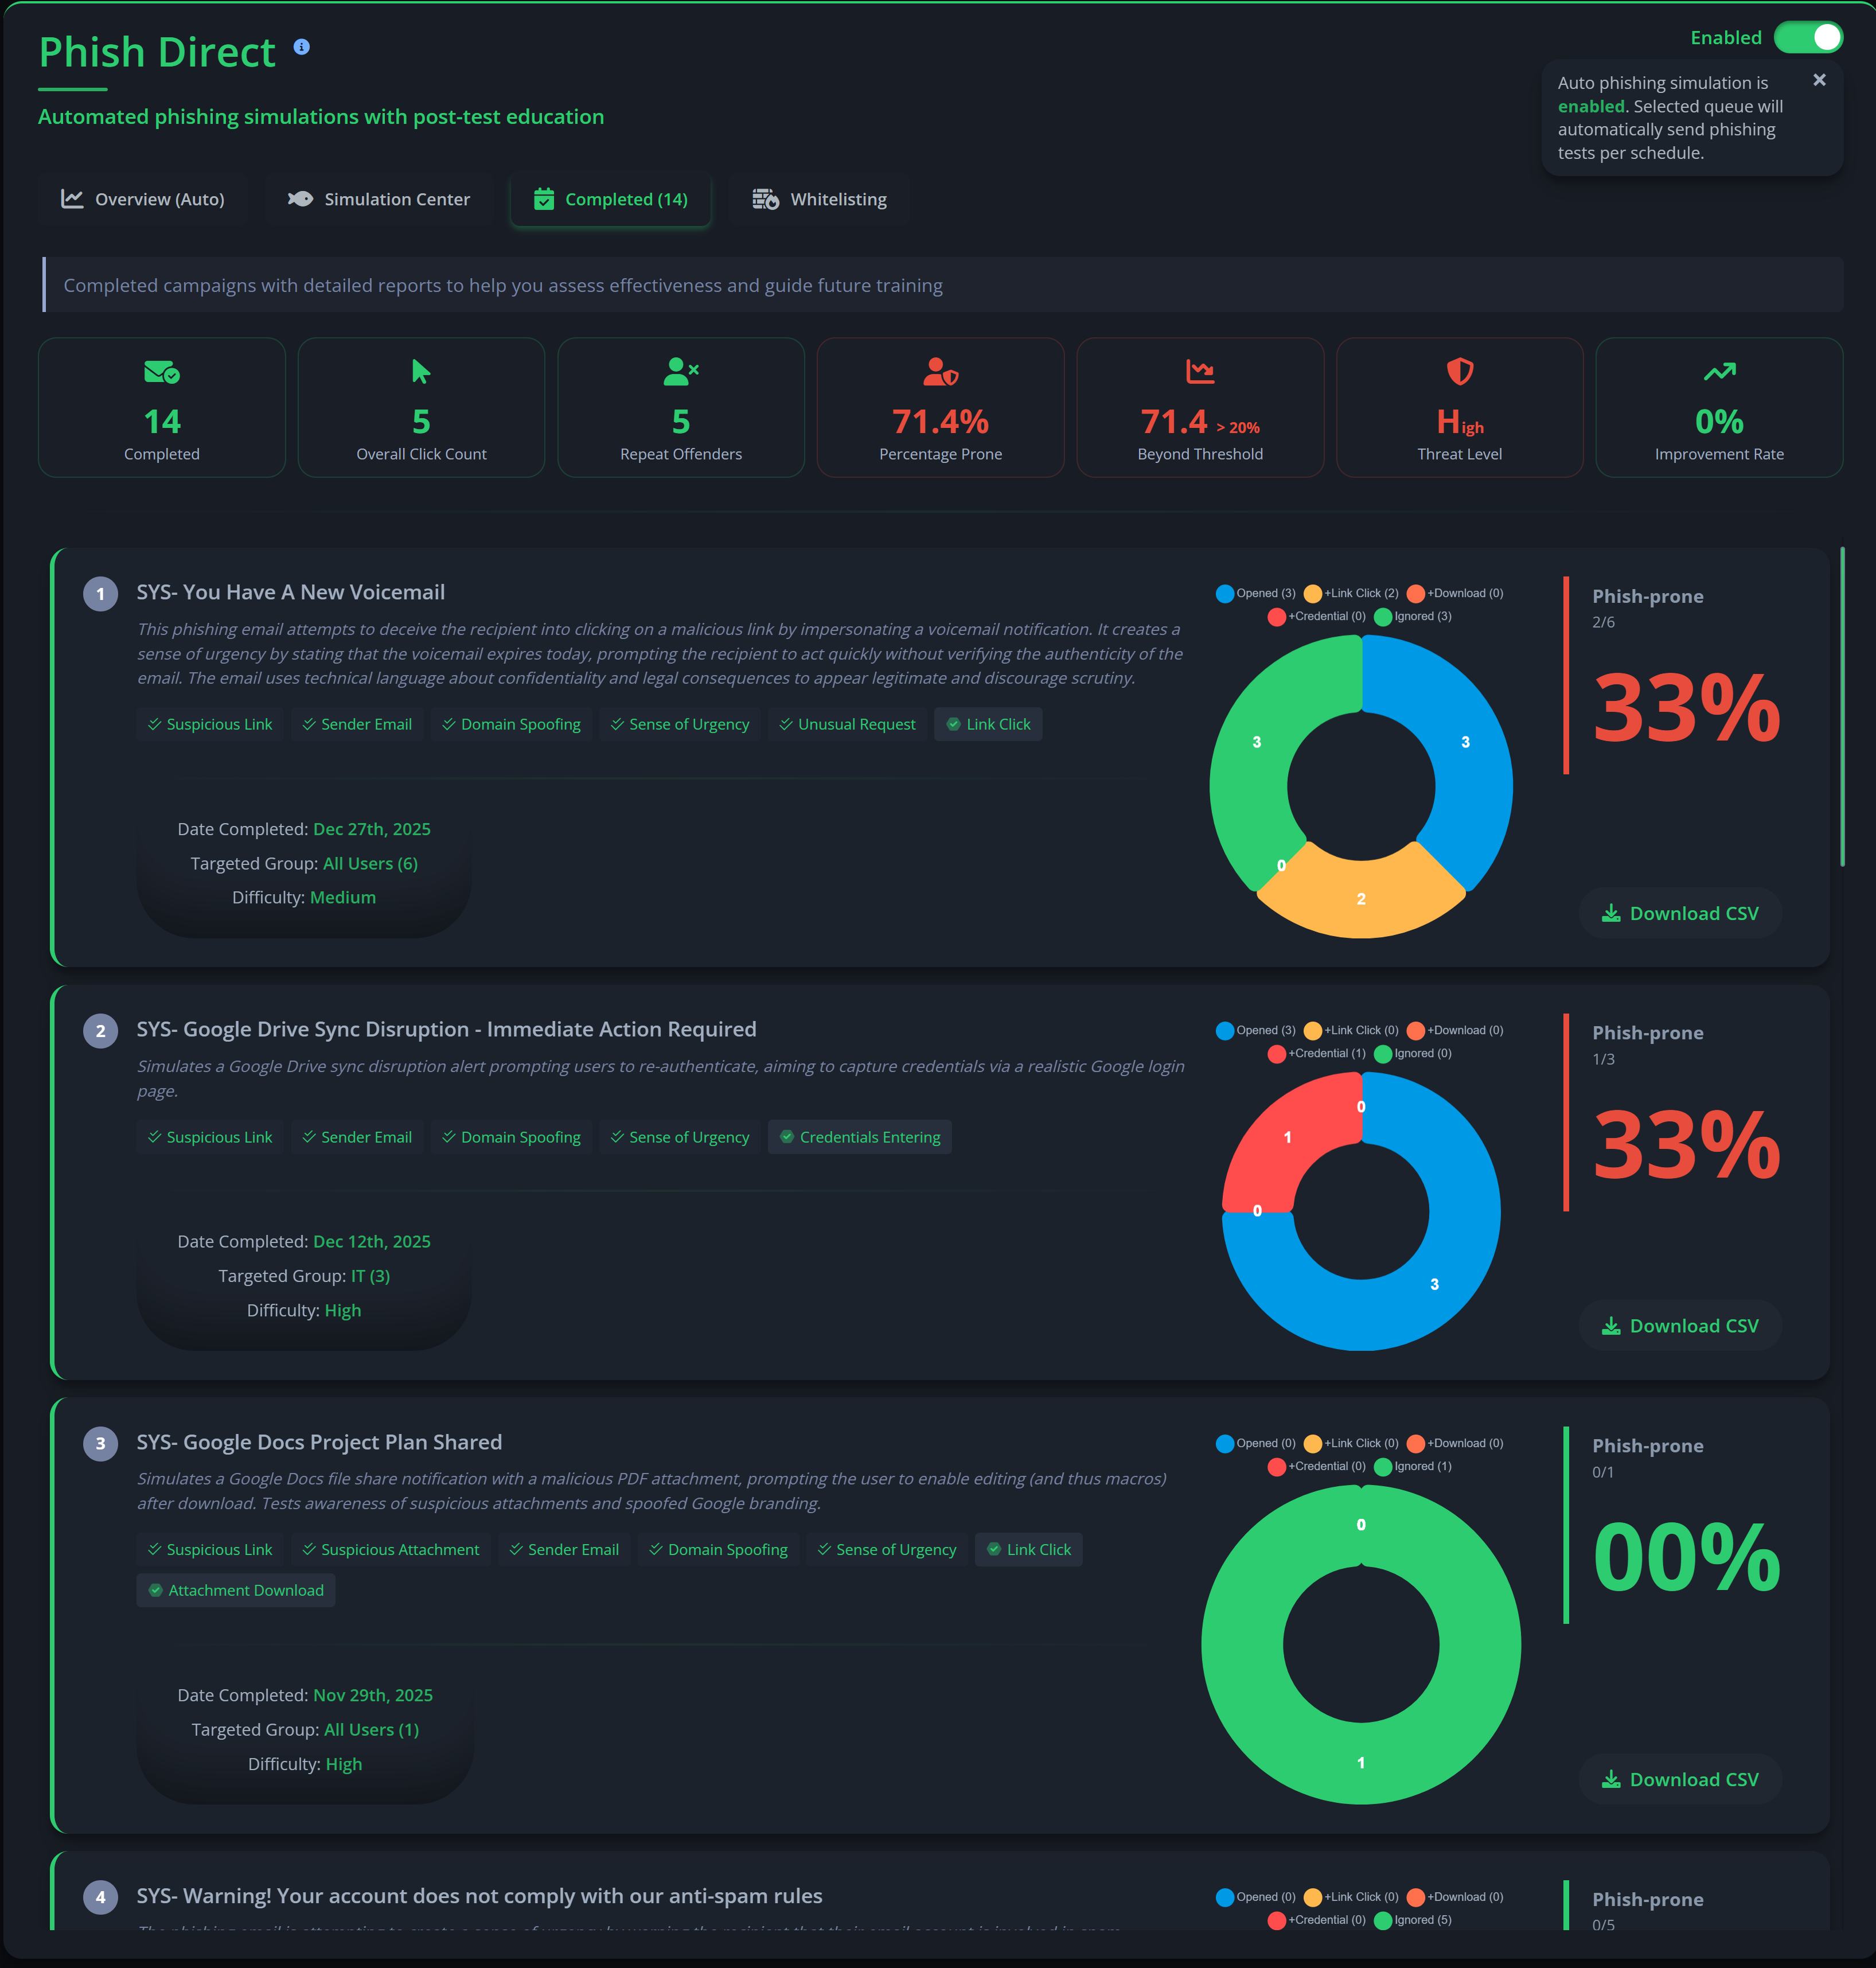
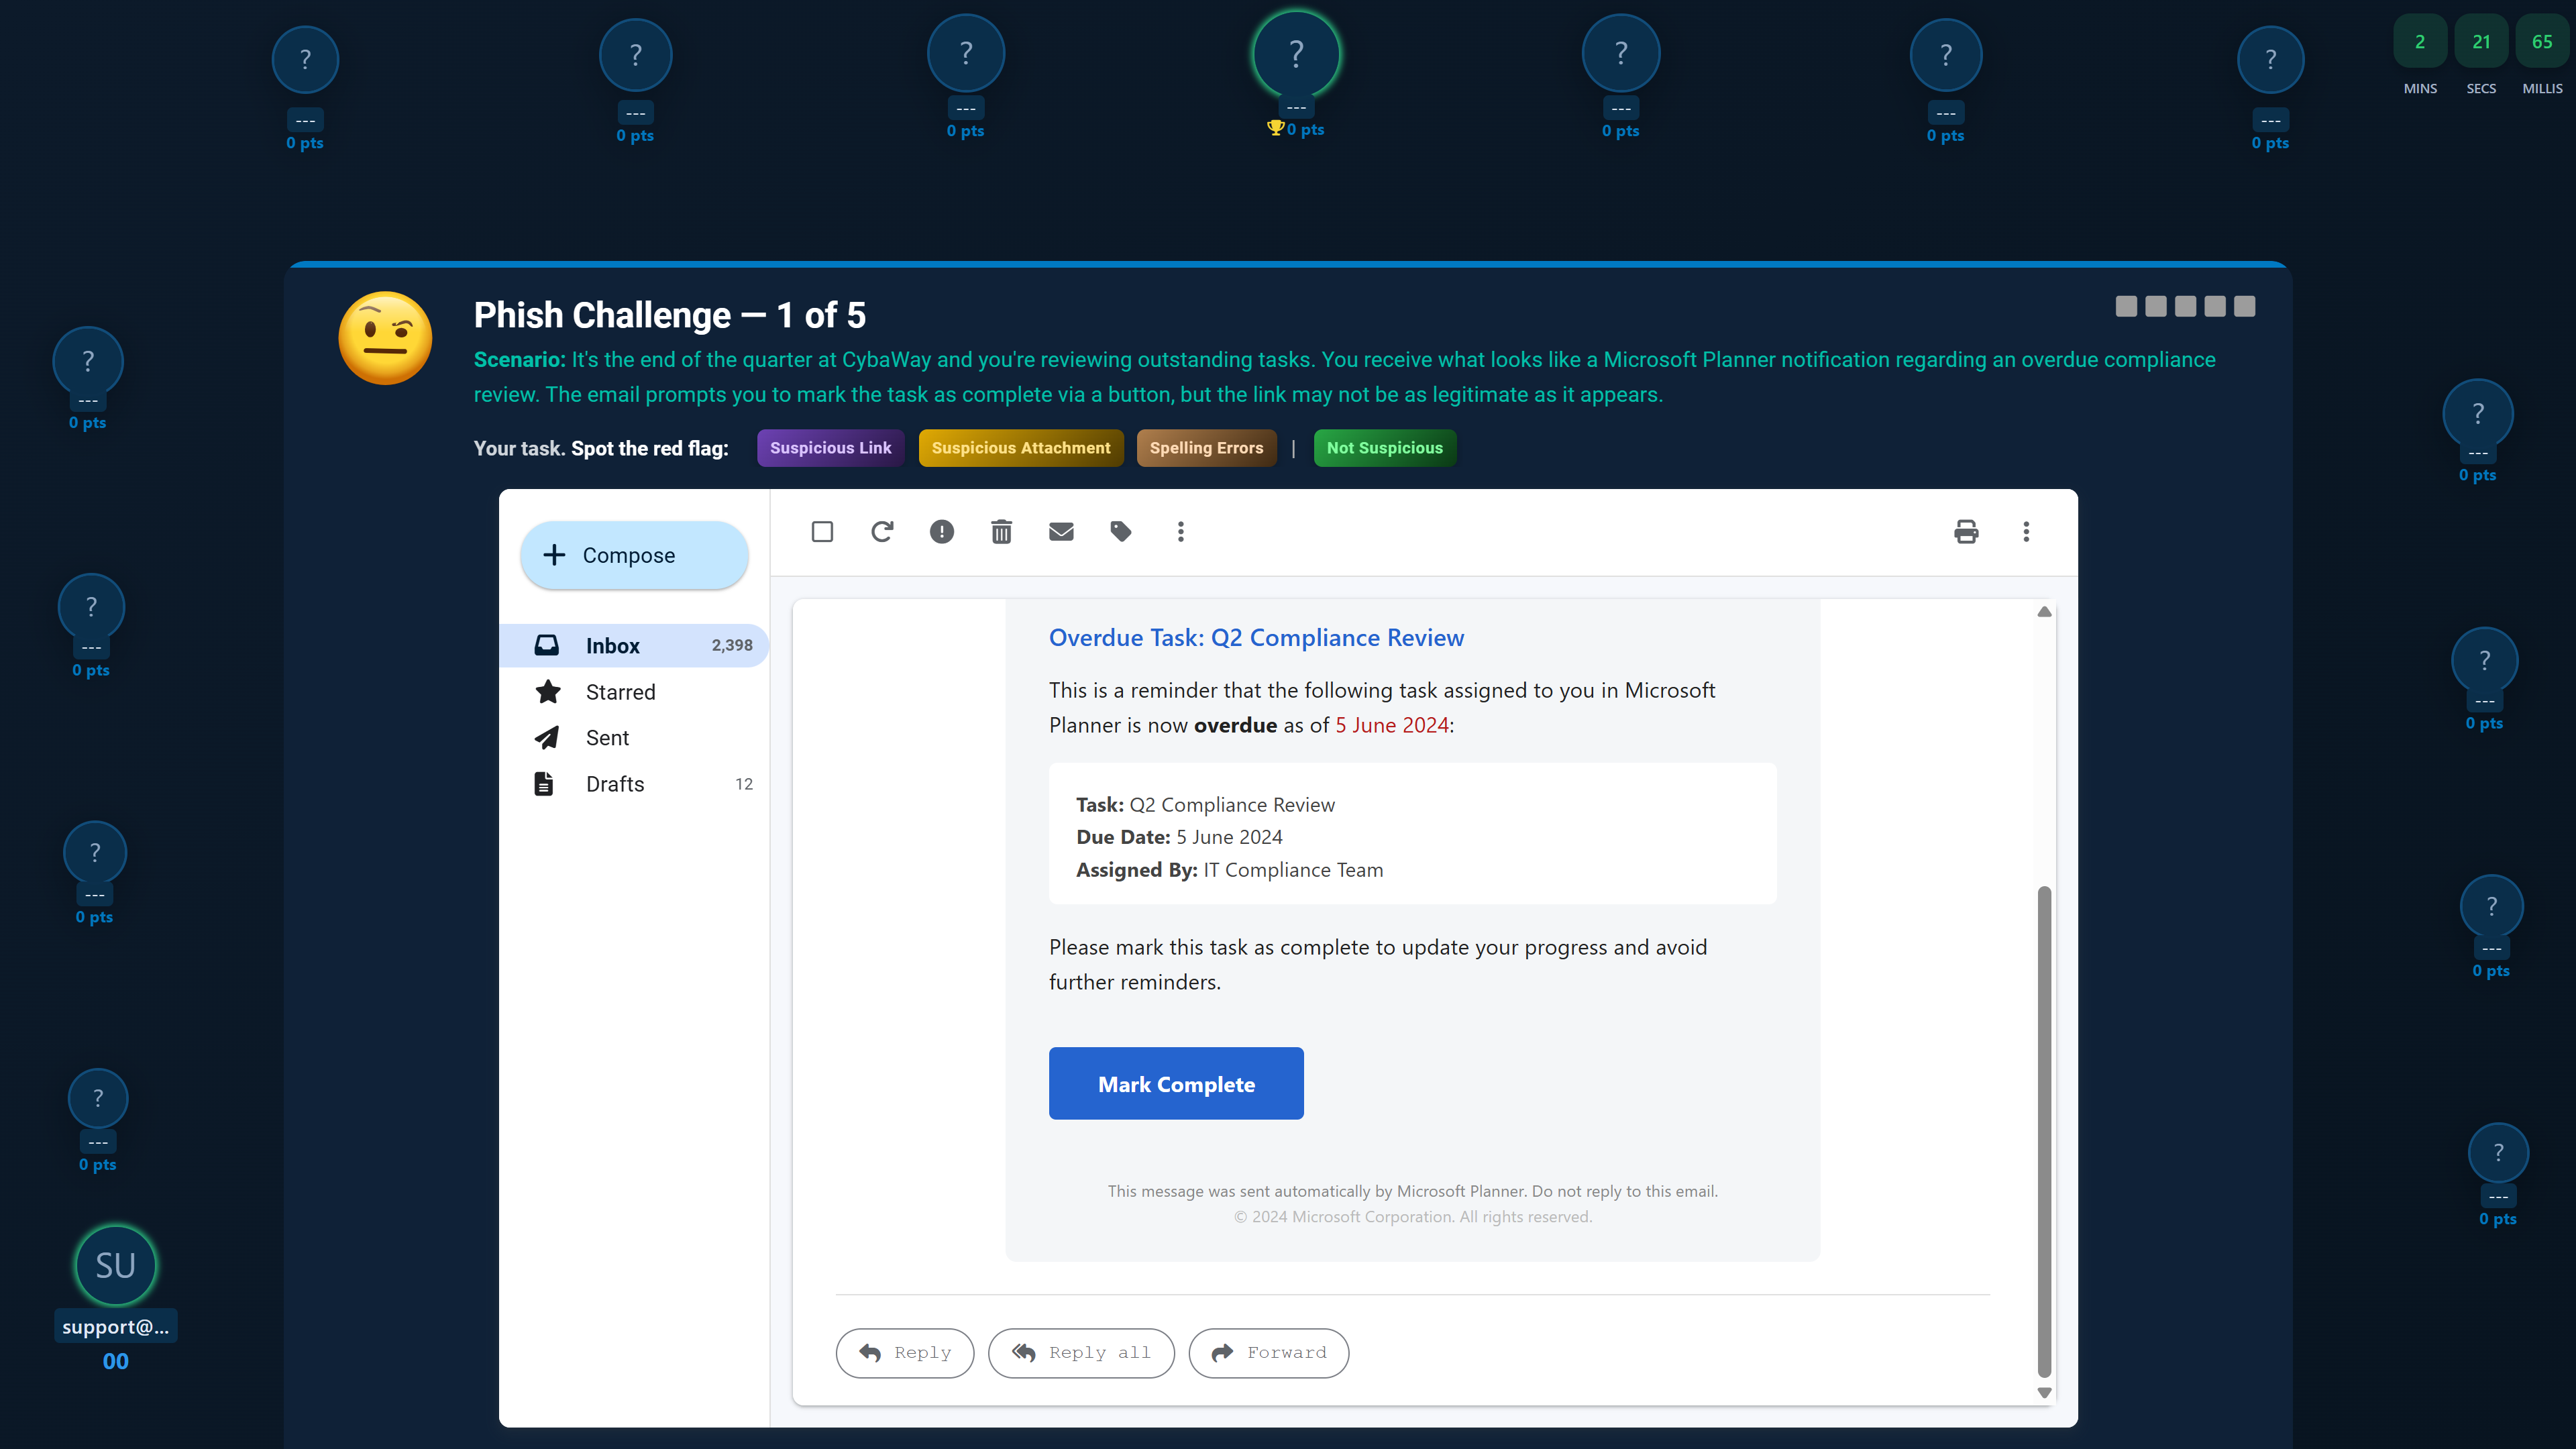
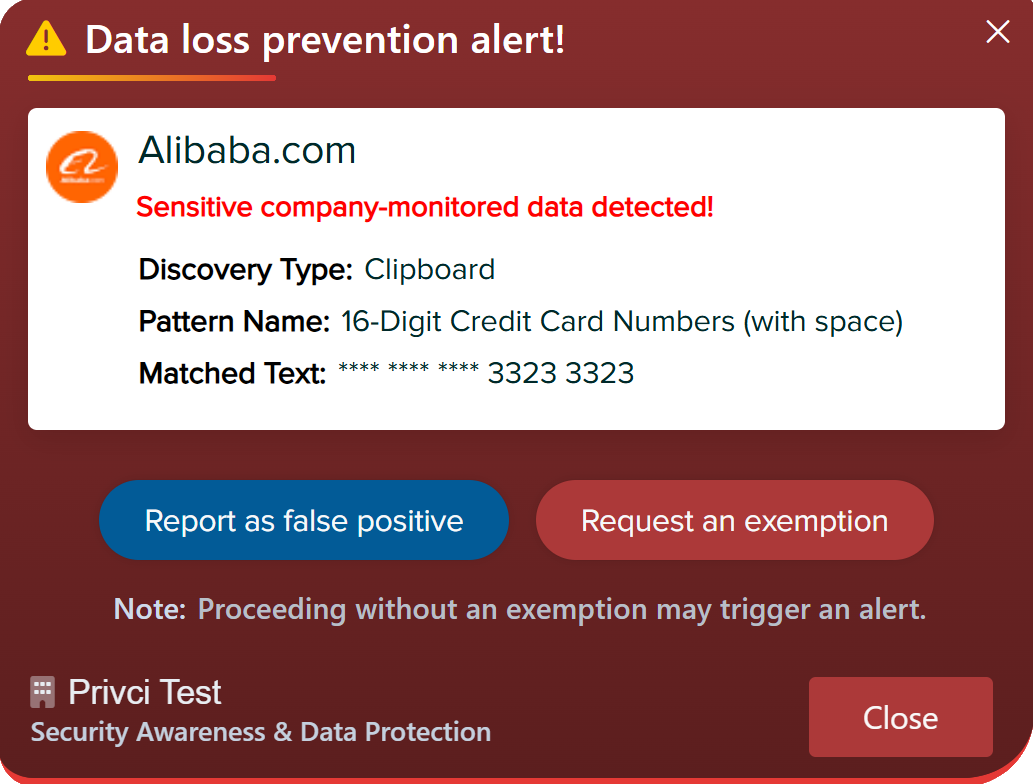
Each scan includes a built‑in Phish Challenge, which assesses users’ ability to recognise phishing indicators without requiring mail server whitelisting. You can optionally enable full phishing simulations (Phish Tests) during the scan, which do require whitelisting before the scheduled send date.
- Phish Master Challenge. Choose the email interface that best matches your organisation’s primary email client. During the scan, users are invited to participate in a phishing challenge that measures both detection skills and response speed. Results contribute to individual scores and the Master Leaderboard.
-
Auto‑Simulation (Requires whitelisting).
If you want live phishing simulations:
- Enable “Auto‑Simulation”.
- Whitelist the sender IP addresses and domains used by Privci.
- Confirm whitelisting before your scheduled phishing campaign date.
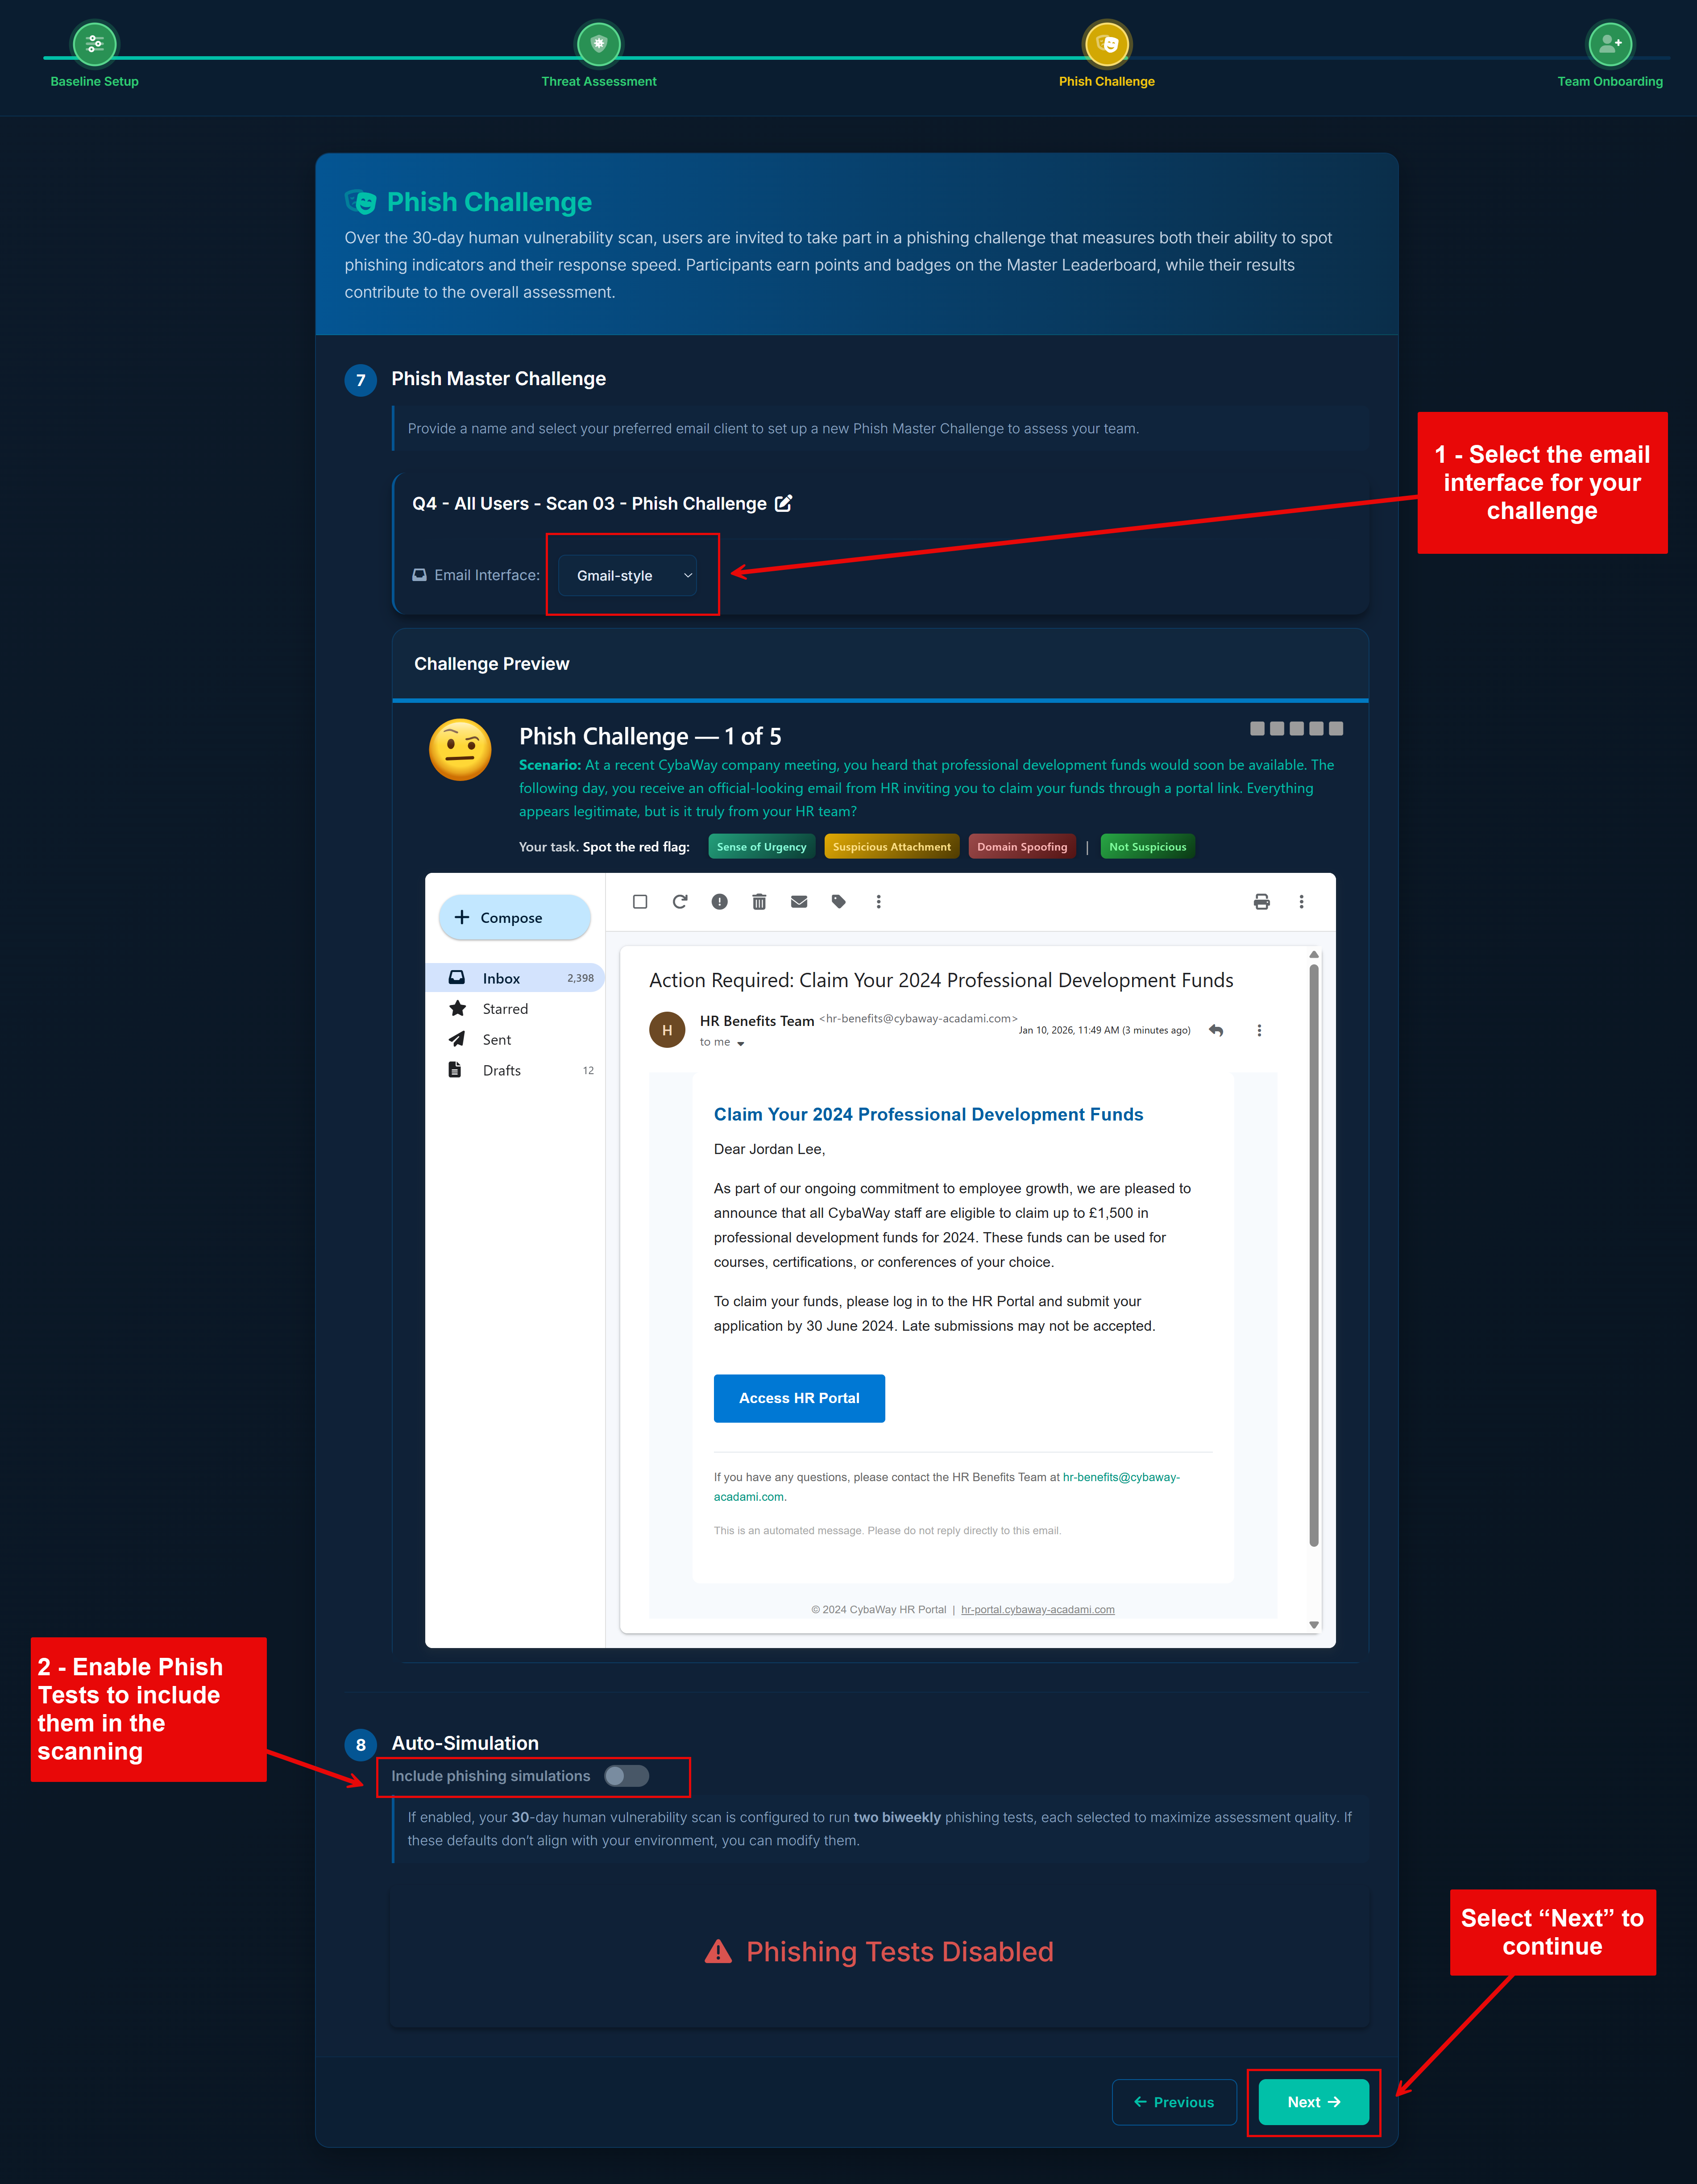
Note: Detailed configuration for both Phish Challenge and Phish Tests is available in the admin portal under Phish Aware. Whitelisting guides and advanced options (templates, schedules, reporting) are also provided there.
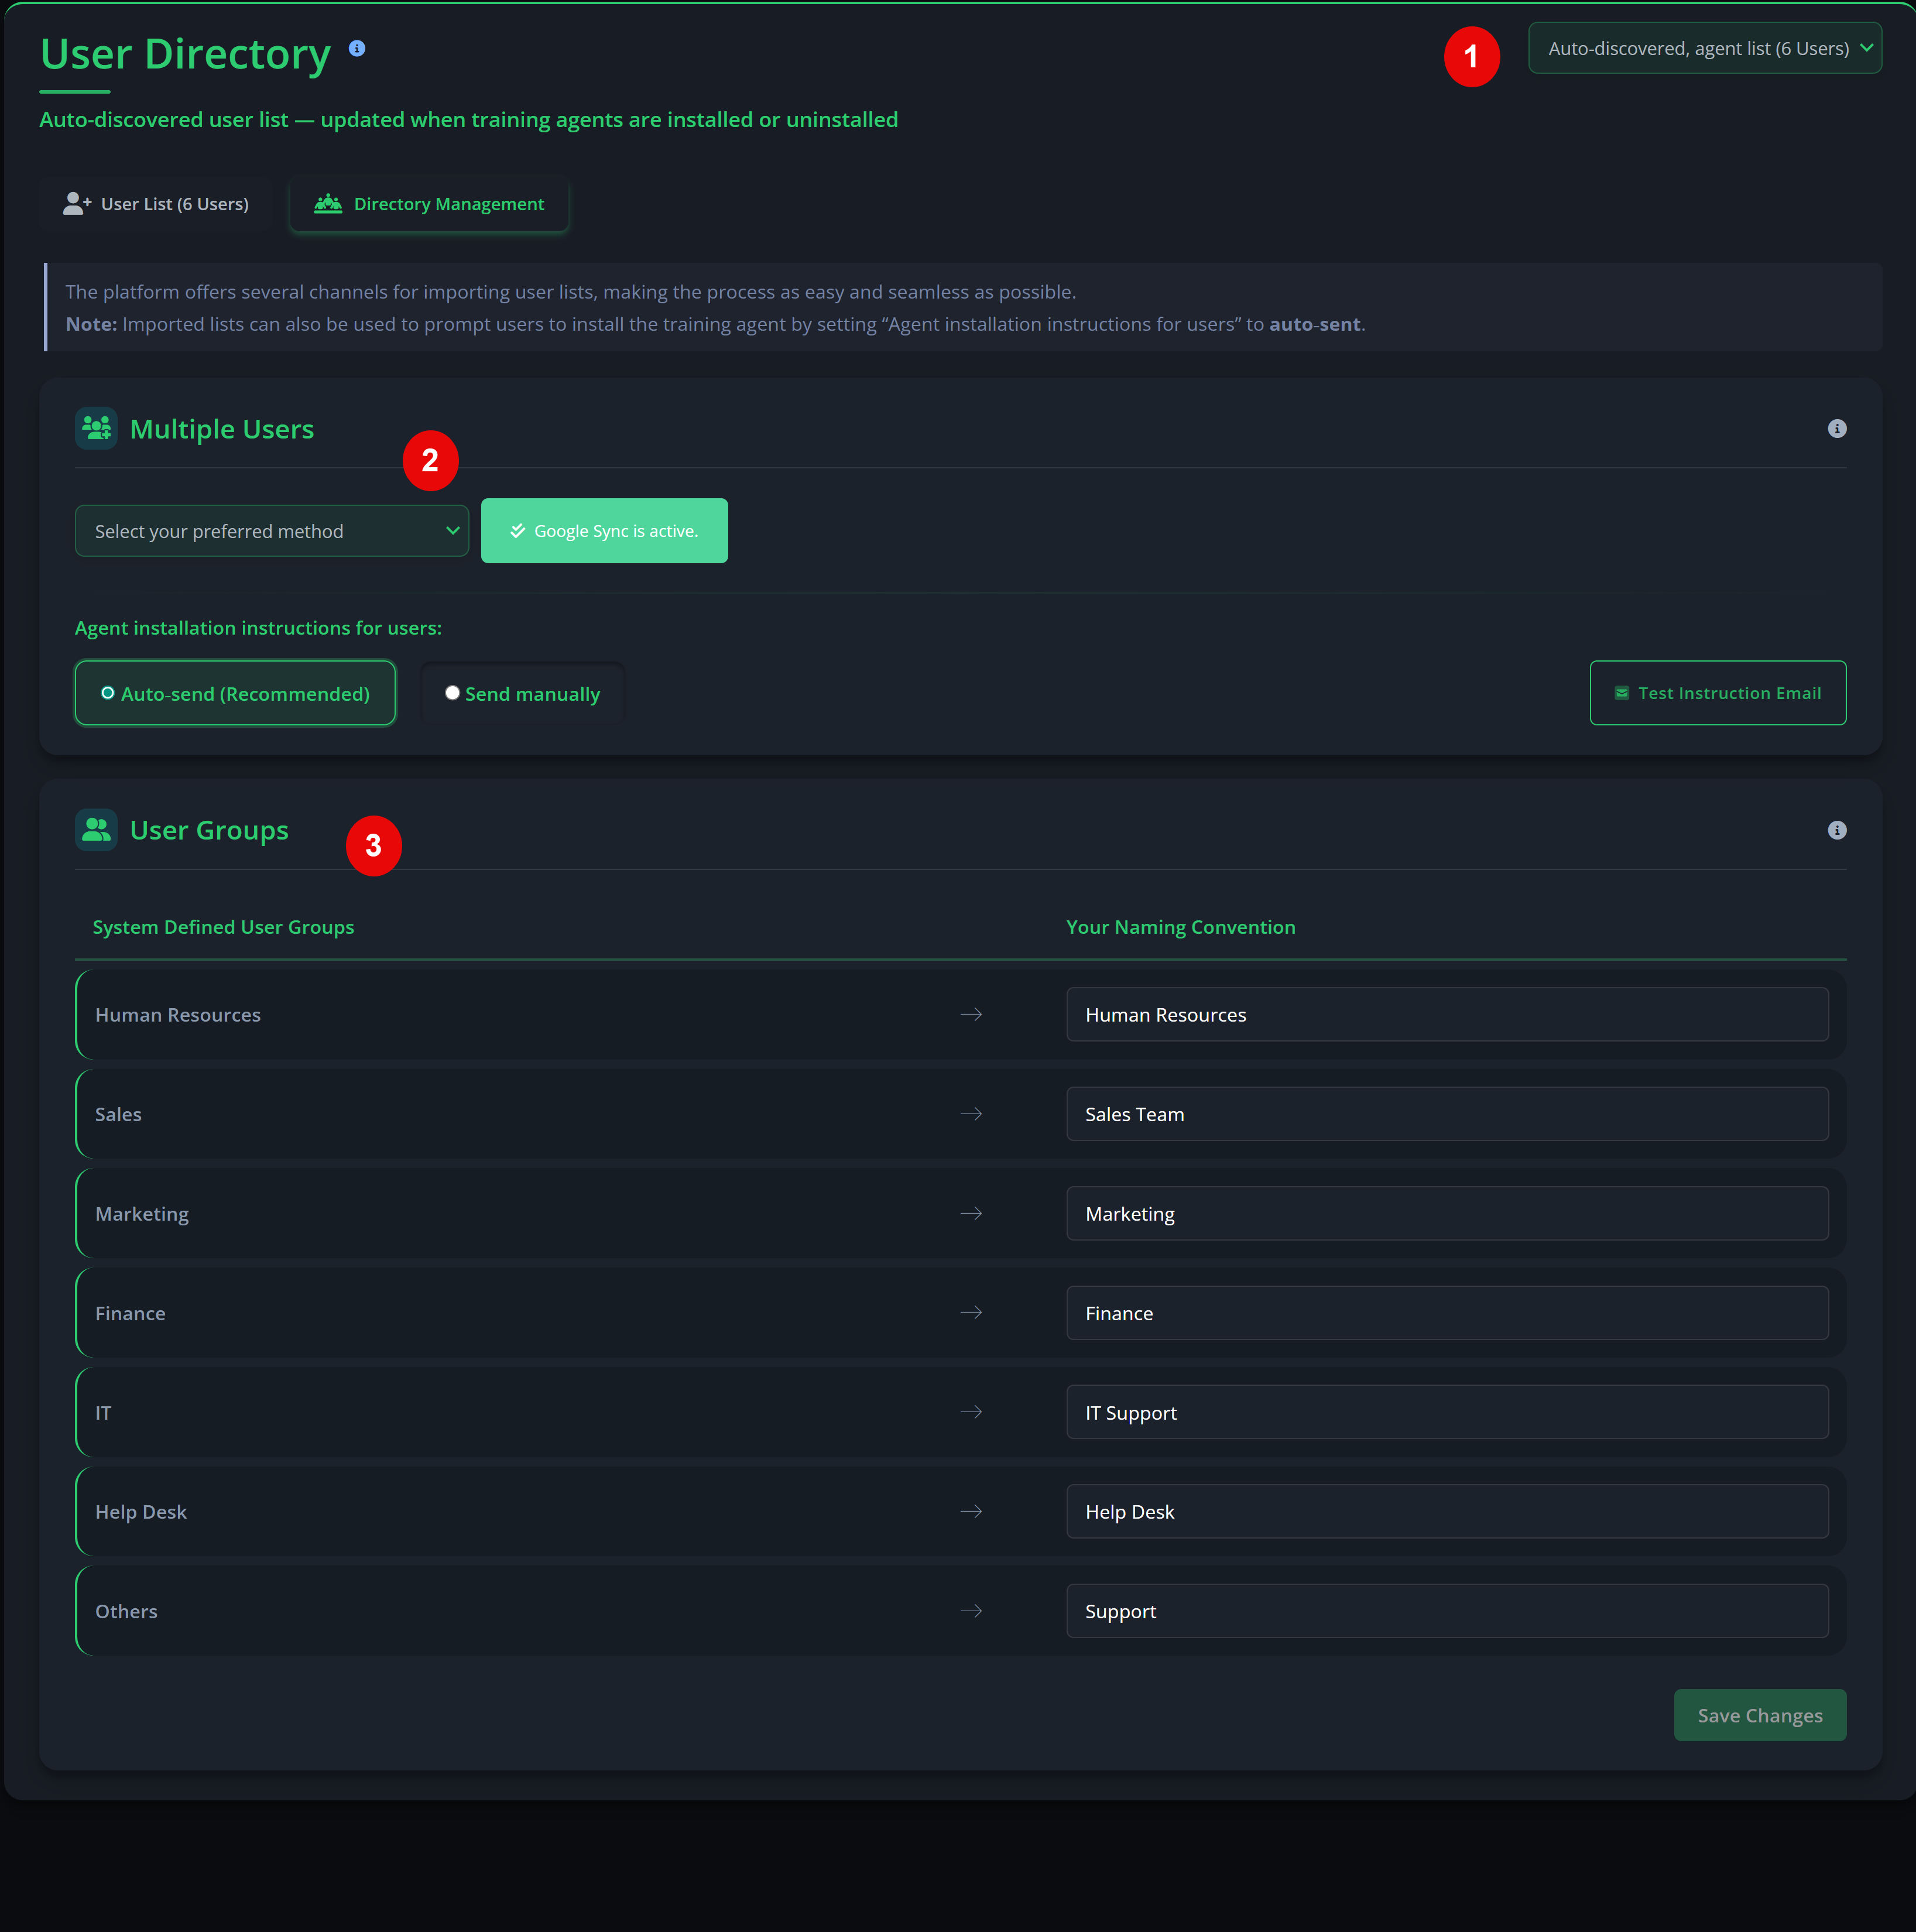
Team Onboarding
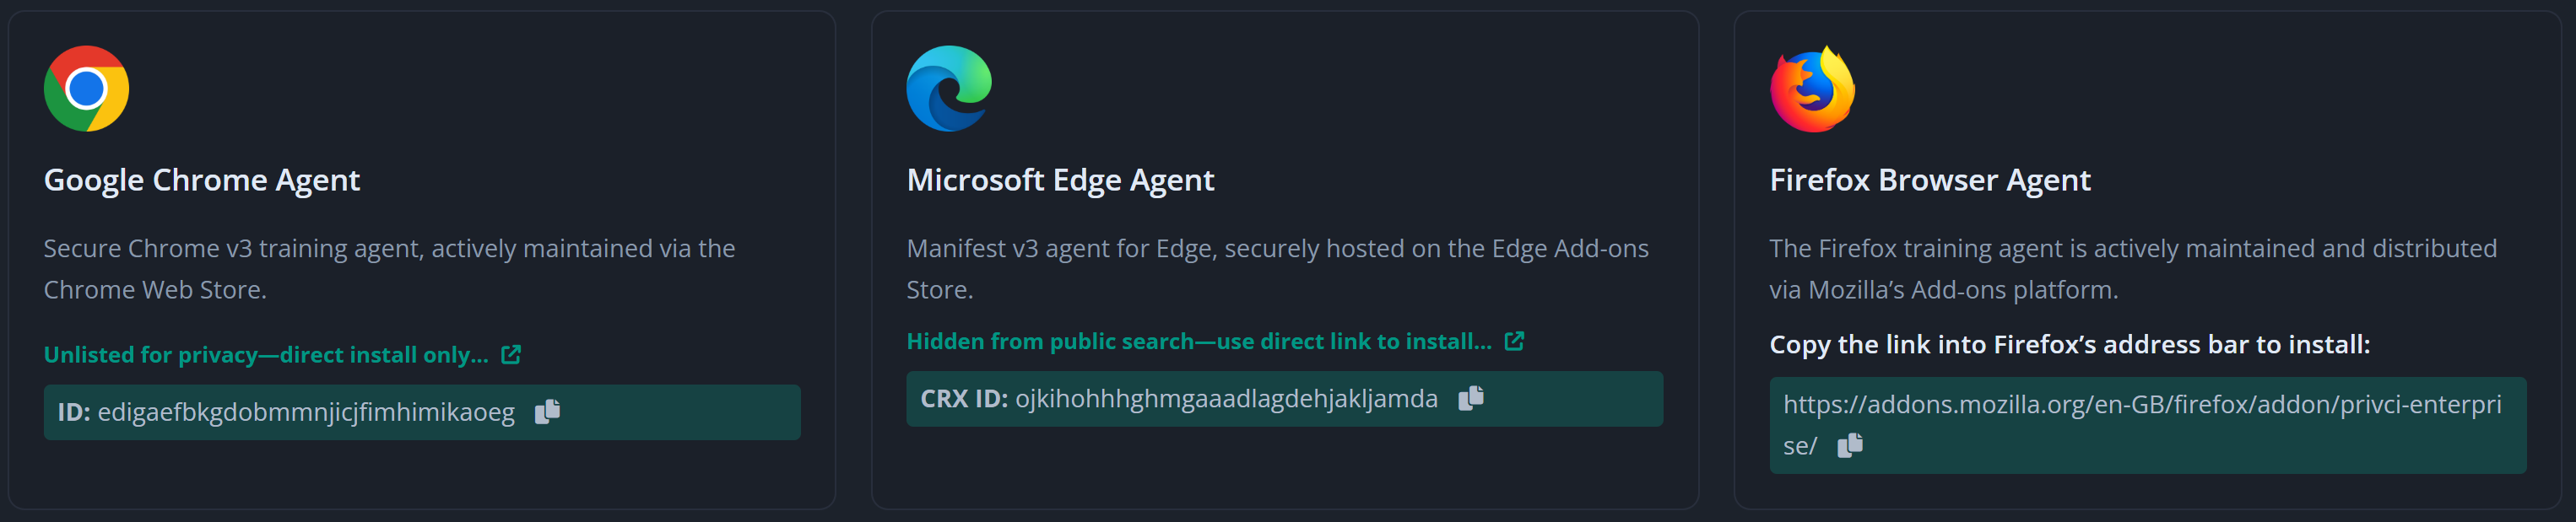
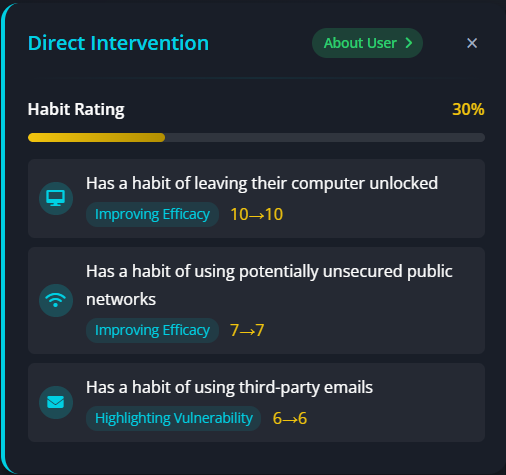
The final step is onboarding your users. Privci uses browser‑based training agents to personalise each user’s experience and capture behavioural signals during the scan. You can onboard users manually for smaller teams, or use automated integrations for larger environments.
- Privci currently provides training agents for: Google Chrome, Microsoft Edge, and Mozilla Firefox.
-
Choose your onboarding method.
For smaller teams, you can:
- Paste user email addresses (comma‑separated), or
- Use the Import User List template.
- Privci will send installation invitations and instructions directly to users if Auto‑send is selected.
-
Configure scalable onboarding.
Larger organisations can use:
- Google Workspace Sync
- Azure AD Integration
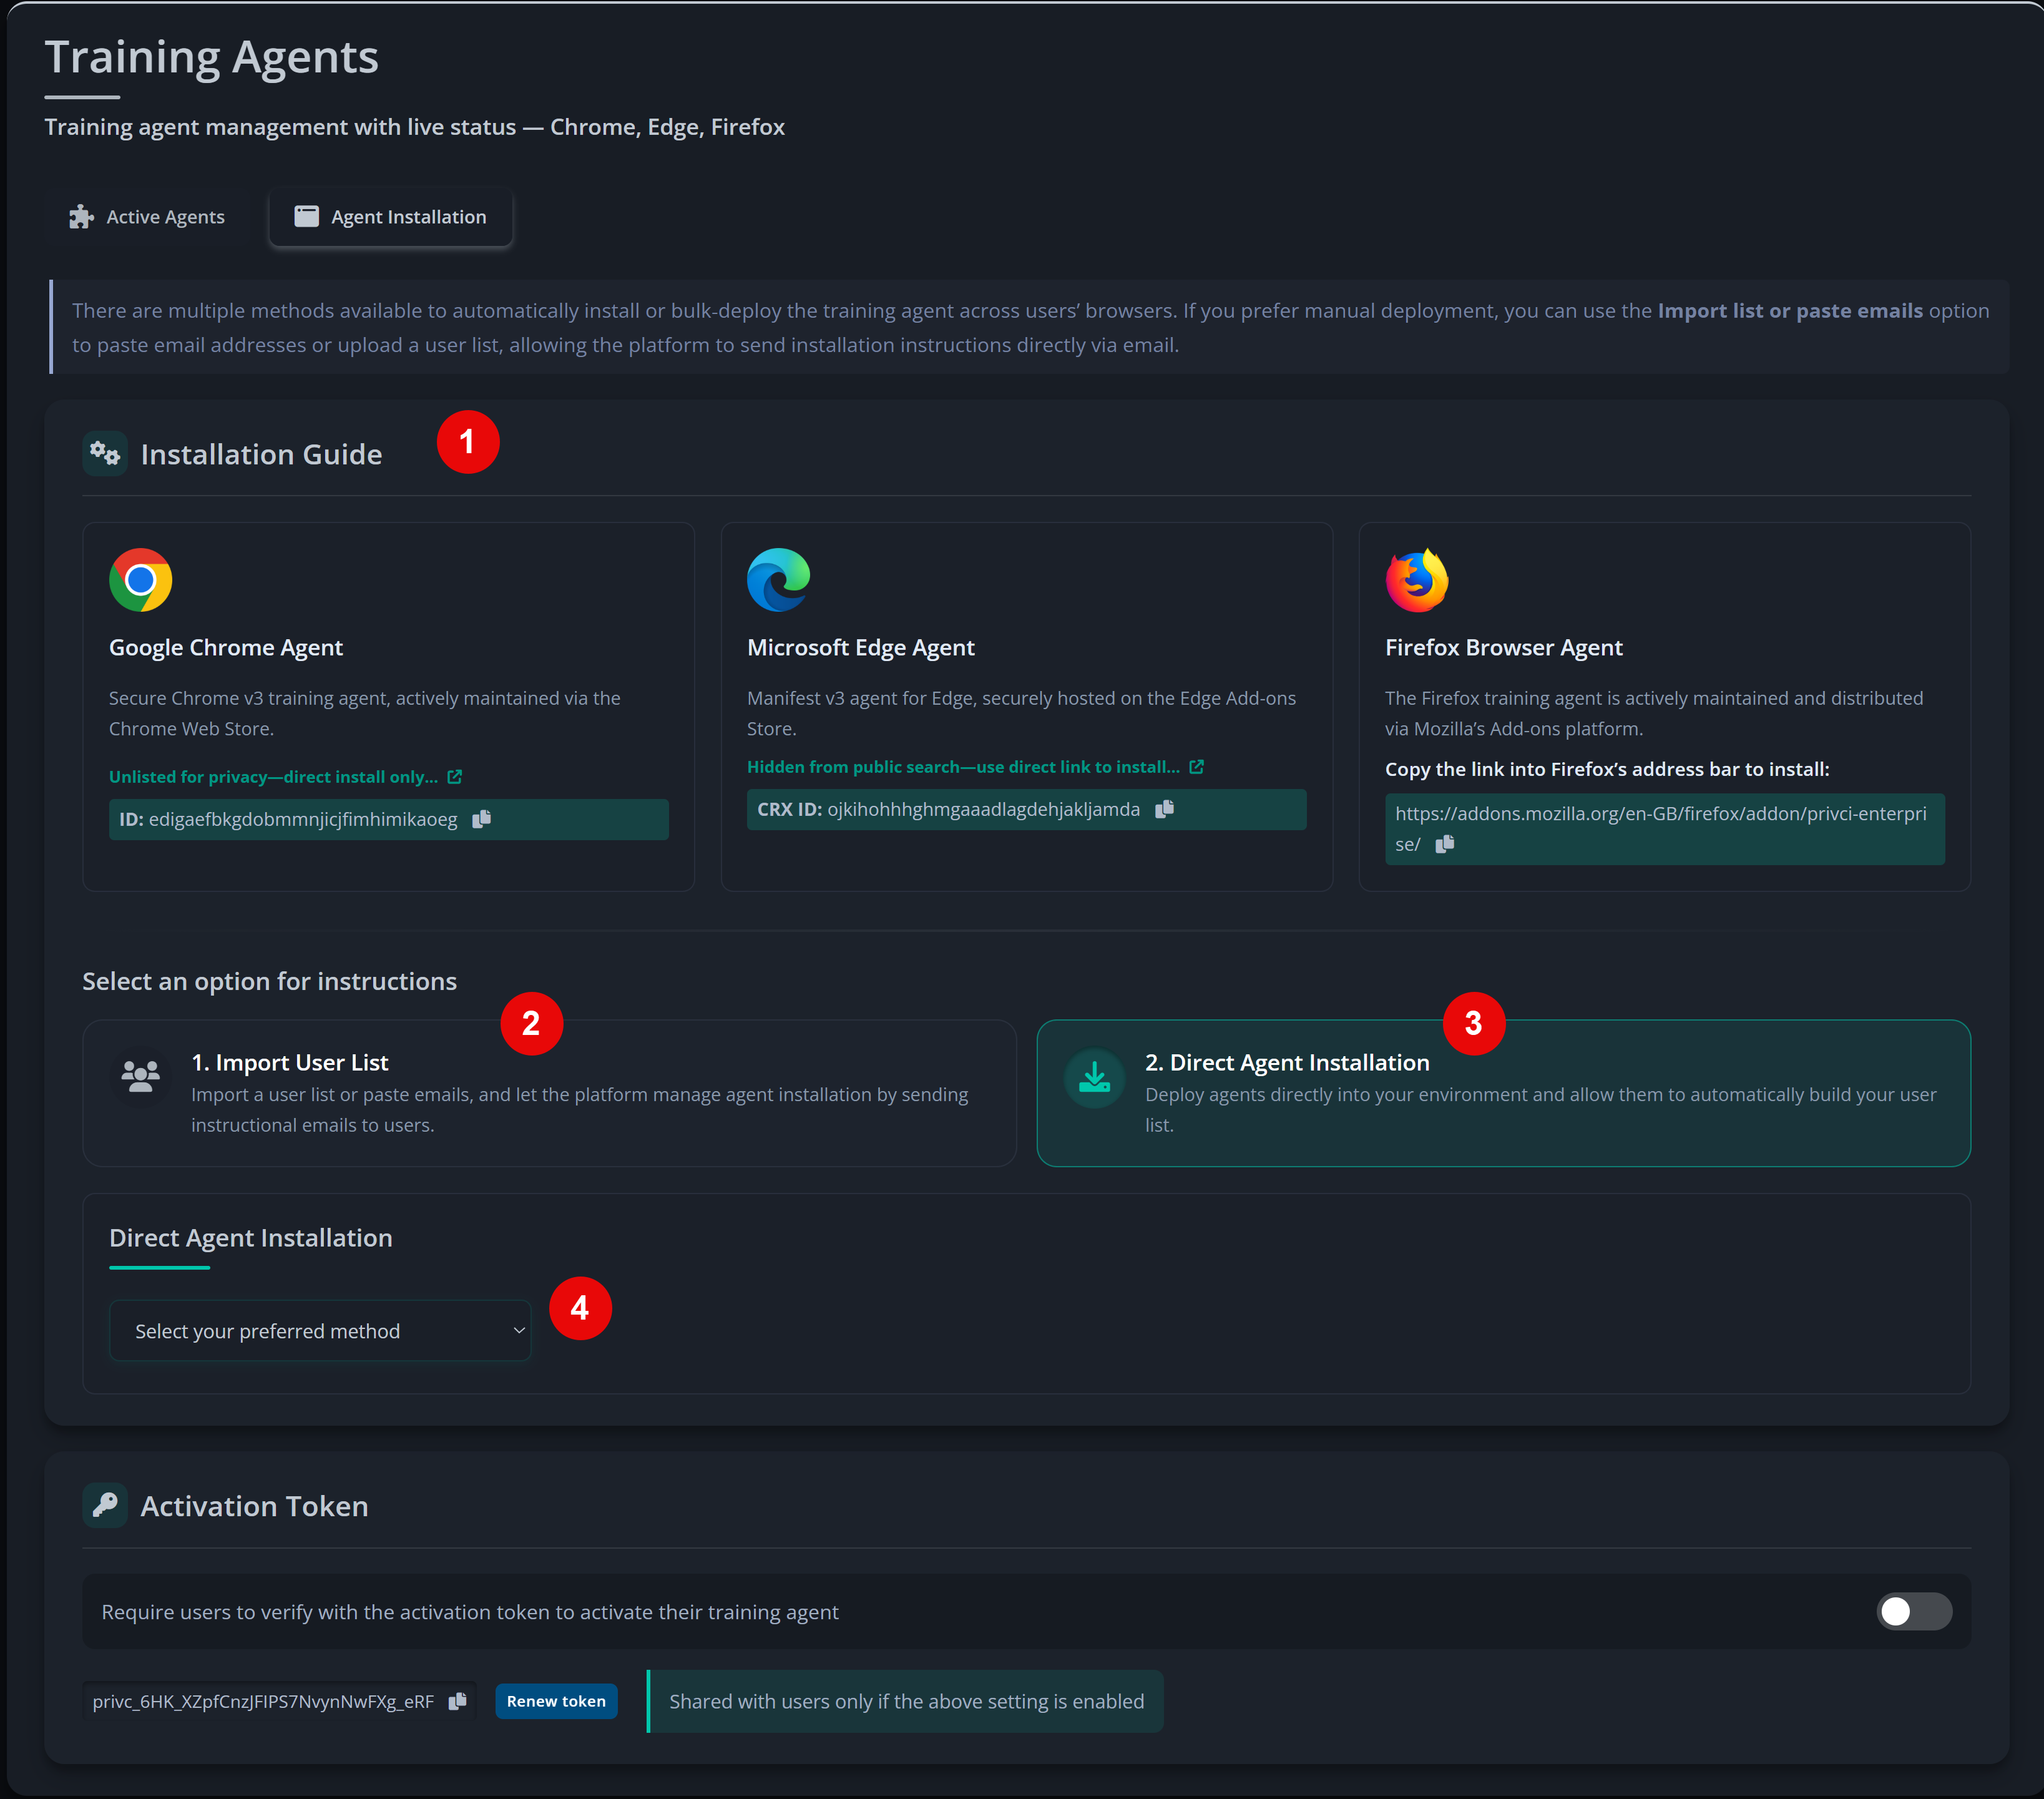
- Choose Direct Agent Installation for additional deployment guides that match your existing environment (e.g., GPO, MDM)
- Set your Time Zone and branding. Choose the appropriate time zone and optionally upload your company logo to improve personalisation, especially for email communications and phishing‑related content.
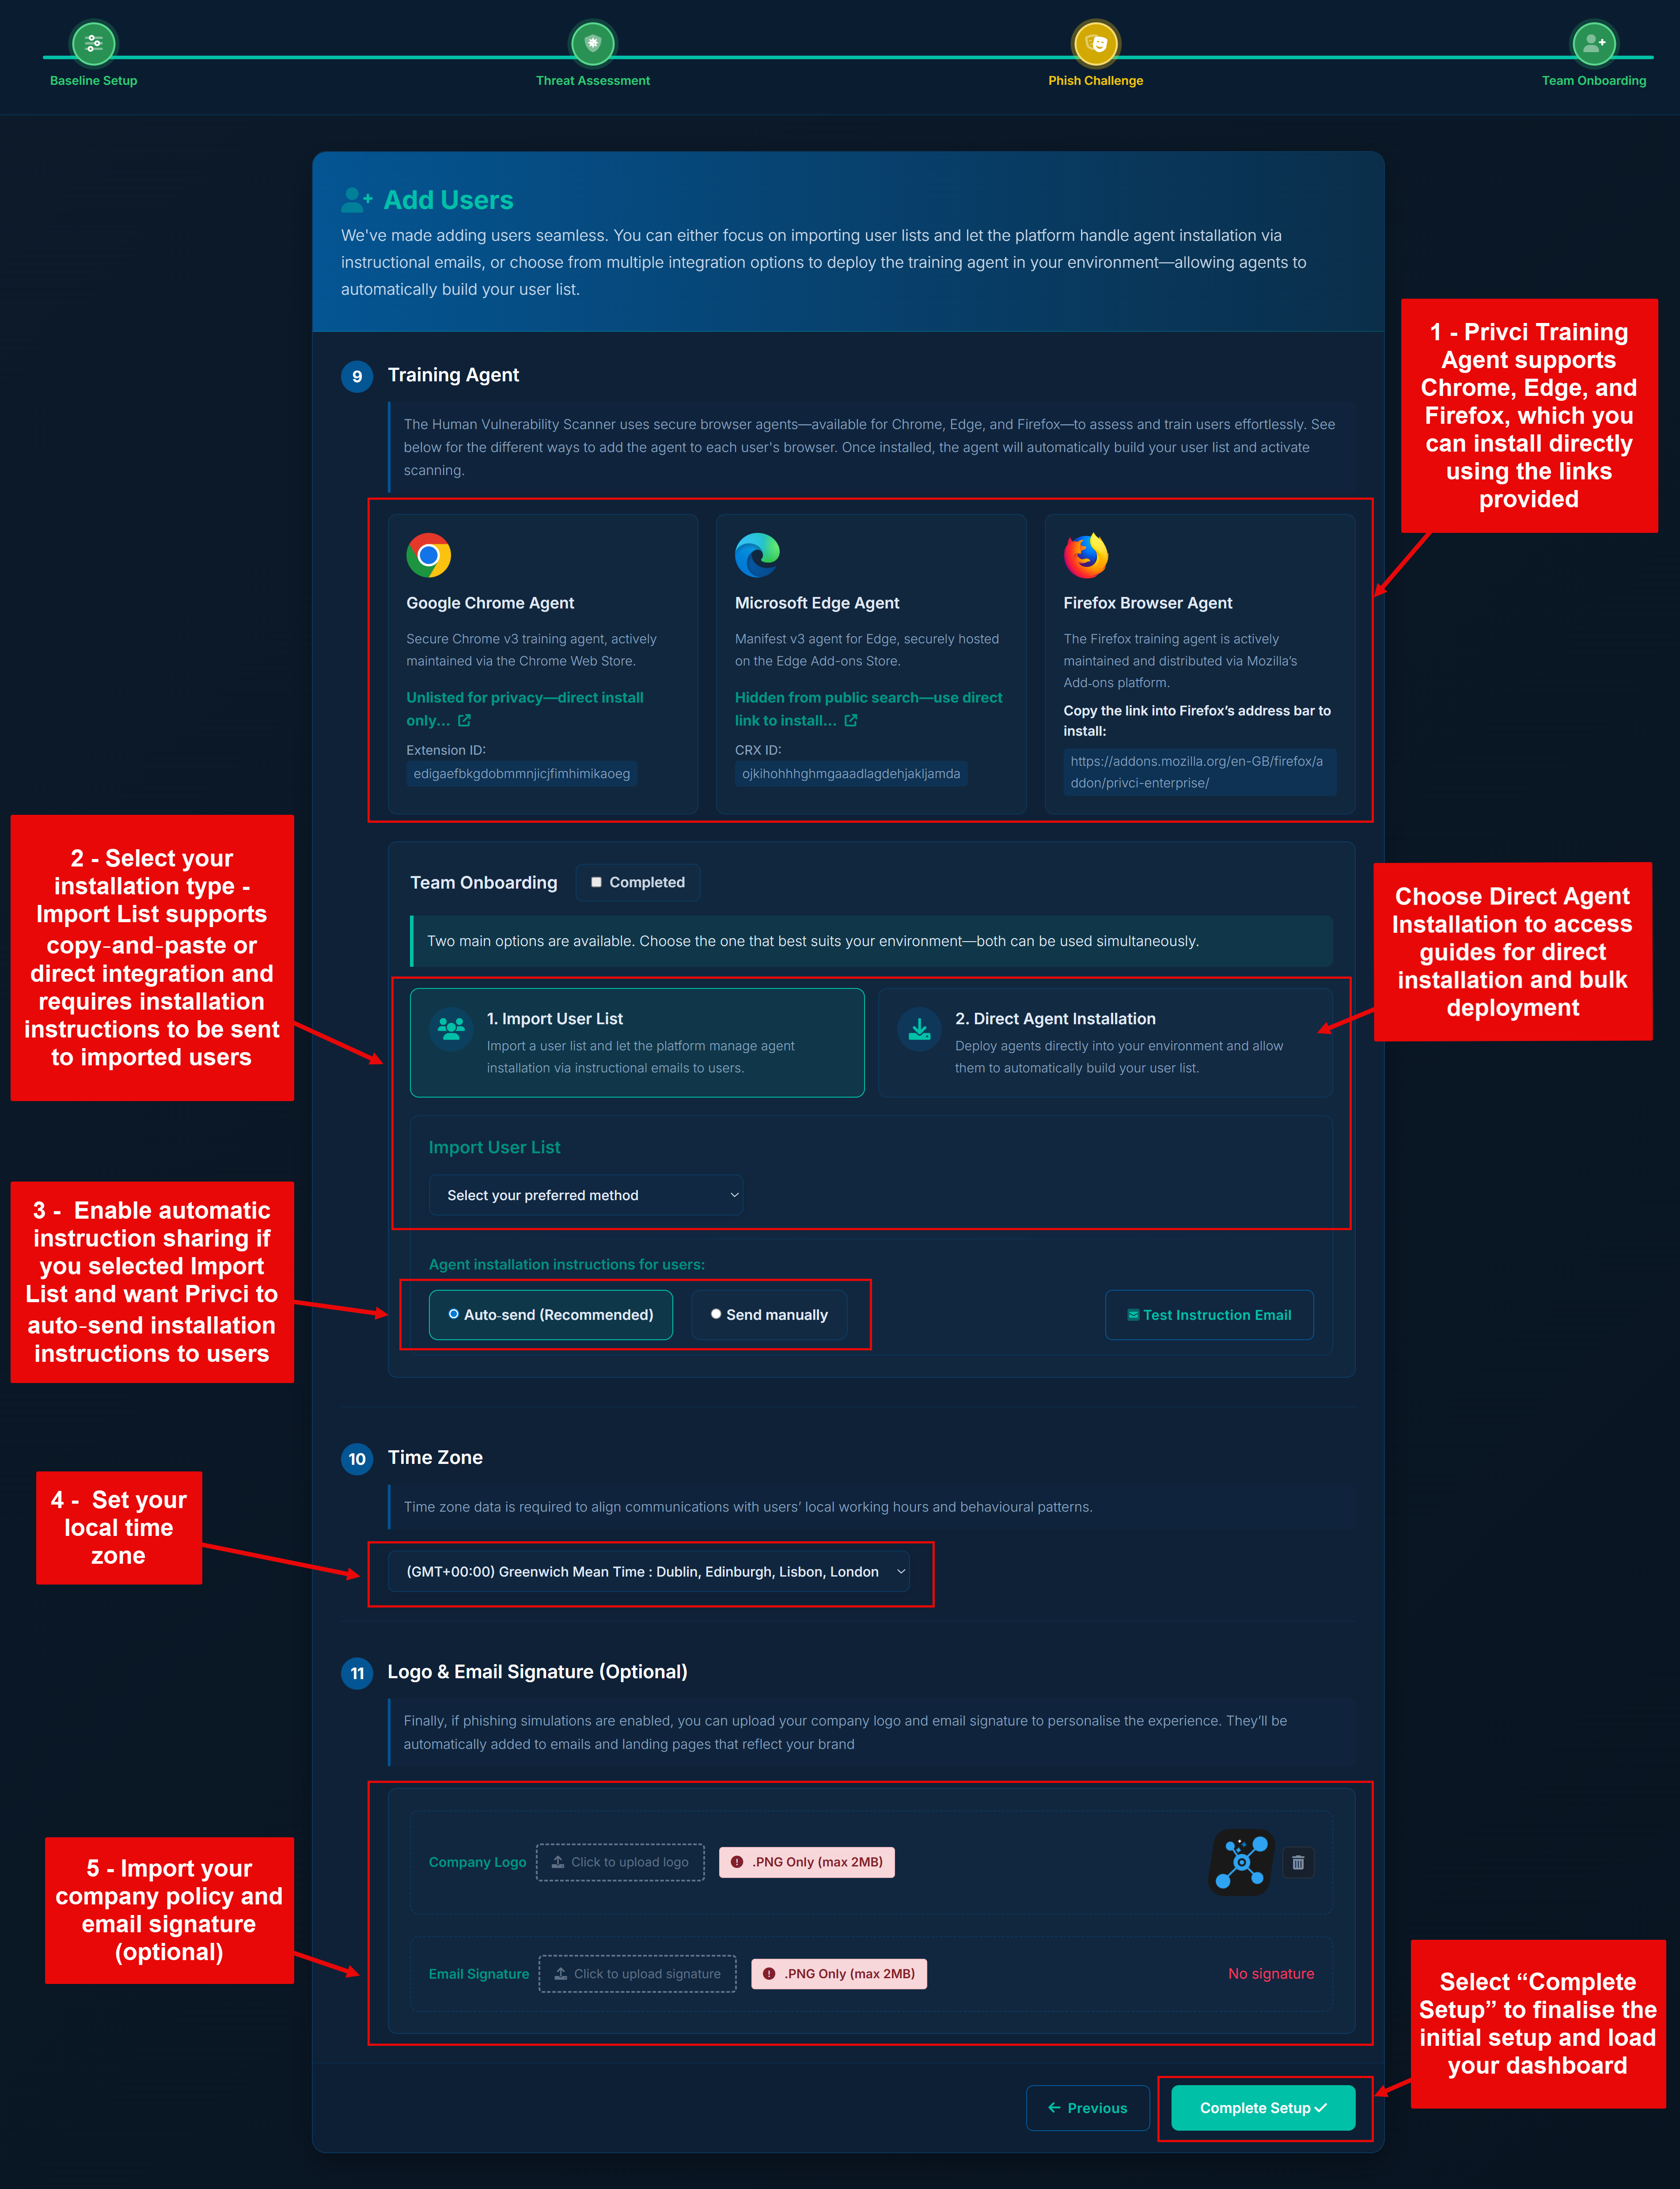
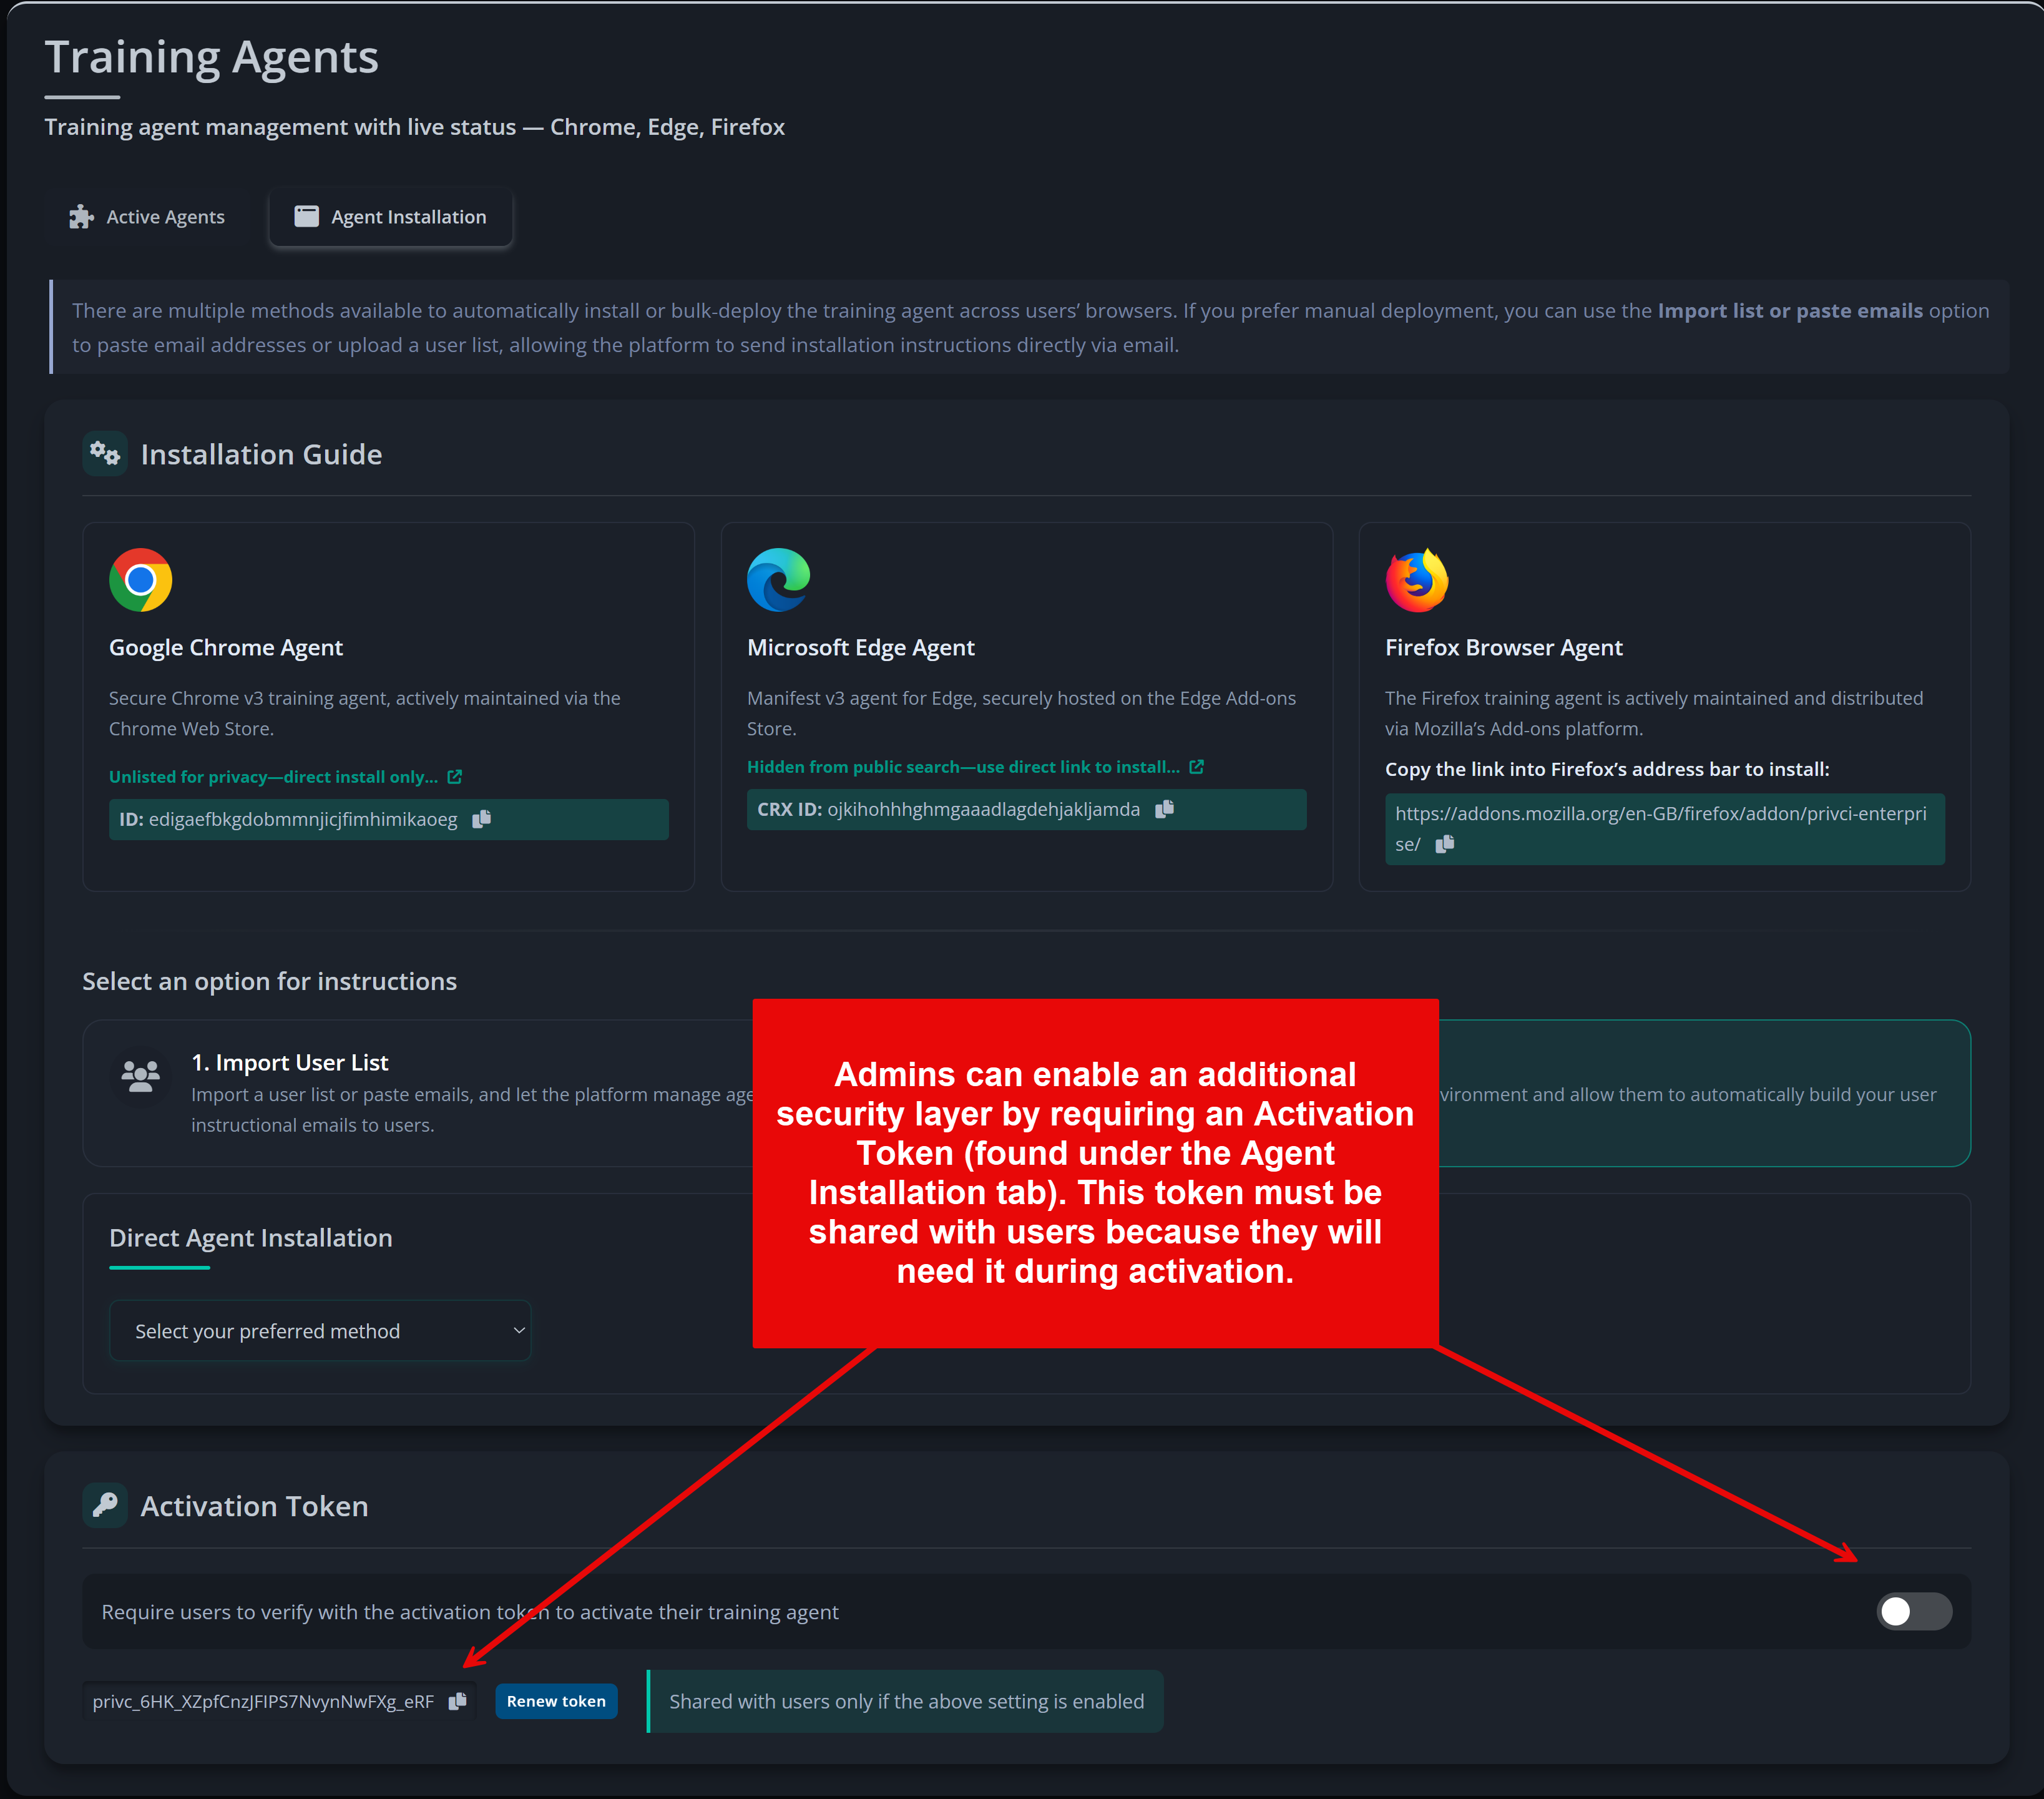
Note: All onboarding options, including detailed installation instructions for each browser, are available in the admin portal under Admin Tools → Training Agents → Agent Installation.